Tag: Oktava
Oktava MK18 vs Russell Technologies Mod
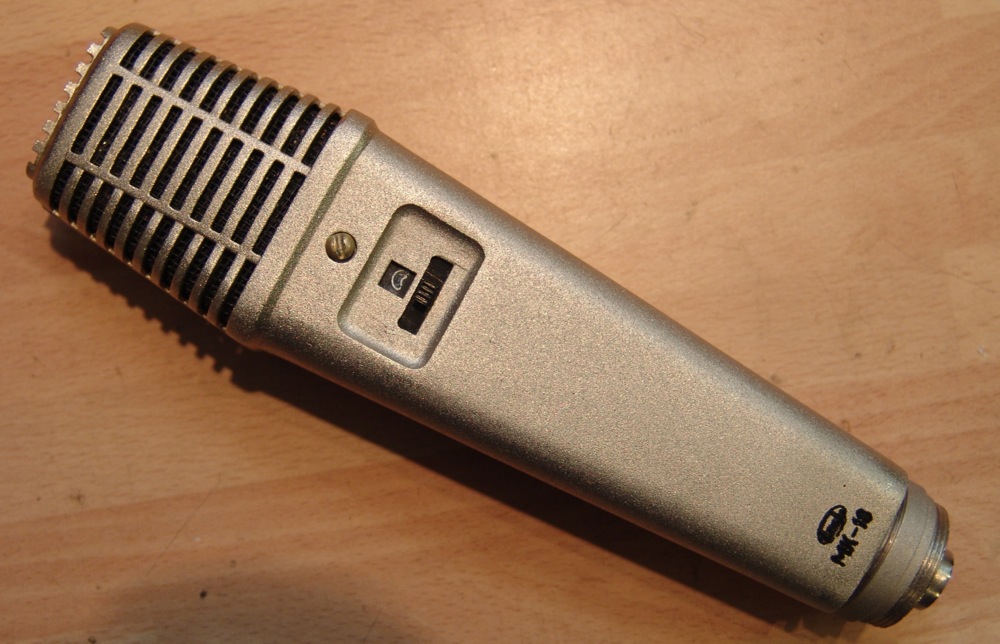 |
| Oktava MK18 |
A pair of Oktava MK18 condenser mics have been knocking about the workshop for a few years. Both mics had similar faults, with weird inconsistent dropouts especially when changing patterns. I suspected leakage somewhere but could not track it down. The capsules seemed OK but the mics were unusable as they were, so I put them to one side and waited for inspiration to strike
The MK18 is an ancestor of the MK219, so when I came across some circuit boards from Russell Technologies designed for the MK 219, it looked like the perfect opportunity to revisit and rehabilitate these microphones.
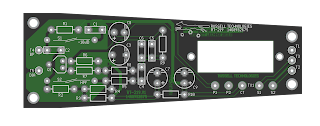 |
| Oktava MK219 PCB from Russell Technologies |
The boards are nice quality and arrived with full instructions, which makes assembly very easy – or at least it would be with the intended MK219. In the case of the MK18 there is some hacking to be done.
 |
| Inside the MK18 – the PCB is smaller than that of the MK219 |
The capsule mount in the MK18 is longer than that in the MK219, so it needed to be chopped, milled and drilled to fit the board. The MK18 also has a 5 pin DIN output, which was drilled out on the lathe with a 19mm bit to make room for an XLR socket.
That done, I discovered that I had lost, sold or binned the original transformers. However, I found a pair of spare BV107s (from Neumann KM84s), which fitted nicely.
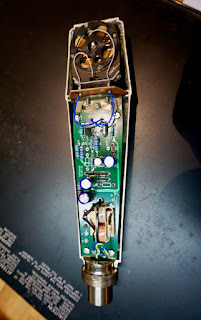 |
| MK18 with Russell Technologies mod |
I omitted the pad and high pass control switches. And I went for cardioid pattern, using just one side of the MK18s double sided capsule, although it would be easy to wire both sides of the capsule in parallel to have an omni pickup.*
Against the popular tide, I also added a layer of fine stainless mesh, to keep dirt and damp air away from the capsule. These mics are bright enough, so I am happy to risk losing a fraction at the top end.
 |
| Modified MK18s – ready for overhead action |
The result is good. I like the sound and I think they would make a nice pair of overheads or stereo instrument mics.
*Or even figure-8. I will let the reader think about that one. 😉
Oktava ML16 Manual
Oktava mod FET biasing
Our good friends at Valley Wood Studios in Leeds had followed one of the popular projects for upgrading Oktava MK319 microphones, which involves changing a handful of resistors and caps, along with the field effect transistor (FET). After the mods one of the mics was about 3dB louder than the other.
This kind of thing is normally due to variations in the FET’s characteristics, and to optimise the modification, it is necessary to adjust one or both of the bias resistors (R7 and R8 in the PDF document). Between them these set the gain of the mic, and the bias point for the FET, which gives the best noise performance.
I often do this by hacking a decade box into the circuit, and in this case we put the mic in our test chamber so that we can tweak and scan as we go along. At the end of the tweaking the pair of mics were well matched, and noise free.
We celebrated with tea and biscuits!
Oktava ML16 ribbon microphone dissected
Oktava MK18 condenser microphone
The Oktava MK18 is the less well known, but more sophisticated older brother of the ubiquitous MK219, which is used and abused by hoards of mic-modders who love to chop and swap grills, capacitors and resistors.
 |
| Oktava MK18, front view with pattern switch |
In contrast to the cardioid-only 219, the MK18 is a dual diaphragm, multipattern condenser mic, with bass roll off (HPF), a -10dB pad, and pattern selector switches.
 |
| Oktava MK18 rear view with pad, HPF and rear capsule switch |
It also has a fourth switch with large and small cardioid symbols. This controls the ‘mix’ of the rear capsule, allowing the in-between patterns to be selected, to give hypercardioid and supercardioid response. Clever!
 |
| Oktava MK18 inside, front view showing components |
The switches are actuated by sprung bits of bent metal, and they make the mic very tricky to reassemble.
 |
| Oktava MK18 inside, rear view showing PCB traces |
The mic has that typical Oktava quirky build style, with etched PCBs and a small square can output transformer that looks different in size style from the ones in the MK219 and 319. The connector is a push-fit din plug!
Unfortunately this mic is designed to run with 60V rather than 48V phantom power. It will work with a normal phantom supply, but is currently giving erratically output, and may need some small modification to make it behave itself!
MOTM: Oktava ML52 (Spot the Difference)
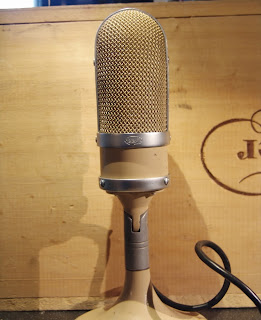
I have a soft spot for Oktava microphones. They look cool, come from Russia, are fairly priced, and everyone has fun modifying them. That’s enough to make the ML52 microphone of the month for June.
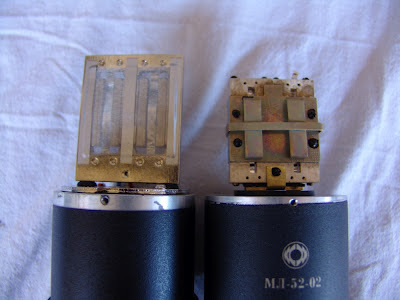
Oktava have a long tradition of ribbon microphones dating back (at least) to the ML11 in the 1950s. The ML52 is one of the most recent models, with a slightly odd double-ribbon motor assembly. I had some in to service recently, and noticed something odd….
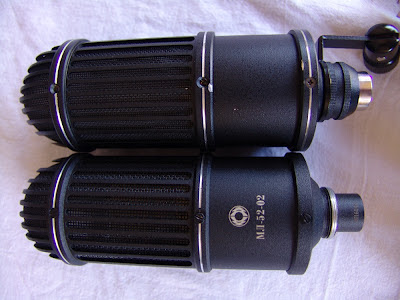
Here are two ML52s – can you see any differences?
The answer is “Yes”. The bottom mic has a logo and serial number, and an XLR that is machined into the bottom bell. It also has slotted screws rather than pozidrive. The grill spacing is also slightly different, but that is harder to see on the photos.
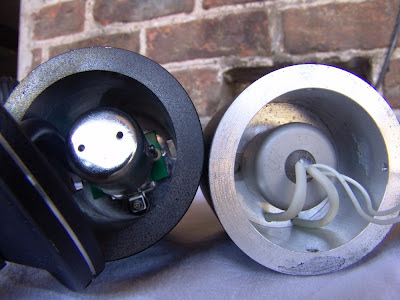
The transformers are also very different. The right hand one is the mic with the logo, and it uses a toroidal transformer. The left hand transformer can looks typical of the China mics, and is connected to a (pointless) circuit board.
Sound-wise, the mics actually sound quite similar, which goes to show just how much the body and grill influence the sound of these mics. The Chinese one has a longer ribbon and stronger (neodynium) magnets, and has slightly stronger output.
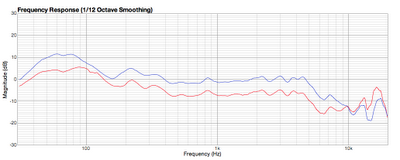 |
| Response plot for Russian (Red) and Chinese (Blue) ML52 mics |


