Thiele Microphones schematics and documents

Thiele, of Liepzig, were one of several manufacturers of tube condenser microphones in post-war Germany, although they are less well known than Neumann, Gefell and Schoeps. Thiele microphones also appeared under the Elektro-Medizin and Wetzel brands.

Thiele M4 microphone

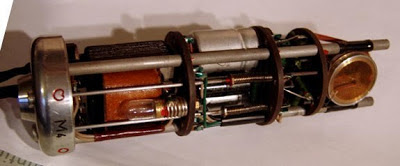
The Thiele M1 (cardioid) and M4 (cardioid and omni) are great looking microphones but feature some frankly bizarre design decisions, most notably the placing of the tube directly behind the capsule, which interferes with the rear pickup whilst simultaneously cooking the PVC on the rear capsule. Of course the manufacturers would never have expected that we would be picking up these mics sixty years on and trying to record with them.

Inside a Thiele M4

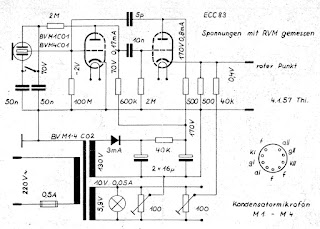
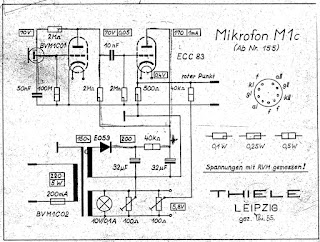
In addition, the power supply was built into the base of the mic which can lead to hum issues despite the on-board potentiometer that acts as a ‘null’. This also means that the mic has two cables running from it – one for power and one for audio. Both mics use two-stage head amplifiers based around an ECC83 tube, and both have unbalanced outputs. Here are the official schematics for the M1 and M4 mics.

Thiele M4 microphone circuit

Thiele M1c tube microphone circuit

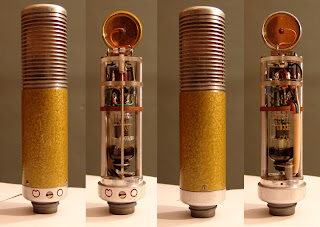
The M5 seems to have been the ‘Studio’ version, with an external power supply and output transformer for balanced low impedance operation. I haven’t seen a factory schematic for the M5, but this is a drawing that I traced out from a specimen on the bench.

Thiele M5 microphone, inside and out.

Here are some original sales and technical documents from Thiele, in  German.

Thiele sales brochure for M1 and M4

Elektro-Medizin M4 technical document

Elektro-Medizin M4 & M5 product sheet

Many thanks to the Microphone Online Museum for kindly sharing the documents and schematics.

Massive Old Dynamic Microphone – GEC?

We’ve had some website issues this weekend, but everything has been sorted out, so let’s get back on track with another vintage microphone curiosity.

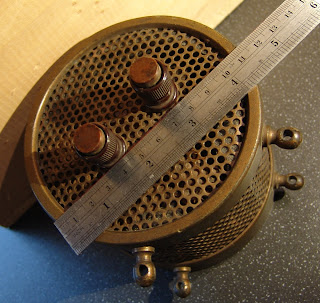
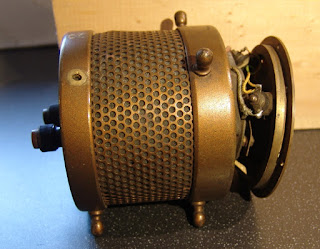
This gigantic bronze dynamic mic has no badge or makers name on it, but arrived in a box of GEC microphones. Connection to the outside world is made via two terminal posts at the rear. From the size and style it probably dates to the 1930s or even earlier. 
It is around 11.5 cm across and 8.5 cm deep, weighs nearly 2 kg, and would originally have been mounted on springs within a hoop. Two of the suspension mounts are missing – it will be a quick job on the lathe to turn new ones from a bit of brass. 
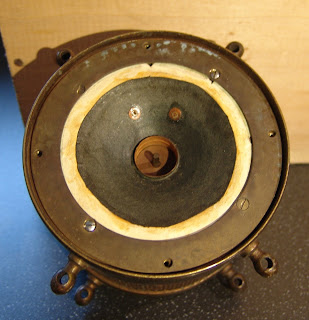
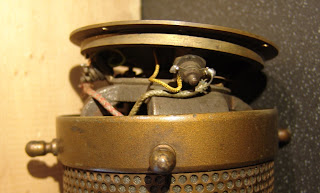
Inside the mic is very much like a speaker in reverse, with a paper and fabric cone driving a coil into the field of an enormous magnet.
On initial testing, the mic wasn’t picking up well as the cylinder in the centre of the diaphragm was scraping against something as it moved. Some careful cleaning to remove the dirt eased the movement, and the mic sounds OK, if rather peaky. The addition of some foam inside the body helped to dampen some of the ringing from the cavity.
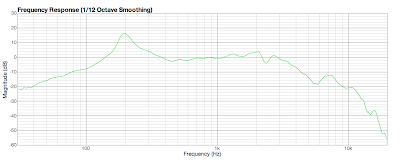
Even with the foam, the mic is far from flat in response with an enormous bump at 200Hz. So if you want to give something an EQ boost at 200Hz, this is your mic!
Frequency plot for big bronze dynamic microphone!
Other uses include door stop, paperweight, shot-put and burglar deterrent (ouch!).
If you recognise this one or have information on any of our other unidentified mics, please get in touch.

MOTM: Bruno – Webster Velotron Microphone

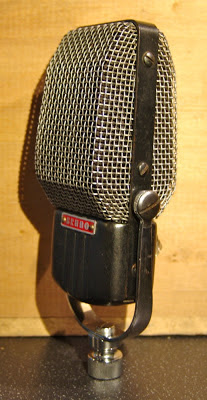
The Bruno Velotron (made by and sometimes badged as Webster) was an oddball microphone that took inspiration from both ribbon and condenser technology. Strips of aluminium foil were attached to an insulated metal backplate, and a voltage applied between the two. As the foil vibrates, the capacitance of the device varies, and a signal is generated. They are notoriously fragile, and there are very few around in working condition.

Bruno Velotron microphone

I found this one on ebay a few months ago and could not resist grabbing it for dissection and possible resurrection. The specimen is in very good cosmetic condition so will look nice in the collection even if it it is beyond repair. But it would be even nicer if we could hear it in action!

Looking inside, the element is marked ‘4½M’ and 2/4/38, which in American would be 4th Feb 1938. The ‘4½M’ may refer to the impedance of the device.

Velotron element

The Velotron requires a polarisation supply and a buffer amplifier to operate – I am not sure if these came with the mic, but the tube amps of the era could easily have been modified to provide this from the high voltage supply. The excellent Coutant.org shows a wiring diagram for a suitable polarisation supply and buffer amplifier…

Supply for Bruno microphone – from Coutant.org

Based on this diagram, I wired a 7205 subminiature tube into one of our tube microphone power supplies, to act as a little amplifier circuit for the mic.

Hacking together a power supply and amplifier.
Miraculously, the microphone worked on the first attempt, even after 74 years! The sound is very warm and dark with an obvious roll off at the top end, and it was very exciting to hear one of these for the first time.
Bruno Velotron – frequency plot
I wondered if some of the roll-off may be due to cable capacitance – if the element really does have an impedance of the order of 4.5 MΩ then even a few tens of pF will become significant. However, swapping cables and using a triaxial arrangement didn’t make any different, so it may well just be the natural response of the beast, and certainly how it would have sounded at the time.
The mic is unfortunately prone to noise and pops. They are notorious for breakdown of the insulation on the backplate and that seems to be the case with this one. So the next job would be to drill out the rivets that hold the element together, strip off the ‘ribbon’ foil and re-lacquer the back plate. 
I’ll save that for one day when I am feeling brave, but for now the Bruno shall be our microphone of the month!
Update 27/5/13: It seems that these were sold in Europe under the Radio Marelli brand. As seen on ebay….

Altec 670A vs 670B microphones – What’s the difference?

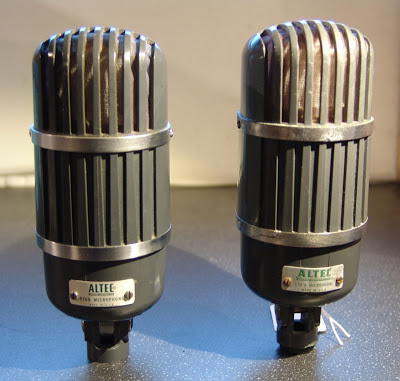
Altec 670B (left) and 670A (right) ribbon microphones

Q. What is the difference between Altec 670A and 670B ribbon microphones?

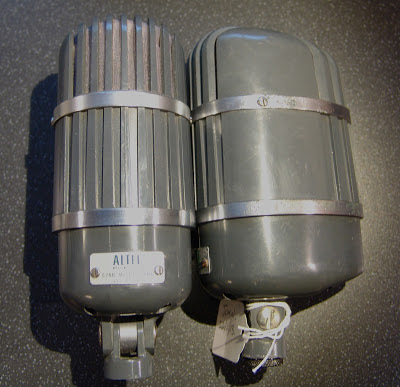
I had not realised that there was a difference until I re-ribboned this 670A for a client, which gave me an opportunity to compare it to our studio 670B. The two microphones look identical from the outside apart from the label. Both are housed in some kind of blue-grey plastic, and the label hides an impedance switch cryptically marked ‘1’ and ‘2’.

Inside, the mics look similar at first glance, but on close inspection the ‘B’ model is a significant evolution of the 670A.

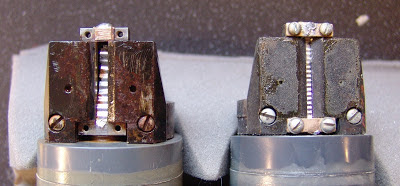
The ribbon in the earlier 670A is twice as wide as the later 670B, measuring 3.8mm and 1.9 mm wide respectively. The narrower gap between the magnets would also give a higher magnetic field, although I forgot to measure that.

Altec 670A ribbon and 670B (right) ribbons.

Both ribbons are the same length, so if the same thickness of foil is used, the 670B ribbon would have (about) twice the impedance of the 670A. This has implications for the transformer design, as a different ratio and different inductance would be required.

A second difference is in how the transformer primary wire is routed. In the 670A (left) the thick wire is routed directly behind the ribbon, which would affect the pickup pattern of the mic. This is redesigned in the 670A and passed to the side of the ribbon.

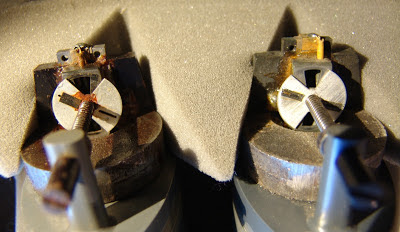
Altec 670A and 670B pattern selectors

Both mics were ready for new ribbons so I replaced both with 1.8 µm foil and measured the impedances (in position 2). The 670A had an impedance of 600Ω whereas the 670B measured 350Ω, which shows that the transformers are indeed different ratios.

It also suggests that the 670A would have originally been fitted with substantially thicker foil – perhaps 4 or 5 µm. The feel and stiffness of the corroded old ribbon also suggests this to be the case.

Here is a frequency plot of the two mics. The 670A is the red line, and the 670B, in blue has a slightly higher overall output. Both mics sound very good and quite similar in tone despite the differences.

Melodium 93C & 530C measurement microphones

Melodium was a French manufacturer of microphones and other audio equipment, probably best known for their excellent model 42B ribbon mic.

The Melodium model 93C is a small diaphragm condenser measurement microphone that was on the market in the 1970s. Although the data sheet is not dated, the frequency plot is marked 03-73, which pins down the measurement, if not the manufacturer, to March 1973. The specimen on the bench was actually stamped with model number 530C, but seems to be the same microphone.

Melodium 530C measurement microphone

The 93C / 530C needs a 13V to 18V supply to operate, and a battery pack was available.

Melodium 530C with battery pack

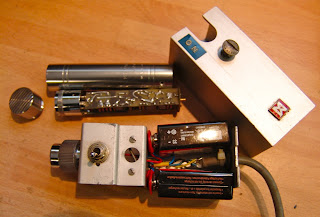
The mic is not compatible with phantom power, but a simple converter can be built. In this case it was built into the old battery pack, with an indicator LED replacing the on-off switch.

Melodium 530C with modified supply to convert from phantom power

Once the power is sorted out, the mic is quite sensitive, with a very hot signal which may even need padding for louder instruments.  The mic seems nice and flat up to about 8000 Hz – here’s the result from our little test chamber, which doesn’t go much past 10KHz anyway.

Frequency plot for Melodium 550C, referenced to Beyer measurement mic

When I wired this one up according to the manufacturer’s data sheet, I found that the mic was out of phase with our reference mic, and indeed the data sheet claims that the ‘Angle of phase rotation 180C to tension’.

Here is the manufacturer’s data sheet for the Melodium 93C.

Thanks to Santiago Calvo Ramos for sharing.

Ward Beck preamps part 2

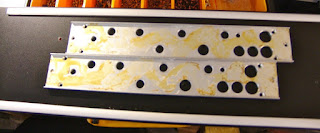
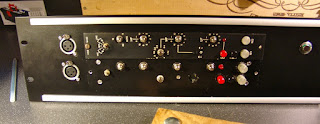
The old aluminium front plates from the preamp modules were screwed to the new front panel to act as a drill guide, so getting the holes in the right places was quite easy (for once). The Canford chassis is very nice to work with – the aluminium panels machine easily, and the metal is thick and sturdy enough for the job.

With additional holes drilled for XLR inputs and a power switch, the panel is ready for the modules to be screwed in place.

It looks like a neat job once the black printed control panels and all the knobs are back in place – I also added a pair of jack sockets as additional outputs so that I can route the signal to either the front of the unit or the studio patchbay – or both for some parallel compression fun!

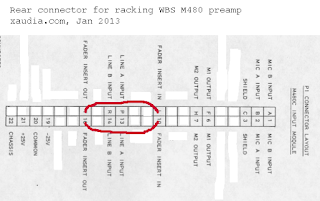
The modules are connected to the outside world via 44 pin card connectors at the rear. Although these look daunting, only a few of the connections are needed for our application. Here’s a revised pin assignment with the surplus connections omitted.

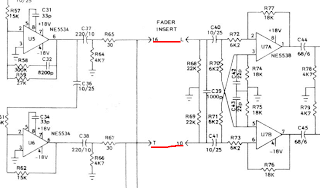
In this case I am just using two of the four available inputs – XLRs on the front connect to Mic Input A, and jacks on the rear for line input A. Both sets of outputs (M1 and M2) will be used, one on the front and one on the rear of the case. On the original WBS mixer the modules would have been wired to a fader, but we can bypass this by connecting across the appropriate pins as shown in red. Note that in the schematic for the M480C, the fader inserts are wired from pin T to 10 and from pin 16 to L, which means diagonally across the connector rows.

However, when we wire it that way the polarity of the preamp is inverted, as shown on the scope.

It seems likely that some other part of the console flips the phase, or less probably that the M480 is differently wired from the M480C – one would expect the modules to be interchangable. Either way, the simple answer is to connect pin T to L and pin 16 to 10, as shown on the pin assignment above.

The hole for the fused IEC power inlet was cut through with an appropriate punch – this gives a neater rectangle than a jigsaw or just drilling and filing, and is quicker too. A dual ±24V bipolar supply is required, and I used a small board left over from an 1176 project. The board from mnats.net uses LM317 and LM337 voltage regulators, and 5Kohm trimmers were used to set the voltages. The modules have on-board filters and regulators to bring the down to ±18V, and their is no audible hum on these modules even at full gain.

Once up and running, the modules sound very nice with plenty of gain. I particularly like the low boost on the EQ, which sounds like it should be useful for beefing up tracks. At the moment many of the pots are rather worn and scratchy, so I next will strip it all down and replace those. It never stops!