P90 sized hexapup stereo pickup, installed in a Fender guitar.
The pickups can be wired for stereo or full six channel output, or somewhere in between! These are exactly the same as our humbucker sized hexapups, but in a P90 sized packet.
Matt from Bobby and Jemima, had one of our stereo pickups fitted to his guitar. For stage use, we made him one of these….
3 channel guitar switch box
It’s a very simple custom 3 channel foot-switch box, which lets him control each of the bass, treble and rhythm channels separately. I was pleased with how it came out. Hammertone paint always gives things a 1950s industrial look.
The battery just lights the three LEDs, and should last for ages, so long as the cables are unplugged when not in use.
Bobby and Jemima… AKA Charlese and Matt (not sure who is who!)
Matt provides a large chunk of the music for the act, playing guitar and drums – often at the same time – and he wanted to be able to send bass runs on the lower strings to a bass amp whilst simultaneously playing the melody and lead from the top strings out through a guitar amp. No problem at all!
I fitted a hexapup to the bridge position, wired out to a pair of output jacks, and an additional toggle switch gave the option of sending the G-string to either the bass or treble output. And we put one of our new P90 pickups in the neck position, with its own output for a third amplifier. Now Matt can make a lot of noise with one guitar!
The E&D strings are wired in series, as are the G&e strings, observing polarity. The negative sides of these pairs are wired to the sleeve(s), and the positive ends of these are connected to a double pole, double throw switch as shown.
The B and A strings are wired between the switch and the two outputs. Flicking the switch then routes the E and D to either the B or the A string, and so on.
This is ideal for a tip-ring-sleeve stereo output jack. If using two mono jacks then the sleeves of these should be connected together, and to ground.
Here are some wiring suggestions and sound samples for our ‘Hexapup’ hexaphonic pickups
Installation – Mounting the pickup
The hexapup is a standard humbucker size and will fit into most humbucker routed guitars without modification. Please note that the hexapup gives best results in the bridge position, and because it uses strong magnets it not really suitable for use as a neck pickup.
1. Mono pickup
When wired as a conventional mono pickup, the hexapup has a bright single coil tone. The coil arrangement means that it has very good hum rejection (humbucking) properties.
2. Stereo guitar.
The simplest way to connect the hexapup for stereo use is to mount two jack sockets into the guitar, and wire one side of the pickup to each jack. The signal can then be run to two amps or DI boxes for gigging or recording. There are two obvious ways to divide the strings, the pickup can be supplied in either split or spread mode, with spread being the default.
Splitmode – low strings are sent to one amp, high strings to the other
Split mode sends the low strings E, A and D to one channel, and the high strings G, B & e to the other, like Neil Young’s stereo guitar. Spread sends alternating strings to each channel, that is E, D and B to one output, and A, G & high-E to the other, which gives a nice spread of frequencies across the stereo image.
Here are some sound samples of the pickup in split mode. As always the stereo image comes across better on headphones than laptop speakers!
In each case the playing is a single guitar, and the recording was made using the DI input of API A2D preamp into protools, processed using Amplitube amp modelling plug-in.
3. Mono / Stereo Jack
An alternative way of wiring the output is to use a stereo jack and a stereo breakout box. If the stereo jack is wired so that the positive wires from both sides are wired to the tip, one negative wire to the ring and the other to the sleeve, then the pickup will also work in mono if a normal mono guitar cable is used.
5. Full hexaphonic mode.
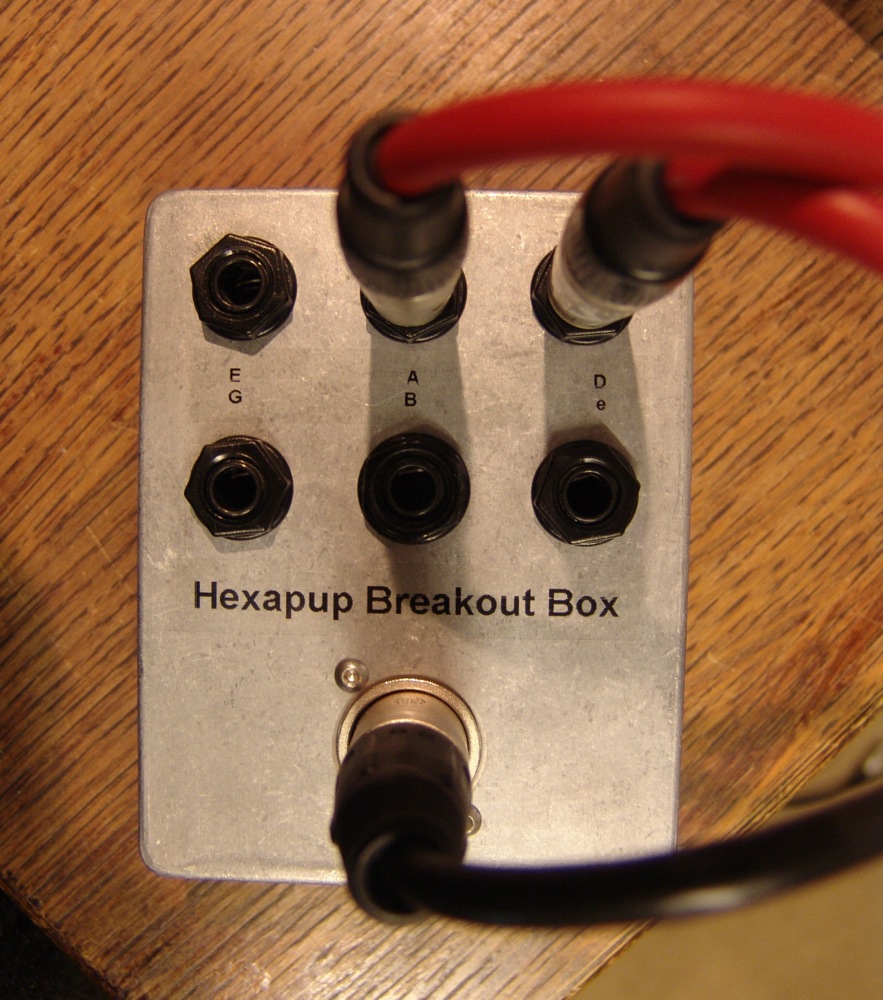
The hexaphonic pickup can of course be supplied with six pairs of output wires, which gives a vast range of wiring possibilities. Probably the simplest way is to use a 6 or 7 pin XLR socket for the guitar output, and run this to a breakout box wired to give six separate jacks.
Heavily modified Jagmaster with hexaphonic and stereo outputs.
When wired this way all six channels share a common negative path, which precludes phase or series / parallel switching of individual strings. However, having six channels without these options is usually enough to worry about! For our demo guitar we used this 8-core screened cable from Canford Audio.
Six channel breakout box for a hexaphonic guitar.
Here is a sample recording made in hexaphonic mode, with the EA strings panned left, the top B and E to the right, and the D and G strings lower in level and somewhere in the middle. Different amp models (Amplitube) have been used for left and right.
Dimensions
Fits in a standard humbucker route.
70 mm x 39 mm x 20.5 mm deep (25 mm including screw lugs)
Stereo model (3 coils in series)
DC resistance = 5.1 K ohms
Inductance @ 1kHz = 0.9 Henry
Wiring = Red & black, green & white.
Case ground = green/yellow
Red & green = positive, black & white = negative
Hexaphonic model (single coil)
DC resistance = 1.8 K ohms per coil
Inductance @ 1kHz = 0.31 Henry per coil
Rear of hexapup with six pairs of output wires
Wiring. Output wires are silver plated, teflon coated.
A hexaphonic pickup lets you record you record the signals from each string separately, either through six amplifiers, or perhaps more sensibly by recording directly through instrument inputs or DI boxes. This gives a lot of creative possibilities.
For example, here’s a G major chord, played lazily from the low strings to the high. This was recorded directly into Protools, with the notes spread across the stereo width.
With a hexaphonic recording, it is simple to change the timing of individual strings. Imagine that we wanted the chord played tightly, rather than note by note. A quick edit and here it is…
Now let’s get silly…
… we want to transpose part of a song, but the guitarist has gone to the bar. We can use Autotune on each track to pull each string up by two semitones to play an A major instead. Here’s how it looks on the screen…
Of course we could have simply pitch shifted the whole chord up to achieve a similar effect – Autotune gives it an interesting glitchy slide texture as it chases the notes
By shifting the G-string up by one semitone rather that two, the chord becomes an A-minor. Now that’s something which can’t be done with simple pitch shifting!
One challenge when building prototype pickups is testing them quickly. It is easy enough to make the electrical measurements such as inductance, resistance and capacitance, but they don’t really tell you how the pickup is actually going to sound. Sooner or later they need to go into a guitar.
Squier by Fender Jagmaster ready for surgery
Changing a guitar pickup isn’t a big job, but it still takes time. Usually the strings need to come off, the scratch plate removed, a bit of soldering, and then back together again before tuning. If you add a cup of tea then you can easily lose an hour.
So I wanted to make or modify a guitar to act as a workhorse for pickup testing, which would allow for quick pickup swaps without having to take the strings off. The obvious approach is to put the pickups in from the rear of the guitar – which means cutting a hole through a guitar and finding an alternative way to mount the pickup.
This Squier Jagmaster guitar makes a suitable victim for surgery. It was fairly cheap, the neck is straight and plays well, and the strat-style trem cutout means that I don’t need to remove a huge amount of wood.
The first job it to strip the Jagmaster down, removing the strings, scratch plate and the existing hardware from the front of the guitar, and the tremolo system from the rear. Then off with the neck to keep it safely out of the way when the jigsaw comes to play.
Once everything is out then I measured up and cut two aluminium rails that will act as mounts for the new pickups. These were filed round at the ends to fit the existing routing, and drilled and tapped for mounting.
Then came the dirty work. With a jigsaw I cut through the body to make a humbucker-sized hole. You can see just how thin the wood is between the pickup and the tremolo routings – just a few millimetres.
After the jigsawing, the hole was cleaned up with a wood file. The rails were then screwed into the body at the top of the guitar – the holes countersunk so that they don’t get in the way of the pickups.
One more job – the bridge no longer has springs to keep it under tension. A block of wood locks it in place instead. The guitar can now be put back together.
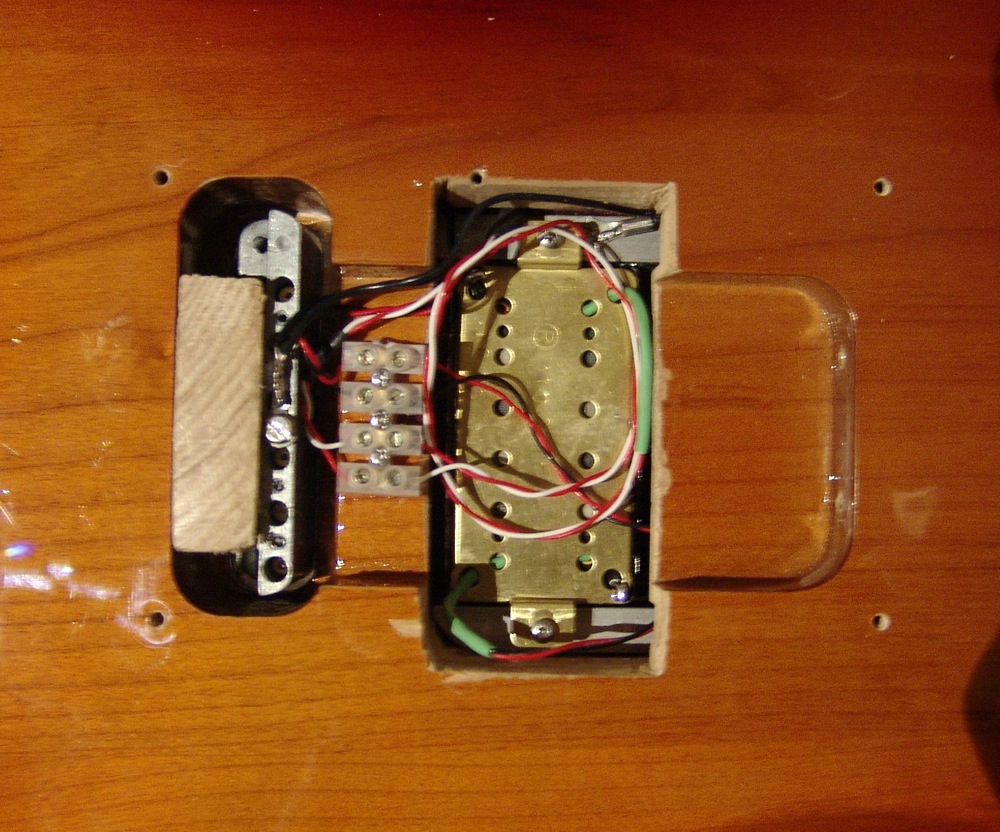
Now the pickup can be fitted from the rear with two screws attaching it to the aluminium rails. Screw terminals are also used to connect the wires to the output sockets for the ultimate quick change experience. A brass plate will cover the mess.
Rear of ‘quick change’ Jagmaster with locked tremolo and pickup mount
Now it takes two minutes to swap a pickup! Time for some rapid prototyping. And here’s the front of the guitar with a hexapup fitted from the rear.
One of the great things about being a micro-business is that you can act quickly! There is no management structure, no liaising with a marketing or accounts departments – we don’t have them! And best of all, no office politics! This means that if we have a good idea, or even a stupid one, we can do it straight away.
Hexapup in a Gretsch-style ‘toaster’ cover
Last month we made a stereo guitar pickup prototype, and it was fairly clear from our customers and comments on forums that a few people might want one. So now, six weeks later, we have a ‘production’ version in a humbucker sized* can – the Hexapup!
Hexapup – hexaphonic guitar pickup
Hexapup guitar pickup
The hexapup is actually made of six small pickups, and can be wired for mono, stereo or hexaphonic output
Mono
When wired as a conventional mono pickup, the hexapup has a bright single coil tone. But it also has hum rejection (humbucking) properties because the coils on one side are reverse wound, with reverse magnet polarity.
Hexapup – serial number 002 with 43AWG wire
Stereo
There are two obvious ways for stereo wiring. Either bottom-and-top, or alternating strings. Put another way, the lowest three strings can be sent to one output, and the highest to the other, so power chords could have one sound, and solos another. Or, the E, D and B strings sent to the left, and A, G & e to the right. This makes for nice stereo width, and is great for multi-tracking chords, and chorus type effects. I have my guitar wired this way!
Hexapup being mounted to a customer’s guitar
Hexaphonic
Each coil can be given its own output, volume and tone control which, with series / parallel and phase options gives a staggering number of combinations. Each string can be sent to a different distortion or delay to get strange new sounds, and could even be auto-tuned or pitch shifted separately – that might be weird. With six outputs, imagination is the only limit!
Here is my much abused Reverend Slingshot, now complete with a properly mounted stereo pickup.
The nice people at Reverend guitars sent me a NOS white scratch plate with routing for 3 P90s, which is perfect for mounting the new pickup alongside the two standard P90s. All I needed to do was drill out a hole for a second output jack.
The open chrome pickup cover was made by modifying a covered one, using a dremel cutting wheel.