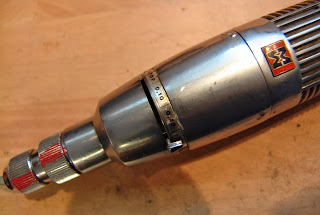
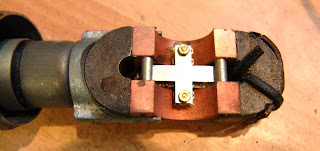
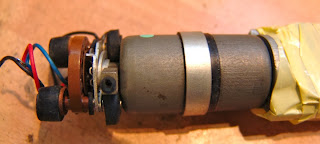
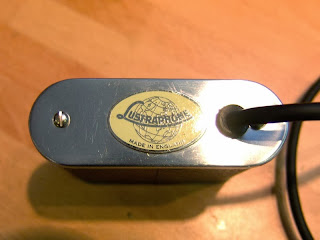
Regular readers will be aware that I am a big fan of B&O microphones, and have serviced quite a few of them over the years. Whilst these mics are stylish and look great, the output levels can often be disappointing, restricting use to sources like guitar amps and drums. The low sensitivity is usually due to weak magnets and the fact that the early microphones have an output impedance of 50 ohms – an older standard. With some work we can make these handsome microphones sound as good as they look.
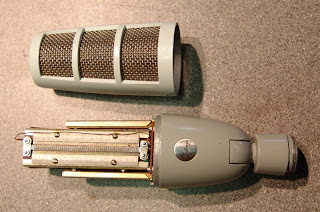
B&O BM3 deconstructed
Firstly, a replacement transformer can be used to convert the microphone’s output impedance. The stock transformer in the early BM2 and BM3 microphones has a ratio of about 1:20, and with the thick wide ribbon gives an output impedance of 50 ohms. Switching to a 1:40 transformer will give an increase of 6dB and raise the impedance to about 200 ohms – Xaudia make such a replacement. With a thinner and lighter replacement ribbon, the output and impedance will both be a little higher.
New magnets!
We also commissioned a batch of custom magnets for BM2, BM3 and BM4 microphones* which greatly increase the magnetic field, and therefore the output level. The magnets in an old BM3 typically have a field strength of 1000 to 1600 Gauss, whereas the replacements give a field of around 6500 gauss – a three or even four fold increase in magnetic field strength, which translates, at least in theory, to a 9dB to 12dB increase in output.
Here are some frequency response plots from three B&O BM3 microphones.
B&O BM3 with new ribbon (blue), new transformer (green), and new magnets (red)
Red = new ribbon, upgrade transformer, new magnets. Green = new ribbon, upgrade transformer, stock magnets Blue = new ribbon, stock transformer, stock magnets.
With the full upgrade, the output level is raised by about +18dB, which transforms the mic into a much more versatile recording tool that can be used for acoustic instruments as well as the usual louder sources. If your B&O mic needs a new ribbon, then it is well worth considering a magnet and transformer upgrade at the same time.
*We have similar magnet upgrades for the BM5 and BM6 mics.
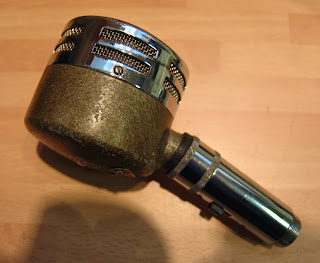
Here is a nice looking Reslosound VMC2 microphone, successor to the VMC, which (probably) stands for Velocity Moving Coil.
Reslosound VMC2
As far as I can tell, the only real difference between the original VMC and this VMC2 is that the newer model has a slightly different grill, and a three pin Reslo output socket instead of a fixed cable. Inside, both mics have the same heavy paper diaphragm and coil.
Reslosound VMC2
The badge proudly declares that this specimen is a low impedance 15 ohm model.
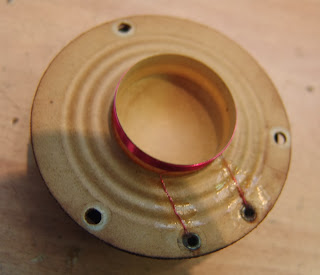
Reslosound used a fibrous paper to manufacture the diaphragm, and the coil is simply glued to the paper tube at the rear. In fact the technology looks very similar to early speakers.
Reslo VMC2 coil and diaphragm.
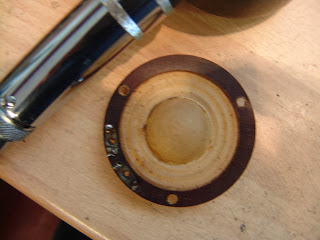
When I plugged it in, the mic gave a very lo-fi sound – even more distorted than one would expected for this era. On investigation, there were some metallic particles sticking to the diaphragm, preventing it from moving freely. The paper cone had also become detached from the diaphragm.
Diaphragm from a Reslo VMC2
The remedy in this case was to carefully unsolder and lift the diaphragm and coil. Then I used a magnet and paint brush to flick and drag the dirt away, both from the diaphragm and from the magnet below.
Reslosound VMC2 magnets
Once the obstructions have been removed, the cone was then lightly glued back using some clear nail varnish, and then replaced in the magnet gap, ensuring that it was centred and free to move. This greatly reduced the distortion.
In use, the mic is slightly boxy sounding, with a steep roll off at the bottom end and some dramatic peaks and dips in the response. It very obviously sounds like an early dynamic mic!
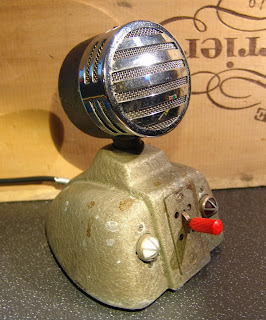
Reslo VMC with base station
For comparison, here is a Reslo VMC with announcer’s base station. Note the difference in the grill, with five horizontal slats, as opposed to three vertical.
Reslosound sold numerous microphone models under their own name, and also made microphones for other brands. This Reslo RV was made for GB Equipment Ltd, and has a funky maroon logo on the top.
This one is labelled RVH – the ‘H’ means high impedance output.
I have also seen and serviced RV models with a Philips badge.
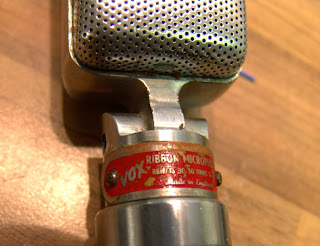
VOX badged Reslo RB
The common Reslo RB models were also sold under the VOX and GEC brands. This Vox mic is identical to the Reslo badged model, apart from the badge.
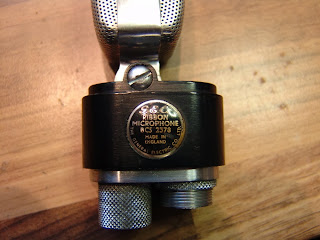
GEC badged Reslo RB
The GEC mics are painted black and given the model number BCS 2378, but it is simply a Reslo
RBS.
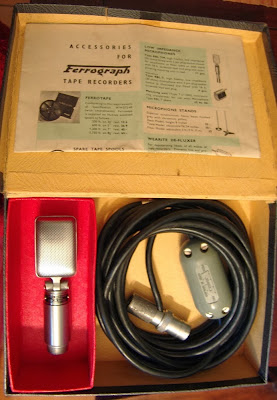
In addition to these re-branded models, many Reslo mics were sold as parts of sets with Ferrograph recorders, and it is common to find Reslos in a Ferrograph box, usually with a matching transformer.
Update January 2015: Here is one more for the collection – a rather scruffy Philips badged Reslo RV seen on eBay.
When describing ribbon mics on this blog, I often note the output impedance of the mic, and possibly the transformer ratio too. Occasionally I receive messages asking how the impedance relates to output level, so here I will try to outline the role that the transformer plays in a ribbon mic. A ribbon mics is a very simple device, and if we consider how it works we will see just how important the transformer is.
In the beginning…. Let there be mics!
If we place a thin, light strip of corrugated aluminium* foil in a magnetic field, it will move in response to sound waves, and, just like an alternator, will induce an electrical potential that oscillates with changing velocity. We have a ribbon microphone!
Tannoy mic – ribbon, magnets and transformer
But to get a useful signal out of the ribbon, we must complete the circuit and connect it to something. Because the voltage of the signal is too low to connect directly to a mic preamp, a transformer is used to increase the output to a more usable level**. So far so good, but what kind of transformer do we need? That depends on the destination of the signal and how far it has to travel to get there.
The Good Old Days
In the early days of sound recording with ribbon mics, the destination would usually have been a tape recorder of some kind, with a tube preamplifier to receive and boost the signal from the microphone.
The mic could be connected in two ways: the budget option would be a high impedance connection using an unbalanced screened cable through a capacitor and straight to the tube grid, just like a guitar! The drawback is that unbalanced, high impedance connections are prone to picking up noise, and parasitic capacitance will limit the length of cable that can be used before the higher frequencies become significantly attenuated.
A better approach is to use a balanced cable to a second transformer in the preamp. The balanced connection will give better rejection of noise and long cable runs can be used. With 30 to 50 ohm microphones it is possible to run cables for hundreds of meters, which was ideal for broadcast and film recording. For these reasons the early impedance standards for microphones in the UK were 30 to 50 ohms for professional use, and high impedance for consumers. Broadcasters in other countries had different standards which just compounds the confusion – for example many Japanese microphones are 600 ohms.
The impedance can be set using the output transformer: Let us make an imaginary ribbon microphone for some thought experiments! In our imaginary microphone, the ribbon in the magnetic field might produce a signal of 1 mV for a given sound level, and the aluminium itself might have an impedance of 0.2 ohms. But the transformer primary winding also has some resistance, and that would add another, say, 0.1 ohms to the impedance of the primary circuit to give a total of 0.3 ohms.
Film Industries transformer dissected
So we will make the transformer with a 1:10 ratio. This increases the impedance by a factor of the ratio squared, so in this case we need to multiply our 0.3 ohms from the primary circuit by 100, which gives 30 ohms. The secondary winding also has resistance, which might be of the order of 2 ohms, and we need to add that in. So overall we have a 32 ohm impedance for our microphone, which is suitable for older 30/50 ohm equipment.
What about the output level? The 1mV signal is multplied by the transformer ratio, so we now have 10 mV output, which equates to a 20dB increase in signal.
This Is The Modern World
Over the decades, broadcast and recording equipment has become more standardised, and most modern mixing desks and dedicated mic preamps are made to work well with microphones of up to around 600 ohms.
Ribbon microphones tend to have low outputs compared to modern dynamic and condenser mics, so it is advantageous to squeeze out as much level as we can. So, let’s go back to the transformer in our imaginary ribbon mic and re-design it for use in the today’s recording environment. We can keep the same primary winding, but change the secondary winding to one with a higher turns ratio.
Xaudia ribbon mic transformers being assembled
Let’s make it a 1:32 transformer, so now we need to take our 0.3 ohms from the ribbon and primary winding and multiply it by 32 squared, which gives 307 ohms. Once again we need to add the resistance from the secondary winding – in this case the wire is not only longer from the extra number of turns, and also will be thinner because we have squeezed the extra turns into the same space. A typical value would be 20 ohms, which would give us 327 ohms altogether, which most modern preamps can cope with quite happily.
Our output level will now be 32 mV, or 30dB gain with respect to 1 mV. So we have an improvement of +10dB over the 32 ohm transformer.
No Free Lunch
In life, and in physics, we know that you don’t get something for nothing. So are there any drawbacks with increasing the ratio. The higher impedance can increase the resistance noise, so it is important to make sure that the transformer is well designed with a very low DC resistance, particularly for the primary winding. However, the extra 10dB could be the difference between asking 50 dB gain from the preamp, or cranking it up 60 dB gain, where many preamps are becoming noisy.
Ancient and Modern
In most cases, it is worth getting the transformer right and demanding a bit less from the preamp. With vintage ribbon microphones it is very often possible to re-wind the original transformer to a higher ratio to get more output from the microphone. If the original laminations and winding style is used, the vintage tone of the mic can be retained, and overall this can give a stronger signal and a better signal-to-noise ratio into modern equipment.
Vintage Ferrograph and Wearite matching transformers
Another option is to use an impedance matching transformer. Back in the 1950s and 60s, most manufacturers of ribbon mics sold transformers to solve all kinds of matching problems. One example is this line matching transformer from Reslo, which connects a low impedance mic to a high impedance tape recorder. Xaudia make impedance matching transformer boxes with XLR fittings to do exactly the same job in a modern studio.
In part 2 of these ramblings I will discuss the effects of the transformer’s inductance and resistance characteristics.
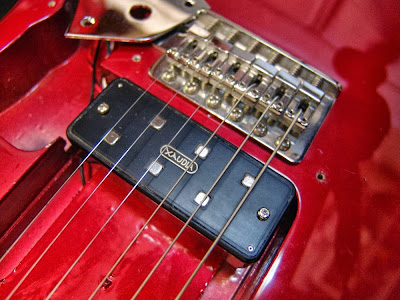
P90 sized hexapup stereo pickup, installed in a Fender guitar.
The pickups can be wired for stereo or full six channel output, or somewhere in between! These are exactly the same as our humbucker sized hexapups, but in a P90 sized packet.
A good customer brought in his Coles 4050 stereo microphone for show-and-tell, which gave us a good opportunity to compare and contrast with some of the STC-Coles mics from the past.
STC4033, 4038 and Coles 4050 microphones
On the of the photo left is the imposing and impressive STC 4033, which contains both a ribbon mic and a ‘ball & biscuit’ dynamic element. These combine to give a cardioid pattern, which was difficult to achieve at the time.
In the middle sits a 4038, which is perhaps the classic British broadcast ribbon – designed by and made for the BBC. This one was made by STC, and they are still made to the same design by Coles Electroacoustics. The soap-dish styling is dictated by the large horseshoe magnet inside.
The 4050 stereo mic is on the right, and looks very different again. It is a more modern styling but form still follows function, and strong neodynium magnets are used not only for the ribbon motor, but also to fix the mics to the stand mount. This allows free rotation and makes setting up for Blumlein pairs very quick and simple.
Frequency sweeps of 4050 (top, red & yellow) and 4038 (bottom red)
We ran a frequency plot of both halves of the 4050, and of the 4038.* Both mics sound very good, and although the old 4038 had a smoother top end roll off, the 4050 had an extended about +6 dB higher output and an extended frequency response. We were also very impressed with how well matched the two 4050 ribbons were – less than ±0.5dB across the range, and mostly much better than that.
The 4038 is prettier though!
* Taken at 30 cm distance. Please note that some of the bumps are due to our test chamber – there are issues with calibration when comparing a figure 8 ribbon with an omnidirection reference mic.
This nice Fi-Cord 1200A tube microphone arrived without a power supply… so we built a new one!
The problem with these mics is that they are filled with resin, and it is almost impossible to get inside them. The mic has a Nuvista tube (like the AKG C28c) somewhere deep inside. Thankfully this one was working well so it just needed a new cable and an Xaudia custom power supply….
Our microphone of the month for September is this a rare and lovely BBC-Marconi ‘type B’ ribbon microphone. The type B is closely related to the ‘A’ series of mics (AX, AXB and AXBT) which were made from around 1935 onwards. The model B was made from 1937 onwards and used the same motor assembly, but with a smaller (yet still massive) magnet and without the ribbon tension adjustment facility.
BBC Marconi type B, side view
The smaller magnet format allowed the mic to be packaged into a smaller cylindrical body, and these were apparently were often used for outside broadcast, attached to the chest of the broadcaster! One would have to be pretty strong to carry that around all day.
Although this is widely know as the model ‘B’, the nameplate calls it 8559A.
BBC Marconi type B badge
As well as the outer grill, there are two extra windshields inside the mic, which would have protected the ribbon from wind blasts and dirt. These windshields did their job well – in this example, the ribbon is unbroken, but this has oxidised and stiffened over the years and will need to be replaced.
BBC Marconi type B ribbon motor
The magnet and motor assembly are held in place with foam rubber, which has mostly survived the years. The output transformer is hidden behind the magnet. This had a break in the secondary winding, but luckily I was able to unwind it by a single turn and bring the mic back to life.
BBC Marconi type B, transformer
At the rear of the mic, connection to the outside world is made by three screw terminals, and square bulge at the bottom shows the location of the transformer.
BBC-Marconi ribbon mic, rear
Overall, the mic sounds warm and rich, although the metal can gives it a certain ‘boxy’ sound that instantly defines it as a very old microphone!
There is some more info about the BBC-Marconi ribbon mics at the Coutant and Orbem websites.
Here is a trio of American model R331 ribbon mics…
American R331 microphones
These rather pretty looking mics made a brief appearance in Back to The Future (at the end, where Marty sings Johnny B Goode….)
Is this the DeLorean of microphones? No.
The mic can be set to either low (50 ohms), medium (250 ohms) or high impedance using jumpers and clamps hidden behind the badge. The inside of the mic looks like a bowl of spaghetti where all the wires from the transformer are run out to the panel.
Impedance settings for the R331
The mic also has a block of wood in it! In fact American Microphones made a range of three ribbon mics, and the sister models – the DR330 and DR332, both employed a dynamic capsule as well as the ribbon motor. In the R331, the wooden block fills the space which would otherwise be occupied by a dynamic capsule – a low tech but effective solution to the problem.
The motor is simply made of two magnets screwed and welded to a metal frame, and the ribbon itself is about 2.1 mm wide. This one needed some welding and a new ribbon, but once repaired sounds nicely balanced for a vintage ribbon, with the transformer rolling off some of the bottom end to compensate for the proximity effect.
I see a lot of Lustraphone VR53 mics around that have lost their original badges – like the ones on the left and right. The glue that was used wasn’t great, and they look rather sad without their original nameplate.
Replacement Lustraphone badge
I am delighted to say that we have just taken delivery of some replacement badges for these that look absolutely fabulous. They have a silver logo on a vintage cream background, just like the originals.
Lustraphone VR53 with new badge!
They of course also fit the Grundig, Pamphonic and Mimco badged versions of the VR53, and also some of the small Lustraphone dynamics too.
Lustraphone dynamic with new badge!
The badges are £5 each plus post from the Xaudia website.