I was lucky enough to come across a pair of Syncron AU7A microphones (aka Fairchild F/22) on ebay. On arrival from the US I found that all the foam lining in the boxes had decomposed and spread black dust everywhere. Luckily the capsules appeared to be in fine condition, and the mics came with the original cables, so the should be a good chance of getting them back to working condition.
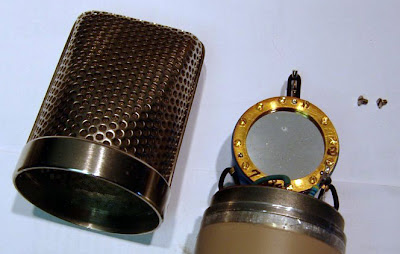
That’s easier said than done! The mics run on 4 batteries – 2 x 4.2V for the amplifier and 2 x 21V for the polarisation. Unfortunately, our microphones came complete with the original vintage batteries inside, which had inevitably leaked and caused corrosion throughout. The batteries are now pretty much unobtainable, so I used a bench voltage supply to simulate the batteries. Microphone number one gave a very weak and noisy (hiss) signal – I suspected the FET had somehow become contaminated by the battery acids. Mic 2 was slightly better, but certainly not something you could use as a serious recording tool.
These are reported to be the first commercially available FET microphone, and searching the internet didn’t throw up any schematics so I traced out the circuit, which is very very simple – capsule -> field effect transistor -> DC blocking cap -> transformer.
EDIT 21/9/2011 : please note that the schematic posted here contained errors. A revised version is here!
The transformer may be wired either for 200 or 50 ohms, and measurement showed it has a voltage ratio of 5:1 in series or 10:1 in parallel mode.
At this stage I needed to make a decision on how to get the best out of the microphone. More on that very soon, but for now here are some web links to Syncron information – there’s not a lot of it about!