 |
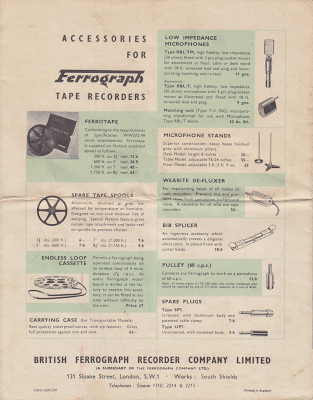
| The Incomparable Ferrograph brochure |
The Xaudia Blog
Quick-change guitar for pickup testing
One challenge when building prototype pickups is testing them quickly. It is easy enough to make the electrical measurements such as inductance, resistance and capacitance, but they don’t really tell you how the pickup is actually going to sound. Sooner or later they need to go into a guitar.
 |
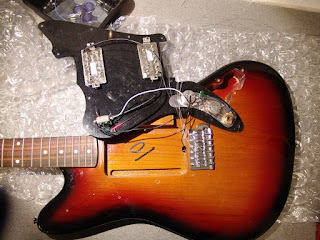
| Squier by Fender Jagmaster ready for surgery |
This Squier Jagmaster guitar makes a suitable victim for surgery. It was fairly cheap, the neck is straight and plays well, and the strat-style trem cutout means that I don’t need to remove a huge amount of wood.
The first job it to strip the Jagmaster down, removing the strings, scratch plate and the existing hardware from the front of the guitar, and the tremolo system from the rear. Then off with the neck to keep it safely out of the way when the jigsaw comes to play.
Once everything is out then I measured up and cut two aluminium rails that will act as mounts for the new pickups. These were filed round at the ends to fit the existing routing, and drilled and tapped for mounting.
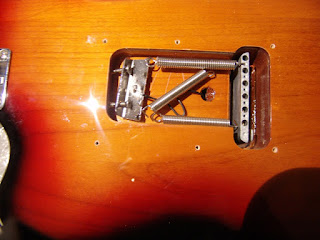
Then came the dirty work. With a jigsaw I cut through the body to make a humbucker-sized hole. You can see just how thin the wood is between the pickup and the tremolo routings – just a few millimetres.
One more job – the bridge no longer has springs to keep it under tension. A block of wood locks it in place instead. The guitar can now be put back together.
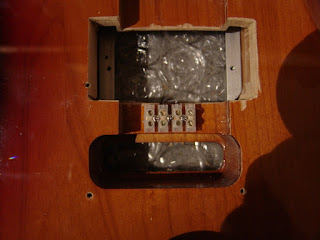
Now the pickup can be fitted from the rear with two screws attaching it to the aluminium rails. Screw terminals are also used to connect the wires to the output sockets for the ultimate quick change experience. A brass plate will cover the mess.
 |
| Rear of ‘quick change’ Jagmaster with locked tremolo and pickup mount |
Now it takes two minutes to swap a pickup! Time for some rapid prototyping. And here’s the front of the guitar with a hexapup fitted from the rear.
 |
| Jagmaster with Xaudia pickup fitted. |
Lustraphone VR53 microphone documents
Lustraphone was one of several British companies making microphones back in the 50s and 60s. The catalog includes product sheets for several microphones and also some accessories such as mic stands and matching transformers. I was lucky enough to come across some old Lustraphone catalog pages, which included a product sheet for the VR53 ribbon velocity microphone and several other microphones. The catalog probably dates from 1952 or 1953. Note the four digit phone number!
 |
| Lustraphone VR53 ribbon mic data sheet front |
 |
| Lustraphone VR53 ribbon mic catalog, reverse |
Although the catalog mentions 20 ohm and 500 ohm models, I have also seen high impedance models of this mic. The frequency response is claimed to be “substantially maintained to 14000 Hz”. From experience, I would say that ‘substantially’ is used loosely. The BBC have a bit more to say about this mic in their R&D reports.
As well as the VR53, the catalog also includes
VC52 “velodyne” noise cancelling microphone
C48 moving coil microphone
C51 dynamic microphone
C151 telephone microphone
AGC496a – Automatic gain control, which looks to be some kind of tube limiter.
Film Industries M8 XLR mod
 |
| Film Industries M8 ribbon mic with XLR |
Italian ribbon microphones
Today we took delivery of some interesting microphones from Italy. Here they are with some other resident Italians.
 |
| Geloso double ribbon, Framez, Do-Re-Mi 351MN, CM, Magneti Marelli MC46, Riem and Meazzi |
From left to right we have ribbon mics by Geloso, Framez, Do-Re-Mi, CM, Magneti Marelli, Riem and Meazzi. On closer inspection it seems as though some of the different brands came from the same factories.
The motor of the Do-Re-Mi mic is the same as the Framez, and the Riem is a skinny version of the Meazzi. We also know from previous research that Framez and Meazzi were related companies. Magneti Marelli made 74B copies under license from RCA.
We know less about the RCA-shaped CM microphone. In fact nothing at all about it, other than it is a fairly standard design, made for public address use.
It seems as though there was once a a thriving ribbon mic industry in Italy, with numerous brands and models, but I don’t know of any modern Italian ribbon mics.
Update: I found this ad for the Riem ribbon microphone, from the magazine Selezione Radio, Feb 1952.
1934 RCA PB90 ribbon mic time capsule
Look what’s on the bench today….
 |
| RCA PB90 ribbon microphone from 1934 |
This is a beautiful RCA PB90, in complete original condition, but need of a little loving care to bring it back to its former glory. Here’s the output transformer….
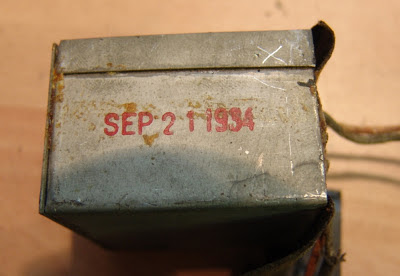 |
| RCA PB90 Ribbon mic transformer, 1934 |
It’s date stamped 21st September 1934! 78 years old. The mic shares a birthday with Leonard Cohen!
That’s amazing.
Grampian microphone documents
Here are links to some manuals and documents from Grampian Reproducers Ltd.
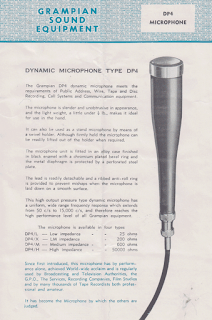
Grampian DP4 dynamic microphone manual.
Grampian price list from June 1976.
Ribbon mic patents
Here are some more ribbon microphone related patents, both US and British, from the 1930s, 40s & 50s.
The diagram (above) is from one of the patents, and may be the first tube ribbon mic!
Look who is really answering your enquiries…
The Trashcaster Lives!
 |
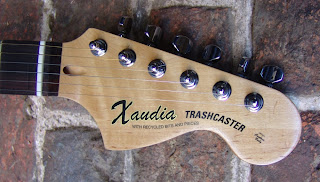
| Xaudia ‘Trashcaster’ guitar |
A couple of coats of clear lacquer helps the slide-on decal blend in. But perhaps I should have called it the ‘Nashmaster’. Too late now! The last job was to file the nut to take the narrower gauge Nashville strings, and to do this you really need a proper set of nut files. They are not cheap but I found these ones on ebay for around £40, and they did the job quickly and accurately.
