The Xaudia Blog

Hexapup samples, wiring and technical specs


Here are some wiring suggestions and sound samples for our ‘Hexapup’ hexaphonic pickups

Installation – Mounting the pickup
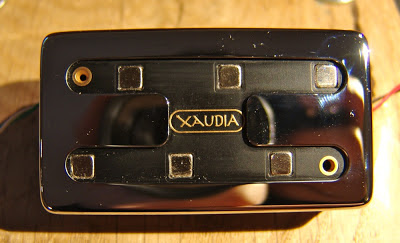
The hexapup is a standard humbucker size and will fit into most humbucker routed guitars without modification. Please note that the hexapup gives best results in the bridge position, and because it uses strong magnets it not really suitable for use as a neck pickup.

1. Mono pickup
When wired as a conventional mono pickup, the hexapup has a bright single coil tone. The coil arrangement means that it has very good hum rejection (humbucking) properties.

2. Stereo guitar.
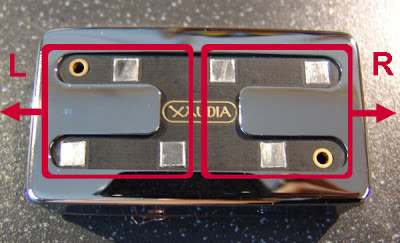
The simplest way to connect the hexapup for stereo use is to mount two jack sockets into the guitar, and wire one side of the pickup to each jack. The signal can then be run to two amps or DI boxes for gigging or recording. There are two obvious ways to divide the strings, the pickup can be supplied in either split or spread mode, with spread being the default.

Split mode – low strings are sent to one amp, high strings to the other


Split mode sends the low strings E, A and D to one channel, and the high strings G, B & e to the other, like Neil Young’s stereo guitar.  Spread sends alternating strings to each channel, that is E, D and B to one output, and A, G & high-E to the other, which gives a nice spread of frequencies across the stereo image.

Here are some sound samples of the pickup in split mode. As always the stereo image comes across better on headphones than laptop speakers!

Split mode Hexapup – picking

Spread mode – alternating strings are routed to each channel

Here is one of the riffs above in stereo ‘spread‘ mode.

Spread mode hexapup – picking

In each case the playing is a single guitar,  and the recording was made using the DI input of API A2D preamp into protools, processed using Amplitube amp modelling plug-in.

3. Mono / Stereo Jack 

An alternative way of wiring the output is to use a stereo jack and a stereo breakout box. If the stereo jack is wired so that the positive wires from both sides are wired to the tip, one negative wire to the ring and the other to the sleeve, then the pickup will also work in mono if a normal mono guitar cable is used.

4. Stereo guitar with Split / Spread switch.
On request, the hexapup may be supplied pre-wired with a switch to choose either split or spread mode. Here is an easy way of switching between the modes.

5. Full hexaphonic mode.
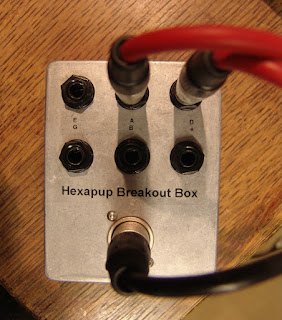
The hexaphonic pickup can of course be supplied with six pairs of output wires, which gives a vast range of wiring possibilities. Probably the simplest way is to use a 6 or 7 pin XLR socket for the guitar output, and run this to a breakout box wired to give six separate jacks.

Heavily modified Jagmaster with hexaphonic and stereo outputs.
When wired this way all six channels share a common negative path, which precludes phase or series / parallel switching of individual strings. However, having six channels without these options is usually enough to worry about!  For our demo guitar we used this 8-core screened cable from Canford Audio.
Six channel breakout box for a hexaphonic guitar.

Here is a sample recording made in hexaphonic mode, with the EA strings panned left, the top B and E to the right, and the D and G strings lower in level and somewhere in the middle. Different amp models (Amplitube) have been used for left and right.

Low and high – hexapup

There are some further sound samples of the hexapup in full hexaphonic mode here.


Xaudia Hexapup – Typical specifications


Dimensions
Fits in a standard humbucker route.
70 mm x 39 mm x 20.5 mm deep (25 mm including screw lugs)

Stereo model (3 coils in series)
DC resistance = 5.1 K ohms
Inductance @ 1kHz = 0.9 Henry
Wiring = Red & black, green & white.
Case ground = green/yellow
Red & green = positive, black & white = negative

Hexaphonic model (single coil)
DC resistance = 1.8 K ohms per coil
Inductance @ 1kHz = 0.31 Henry per coil

Rear of hexapup with six pairs of output wires
Wiring. Output wires are silver plated, teflon coated.
Colour = positive, black = negative
E = Red & Black
A = Pink & Black
D = Yellow & Black
G = Green & Black
B = Blue & Black
e = White & Black
Case ground = green/yellow

More Hexaphonic pickup sound samples

Xaudia Hexapup

A hexaphonic pickup lets you record you record the signals from each string separately, either through six amplifiers, or perhaps more sensibly by recording directly through instrument inputs or DI boxes. This gives a lot of creative possibilities.

For example, here’s a G major chord, played lazily from the low strings to the high. This was recorded directly into Protools, with the notes spread across the stereo width.

Gmajor – spread

Adding an amp simulator gives it some body…

Gmajor – jazz amp

With a hexaphonic recording, it is simple to change the timing of individual strings. Imagine that we wanted the chord played tightly, rather than note by note. A quick edit and here it is…


Gmajor – all together

Or perhaps we would prefer to strum from the top to the bottom instead. No problem – we can just shift the notes slightly and we have it …

Gmajor – reverse strum

And by reversing the waveform of three strings and repeating the notes, we get this little ambient loop. A semi-reversed guitar

Gmaj & Amaj – edited loop

Now let’s get silly…
… we want to transpose part of a song, but the guitarist has gone to the bar. We can use Autotune on each track to pull each string up by two semitones to play an A major instead.  Here’s how it looks on the screen…

And here’s how it sounds!

Auto-tuned Chord – Gmajor to A major 

Of course we could have simply pitch shifted the whole chord up to achieve a similar effect – Autotune gives it an interesting glitchy slide texture as it chases the notes


By shifting the G-string up by one semitone rather that two, the chord becomes an A-minor. Now that’s something which can’t be done with simple pitch shifting!

Auto-tuned Chord – Gmajor to A minor!

The possibilities are endless!

Polyphon mechanical music player

And now for something completely different, let’s look at a portable music player from a hundred years ago!

This rather wonderful Polyphon type mechanical disc music player was a Christmas gift. Thanks Santa (& Mum & Dad!).

Metal disc music player

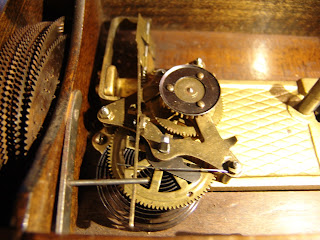
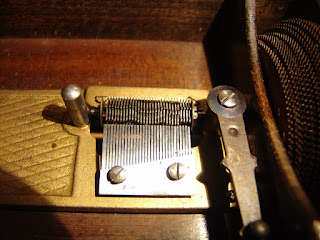
Inside the box is a clockwork device very much like a music box, but the music is encoded onto a metal disc with teeth around its outer edge.

The disc is driven by a clockwork device, with a coiled spring providing the power, and a spinning regulator to keep the speed constant.

The disk drives a set of rotating gears, which in turn strike the tines of the comb to produce the sound. Each tine is a different length, and so a different note. The sound is then amplified simply by the resonance of the wooden box.

Small polyphon style music discs

The discs are about the size of a CD, and the musical information is stored in them by punching and bending strips of metal so that they strike the music player. Each disc holds a mammoth 20 seconds of music, approximately. A few of the discs are rather rusty and bent, but the majority of them still play well enough.

Rusting gracefully!

Each disc is ink stamped with a number and the name of the tune. I have discs with numbers beyond 400, so this must have been a popular format with a wide choice of titles.

Here are some sound files  for a few of the discs. The sound is pretty and a little creepy at the same time, with all of the mechanical clicks and whirrs.  (mono .wav files around 3 Mb each, recorded with a Neumann TLM49 through RFZ KV80/1 preamp).

133 – Bonnie Dundee
143 – Banks of Alan Water
152 – Sally in our Alley
156 – Rock of Ages
189 – In the good old summertime
219 – Liberty Bell March (damaged)
222 – Marching through Georgia
402 – Carmen Polka

My aim is to record and share all of the discs that I have, so check back later for more.

Update….
I found this video on the web, which features the same player. The owner claims that it was made by the Swiss company Thorens in around 1910. One can imagine people taking this kind of music player along on a picnic perhaps, on a sunny summers day!

Mine seems to run a lot faster than this, so I may need to adjust the regulator.
Update 2…
Thanks to Alexander Schulz for sending in a link to the History of Thorens webpage.

Happy 2013

Thanks to all of our friends, customers and suppliers who helped to make 2012 another exciting and successful year for Xaudia.

Hot-rodded Reslo RB microphones

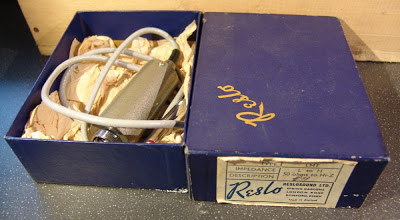
In 2012 we repaired 203 microphones for customers, an increase over 2011, and Reslo microphones were again very popular – we serviced 47 of them this year.  Once again RCA mics came in second place (23), with AKG and Beyerdynamic in third and fourth.

Xaudia – microphones serviced in 2012

We sold a further 50 or so refurbished vintage ribbon microphones through our website, including about 25 ‘Beeb’ modifed Reslos. And we also introduced our own low noise ribbon microphone transformers for repairs and upgrades.

2013 looks to be just as exciting – we will be launching a range of guitar pickups, making a few more transformers, and also there will be some tube mic power supplies. And of course we will be here to repair your microphones.

Happy New Year!
Stewart & Jane
Xaudia.com

Racking a pair of Ward Beck M480 preamps – Part 1

Ward Beck M480 preamp modules

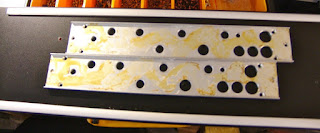
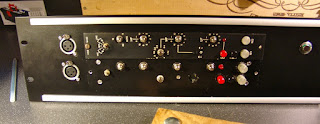
I recently acquired this pair of Ward Beck M480 input modules. Ward Beck Systems, or WBS, have a great reputation, and so I am very keen to get these racked up as microphone preamps. The modules have four switchable inputs, and a parametric EQ section too.

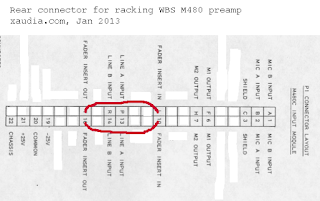
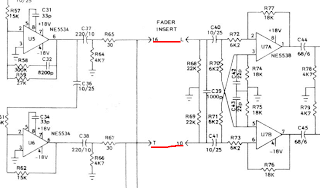
I have not yet found a copy of the M480 manual, but the Ward Beck Preservation Society have the manual for the later variant, M480C. The pin assignments look the same although the later ‘C’ revision has some additional features such as a switchable phantom.

The modules are very neat and clean inside, and use 44 pole PCB edge connectors. Luckily I had three gold plated connectors in the parts bin. These were salvaged from some scientific equipment that I pulled from a skip. It pays to recycle… and never throw anything away!

Although the modules are in great shape inside, the front panels and knobs are very dirty from years of sticky fingers. Naughty engineers!

The collet knobs can be removed by popping off the coloured caps, and then loosening the central locking nut. Then the black control panel can be prised away from its glue. In both cases they are destined for a long zap in the ultrasonic bath, which will clean them up nicely.

WBS M480 stripped down for racking
The modules will be mounted in a standard 19 inch rackmount case, and the construction makes this very simple. The existing aluminium front plates can be used as templates to drill the holes in the new front panel, and the black screen printed control panels can be mounted over these. Then it just needs a ±24V power supply and we will be ready to go.
Part 2 to follow soon, when the new case arrives

Reslosound and the Incomparable Ferrograph

The Incomparable Ferrograph brochure
Here is an old Ferrograph brochure whoch arrived with a Reslo ribbon microphone. Built like tanks, Ferrograph made arguably the best reel to reel tap recorders through the 50s and 60s, and it seems that they had a formal agreement with Reslosound as the two names often appear together in catalogs.  The final page of the document shows the Reslo RB microphone, along with accessories including matching transformers and stands.

The Reslo microphone sold for 11 Guineas at the time of publishing. (1 Guinea = one pound and one shilling. Only the British could come up with such a bizarre coin!)

Quick-change guitar for pickup testing

One challenge when building prototype pickups is testing them quickly. It is easy enough to make the electrical measurements such as inductance, resistance and capacitance, but they don’t really tell you how the pickup is actually going to sound. Sooner or later they need to go into a guitar.

Squier by Fender Jagmaster ready for surgery
Changing a guitar pickup isn’t a big job, but it still takes time. Usually the strings need to come off, the scratch plate removed, a bit of soldering, and then back together again before tuning. If you add a cup of tea then you can easily lose an hour.
So I wanted to make or modify a guitar to act as a workhorse for pickup testing, which would allow for quick pickup swaps without having to take the strings off. The obvious approach is to put the pickups in from the rear of the guitar – which means cutting a hole through a guitar and finding an alternative way to mount the pickup.
 

This Squier Jagmaster guitar makes a suitable victim for surgery. It was fairly cheap, the neck is straight  and plays well, and the strat-style trem cutout means that I don’t need to remove a huge amount of wood.

The first job it to strip the Jagmaster down, removing the strings, scratch plate and the existing hardware from the front of the guitar, and the tremolo system from the rear. Then off with the neck to keep it safely out of the way when the jigsaw comes to play.

Once everything is out then I measured up and cut two aluminium rails that will act as mounts for the new pickups. These were filed round at the ends to fit the existing routing, and drilled and tapped for mounting.

Then came the dirty work.  With a jigsaw I cut through the body to make a humbucker-sized hole. You can see just how thin the wood is between the pickup and the tremolo routings – just a few millimetres.

After the jigsawing, the hole was cleaned up with a wood file. The rails were then screwed into the body at the top of the guitar – the holes countersunk so that they don’t get in the way of the pickups.

One more job – the bridge no longer has springs to keep it under tension. A block of wood locks it in place instead. The guitar can now be put back together.

Now the pickup can be fitted from the rear with two screws attaching it to the aluminium rails. Screw terminals are also used to connect the wires to the output sockets for the ultimate quick change experience. A brass plate will cover the mess.

Rear of ‘quick change’ Jagmaster with locked tremolo and pickup mount

Now it takes two minutes to swap a pickup! Time for some rapid prototyping. And here’s the front of the guitar with a hexapup fitted from the rear.

Jagmaster with Xaudia pickup fitted.

Lustraphone VR53 microphone documents

Lustraphone was one of several British companies making microphones back in the 50s and 60s. The catalog includes product sheets for several microphones and also some accessories such as mic stands and matching transformers. I was lucky enough to come across some old Lustraphone catalog pages, which included a product sheet for the VR53 ribbon velocity microphone and several other microphones. The catalog probably dates from 1952 or 1953. Note the four digit phone number!

Lustraphone VR53 ribbon mic data sheet front

Lustraphone VR53 ribbon mic catalog, reverse

Although the catalog mentions 20 ohm and 500 ohm models, I have also seen high impedance models of this mic. The frequency response is claimed to be “substantially maintained to 14000 Hz”. From experience, I would say that ‘substantially’ is used loosely. The BBC have a bit more to say about this mic in their R&D reports.

As well as the VR53, the catalog also includes

VC52 “velodyne” noise cancelling microphone
C48 moving coil microphone
C51 dynamic microphone
C151 telephone microphone
AGC496a – Automatic gain control, which looks to be some kind of tube limiter.

I have uploaded a PDF of the full catalog here. (10 Mb).

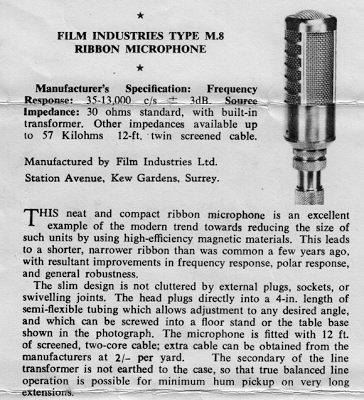
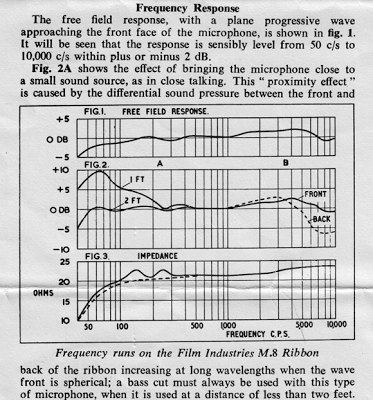
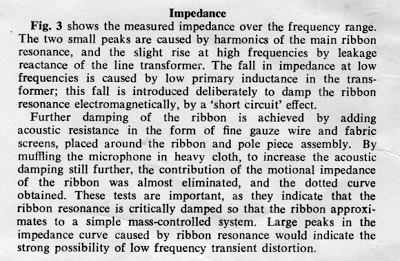
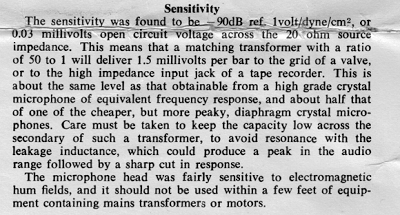
Film Industries M8 XLR mod

Film Industries M8 ribbon mic with XLR
In the days before XLR became the standard microphone connector, most manufacturers made their own custom connectors. The British companies Reslosound, Grampian, Cadenza and Film Industries all followed this practice.

I guess at the time it was a good idea and meant that the company could earn extra revenue for spares and replacements, but 40 or 50 years down the line it is becoming increasingly hard to find good quality  connectors for these mics.
Here is a humble Film Industries mic that arrived without a connector. It was converted to XLR at the owners request. With a bit of care the new connector can be fitted without spoiling the look of the mic. Now it is good to go back into service. Better than being stuck in a box!

Italian ribbon microphones

Today we took delivery of some interesting microphones from Italy. Here they are with some other resident Italians.

Geloso double ribbon, Framez, Do-Re-Mi 351MN, CM, Magneti Marelli MC46, Riem and Meazzi

From left to right we have ribbon mics by Geloso, Framez, Do-Re-Mi, CM, Magneti Marelli, Riem and Meazzi.  On closer inspection it seems as though some of the different brands came from the same factories.

The motor of the Do-Re-Mi mic is the same as the Framez, and the Riem is a skinny version of the Meazzi. We also know from previous research that Framez and Meazzi were related companies. Magneti Marelli made 74B copies under license from RCA.

We know less about the RCA-shaped CM microphone. In fact nothing at all about it, other than it is a fairly standard design, made for public address use.

It seems as though there was once a a thriving ribbon mic industry in Italy, with numerous brands and models, but I don’t know of any modern Italian ribbon mics.

Update: I found this ad for the Riem ribbon microphone, from the magazine Selezione Radio, Feb 1952.