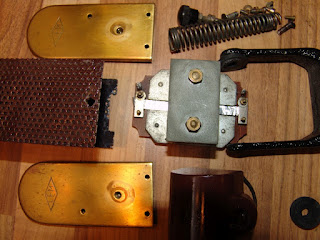
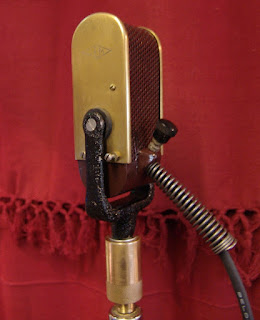
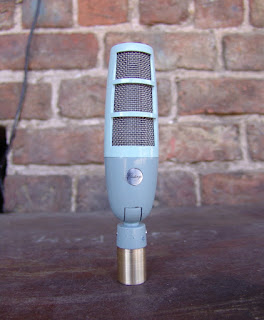
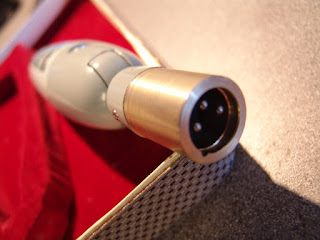
Pete Gardiner is a singer/songwriter and acoustic guitar player based in Newtownards, Northern Ireland and his new album ‘Songs at Sunset’ was produced by Paul Steen, who used a Reslo mic on the vocals alongside a Shure SM7b.
Paul bought one of our Xaudia upgrade transformers for his Reslo RB ribbon microphone, to give the mic an output of around 250 ohms. Paul fitted the transformer himself and used Ward Beck preamps for the recording. Paul said….
“I recorded with the reslo and an sm7b but the final edit ending up being 99% reslo. The sm7b is heavily compressed and dialled in on occasion for choruses etc.”
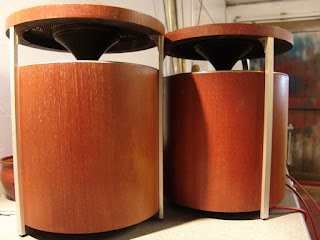
I didn’t have space for a Melodium sculpture, but here is something that I do have space for! I was delighted to find a pair of Kolster Brandes KS651 speakers at our local car boot sale this Easter weekend.
Kolster Brandes speakers
Kolster Brandes KS651 speakers
They were made sometime around 1970, and have an unusual but very chic cylindrical design, with mahogan-ish veneer and aluminium and gold trim. The bottom acts a bass chamber, and a horn mounted on the top projects the higher frequencies upwards, giving an omnidirectional behaviour in the horizontal plane.
Inside, there is just a single six inch driver, rated at 15 watts, and a lot of foam padding.
It is always a risk buying used speakers, but they both work perfectly and I am rather charmed by the sound. They rather soften and round the edges of the program material, but maintain a good stereo image. Perfect for relaxing in the evening, and an antidote to a day of precise listening on headphones and studio monitors. Although only rated for 15 watts they are plenty loud enough for home use, and well worth the £40 paid.
Gramophone magazine reviewed these in 1970, and they retailed at £31 when new. They recommend placing them on a shelf, but I really can’t agree with that. They seem perfectly suited to sitting on the floor of an elegant room and filling it with music – because of their omnidirectional behaviour they have a wide ‘sweet spot’, and are very easy to position.
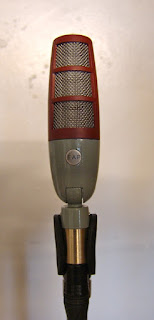
Here is a nice Frankenphone ribbon mic that I put together from spare parts ….
The mic body was salvaged from a broken SE condenser mic, repainted with some nice hammer finish paint and given one of our shiny brass nameplates.
The ribbon motor frame was an unidentified part that was found in an old Reslo mic, but fitted with new neodynium magnets to give a good strong magnetic field. And the transformer was, of course, wound here at Xaudia.
Ribbon motor with new magnets, and transformer
The microphone is rather nice sounding, with a full bottom, big proximity effect and a and good top end response too, for a ribbon. We’ll be putting it through its paces with Silent Fears at the weekend, along with some other new toys.
This rather lovely RCA44 style ribbon is our microphone of the month for March. He was found on Australian ebay, and so will be known as ‘The Australian’ until his true identity is discovered!
‘The Australian’ Vintage RCA style ribbon mic
The mic has a chrome plated steel bottom, a steel yoke, and brass grills, painted black. Connection to the rear is via a pair of screw terminals for balanced output, but with no ground connection.
Although the body shape is very similar to an RCA44, the interior is more like the early Harry Olson prototypes, with a single large horseshoe magnet and broad flat pole pieces, giving a magnetic field strength across the poles of around 1000 Gauss.
The transformer is a dual bobbin type, with a primary inductance of 255 µH at 1 KHz, and 770 µH at 100 Hz. The thick primary wire gives a measured DC resistance of 27 mΩ, and the overall turns ratio is 1:50. With a 2.4 micrometer ribbon, the Australian has an output impedance of about 600 ohms.
There is no maker’s name plate, and no sign that there ever was once. However, next to the ribbon there is some writing in pencil. This is a little tricky to capture on film, but it reads “RIBBON 23825 B1154”.
Sound-wise, the mic has a rich warm tone with a decent output for its age, and the 600 ohm output makes it very usable with modern equipment. The lack of an earth connection makes hum an issue, and I am contemplating adding a third terminal to the rear, if I can find one that matches.
Perhaps it was made by an Australian manufacturer? AWA made copies of RCA microphones, and Zephyr were another Australian company that made some nice ribbon mics. For now it is a bit of a mystery, but we would love to hear from you if you know more about this.
Here is video that was sent to me Göran Petersson, of an acoustic recording of a song by the very talented Lena Swanberg.
Last year we re-ribboned Göran’s Reslosound RBL ribbon microphones, and upgraded the transformers. One of those Reslos is used here on the acoustic guitar, combined with a Neumann KM184. It just sneaks into shot towards the end of the video.
Toshiba are better known these days as a giant manufacturer of consumer electronics goods, so it is perhaps surprising to find a ribbon microphone with their name on. In fact back in the 1960s Toshiba made some pretty decent models, some of which were good copies of RCA mics.
Beneath the outer grills lies a perforated metal baffle backed by a finer mesh screen, which protects the full length of the ribbon against air blasts and pops. The top and bottom of the shield have a tendency to go ‘ping’ – I could actually hear this ringing when speaking into the mic, so a little bit of sticky foam was used to damp this.
Rear of the Toshiba showing transformer and magnets
From the rear, we can see that the field is suppled by a pair of strong horseshoe magnets glued to the pole pieces, which give a measured field of about 3000 Gauss between the poles. The transformer is a twin core ‘humbucking’ type, in this case wound for high impedance.
Once the inner screen is removed, two features stand out as unusual. Firstly, there are no ribbon clamps! The ribbon is simply glued to the supports, and then soldered to the terminals. The arrangement works well enough, but you only get one go at fixing the ribbon.
Toshiba ribbon
The second interesting thing is the small cross bar that bridges the pole pieces. This is actually glued to both the pole pieces and the ribbon itself, dividing the 3.6 mm wide, 60 mm long ribbon into two sections in a 3:2 ratio. I can imagine two purposes for this – to stop the long thin ribbon from travelling to far, and to minimise overtones from harmonic motion.
I have also seen this ‘node’ on another Toshiba ribbon model, so it does seem like a little trick of theirs. The nearest thing I have seen in other microphones is in the Cadenza mics, where the ribbon is glued to a support half way along.
Microphone cleaning
This mic was rather dirty inside. Lots of little bits of iron were interfering with the ribbons movement, making it sound like it was scraping against the sides – which it was! These were easily cleaned with some sticky tape, but the ribbon had to be sacrificed first.
New ribbon in the Toshiba mic
A new ribbon was fitted – soldering 1.8 μm aluminium foil is a bit tricky, but I got the hang of it after a couple of tries. And gluing the cross bar to the ribbon also requires a steady hand!
Once re-ribboned and reassembled (and fitted with a low impedance transformer), the microphone sounds nice, with a relatively flat response up to around 6KHz, where it begins to roll away.
I spent Saturday helping my former band-mate Ant make new pickups for his 1983 Fender Stratocaster – the stock pickups were OK but lacked a little warmth, and he wanted something overwound (i.e. more turns than a ‘standard’ strat pickup), to give a hotter, fatter sound inspired by Rory Gallagher’s ‘Irish Tour’ album.
Ant makes single coil pickup formers from board and magnets.
Magnetic fields fall away rapidly with distance, and with a moulded plastic bobbin, there is inevitably a gap between the pole piece and the coil. Instead, we made the pickups in the traditional manner, with board and Alnico-V magnets supplied by the mighty StewMac.com. Although it takes a little time to construct the pickup in this manner, this method does give a better sound, as the copper wire coil is wound directly onto the magnets, with the most intimate contact possible.
The old strat pickup assembly removed
We made a couple of small tools to help with the assembly. A pair of acrylic blocks were cut to act as spacers between the top and bottom of the pickup, to keep the boards parallel. One of these was drilled to help align the magnets as they were knocked into place. The other tool was a spindle for the coil winder.
Knocking in the magnets – a strip of wood protects the magnet from the hammer!
Once the three bobbins are assembled and glued, it is a simple case of winding the required number of turns onto the former without breaking the wire! The neck and mid pickups were wound with 9000 turns of 42 AWG plain enamel copper wire, and the bridge pickup with 9800 turns, which gave DC resistances of 6.7 kΩ and 7.4 kΩ respectively. 7.4kΩ indicates that around 1300 meters of wire has been wound onto the pickup! For comparison, according to Vintage Guitars Info, the original Stratocaster pickups measured circa 5.8 kΩ to 6.3 kΩ.
An assembled pickup – magnets and flatwork – on the coil winder.
It was interesting to see how the original pickups were wound – they are pretty inconsistent, and one in particular had substantial asymmetry to the coil. Perhaps there is some magic to this, but we suspect that it was just their winder drifting out of alignment and piling up the wire on one side.
Fender Stratocaster pickup, circa 1983.
Our pickups were a bit neater than that! Once wound, the lead wires are soldered on, and the complete pickups are dipped in the wax bath to stop microphonics, and then magnetised. A pair of very powerful 1 inch circular neodynium magnets were used to magnetise the Alnico 5 pole pieces, and we measured around 900 to 1100 gauss for each of the poles. The middle pickup was reverse wound, and given a reverse polarity, by simply flipping the bobbin over for the winding and magnetisation processes. This gives some humbucking when the mid-positions are selected.
The verdict? “Those pickups are PHAT!! Awesome. Loads more bass!“
Anyone who has ever tried to put a Melodium 42B on a mic stand knows that it is challenge, if the original adapter is missing – which it often is.
So we have made some replacement adapters. These are machined from 1 inch (25 mm) solid brass bar, and fit snugly inside the yoke. There is a shoulder to support the weight of the heavy microphone, and a recessed band to accept the thumbscrew. The base is tapped to accept a standard 3/8″ mic stand thread.
Melodium 42B with Xaudia stand adapter
The Melodium 42B can now be securely mounted on a stand. Problem solved!
The Altec 436 and 438 series are vari-μ tube compressor-amplifiers that were famously used at Abbey Road in the 1960s, when the Beatles were there. The 438C is the best of these models, in that it has a built in mic preamp, and also control of the threshold and release, which make the compressor a lot more usable.
I have been looking for one of these for some years now, to the extent that I even built one from scratch – but of course without the gorgeous meter. I finally took the plunge and bought this one on US ebay, for (what I considered to be) a fair price.
Altec 438C compressor
Having paid the ransom to release it from customs, I picked it up from Parcel Force today. Happily, it looks to be in good original condition, and it should not be too much of a challenge to get it up and running again.
There is plenty of vintage dust inside…
Inside the Altec 438C compressor
A few things will need to be done. These were built for the US market, and the transformer will need to be swapped to a 240V model. It would also be prudent to swap out the electrolytic capacitors. All the original transformers are present, which is a relief as these are difficult / expensive to find.
The ‘clone’ has been in regular use for years, and it will be interesting to see how the original compares!
Next week we will be making a few single coil pickups for Stratocasters, so I quickly made this simple little spindle tool to help with the job. It was machined this from 15 mm brass stock on the new mini-lathe, which arrived earlier this week. Below is the roughly machined spindle, before cleaning.
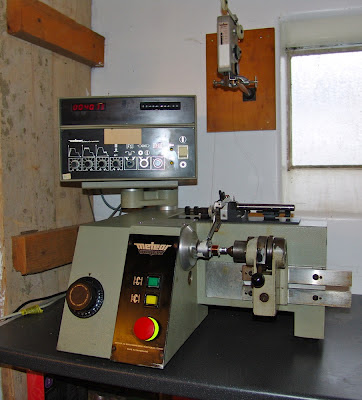
The pickup bobbin slips onto the 3mm post, supported by the wide shoulder, and is locked in place by a square of flatwork board, screwed into the side. This prevents the pickup from slipping on the spindle, without interfering with the wire as it is wound on. The barrel was turned down to 8 mm to fit the Meteor coil winder, although it could equally well be used on a power drill chuck.
It will certainly be much quicker and more accurate than screwing the pickup to a block of wood, which was my previous method.