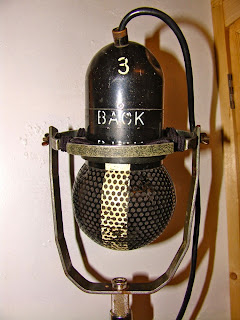
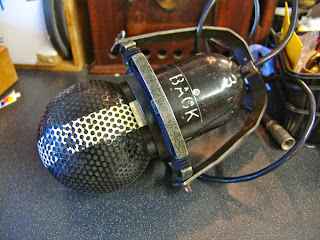
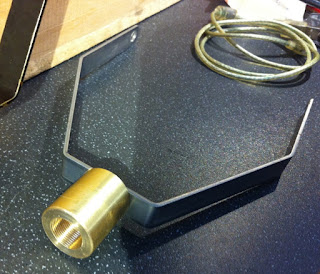
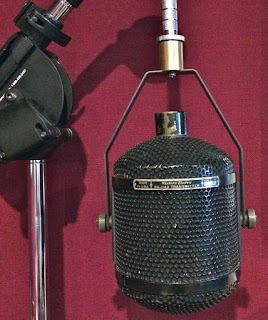
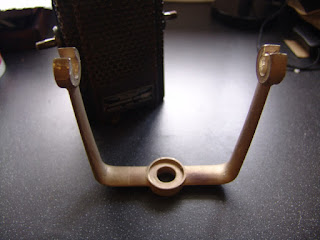
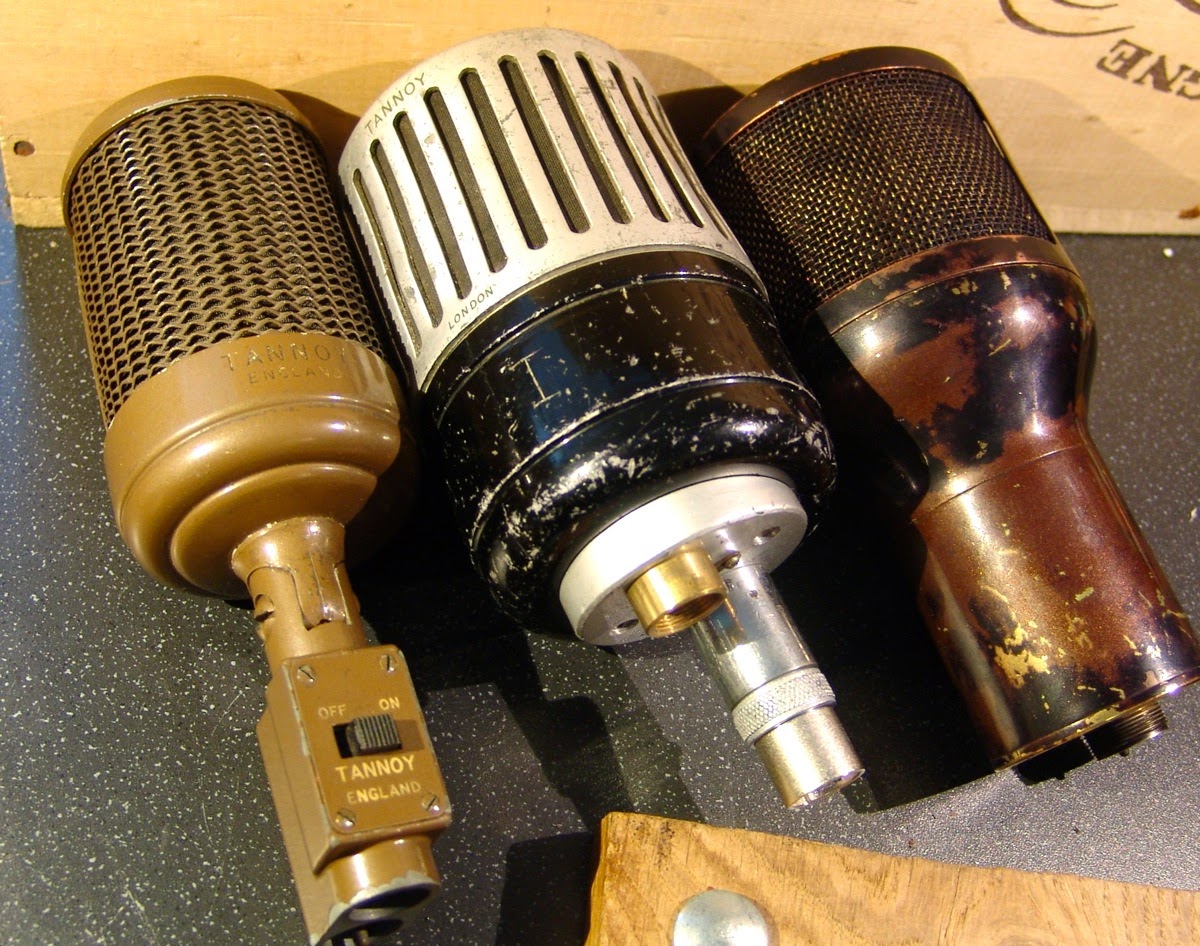
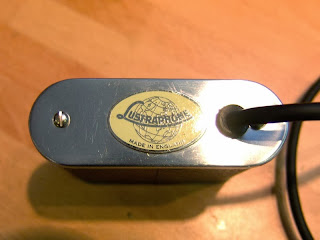
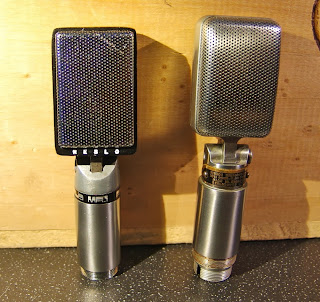
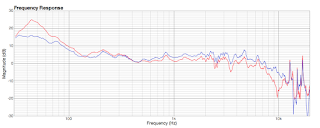
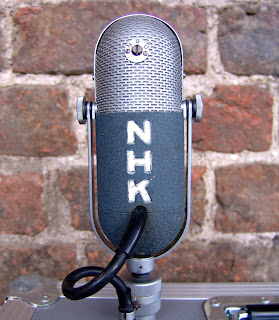
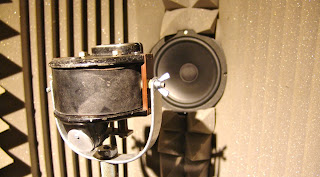
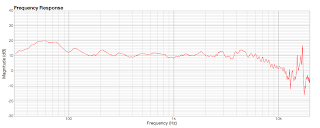
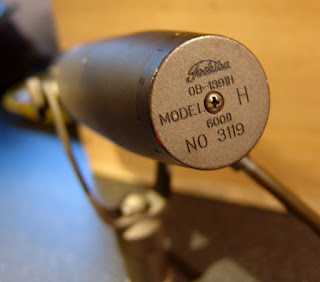
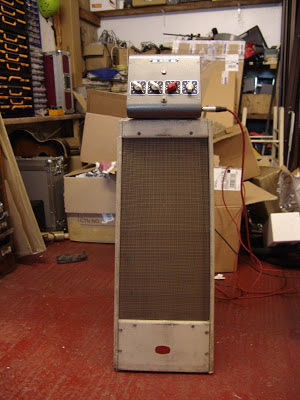
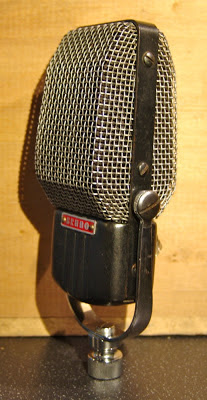
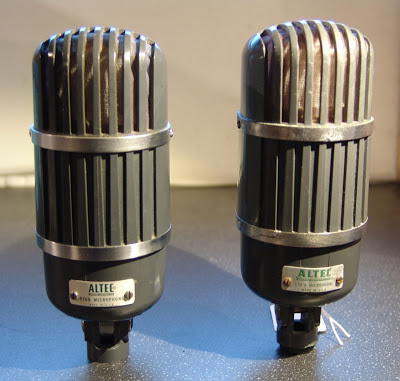
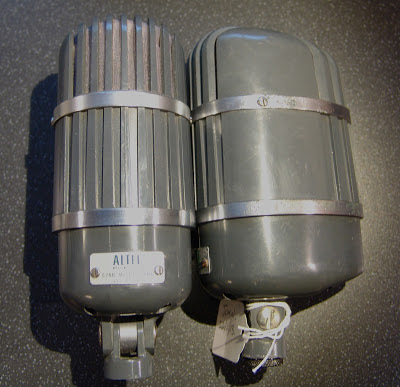
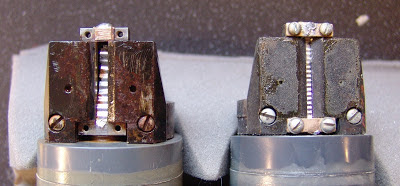
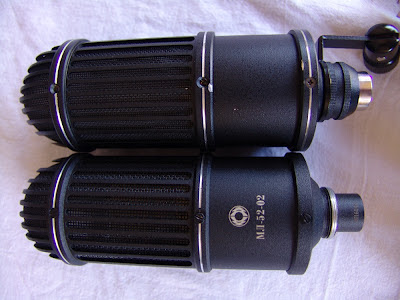
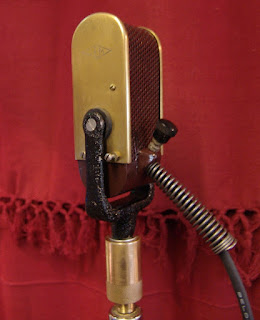
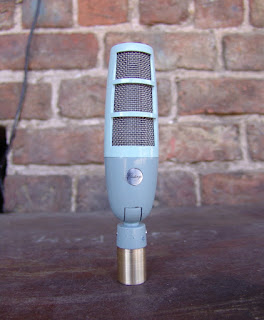
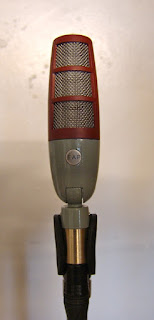
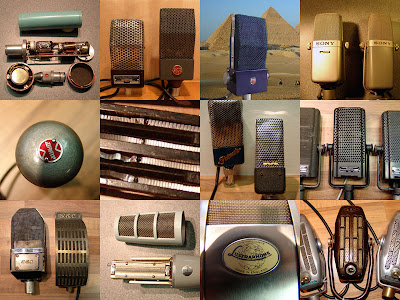
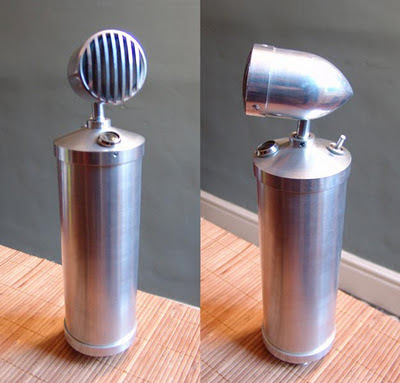
AKG DX11 microphone… with reverb!

You can easily imagine the product development meeting at AKG back in nineteensixtysomething…

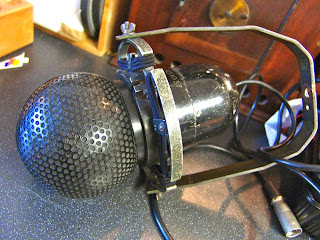
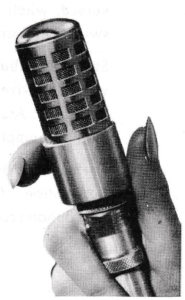
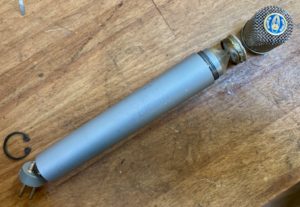
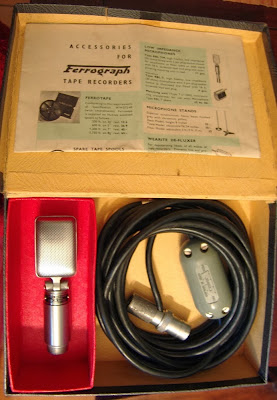
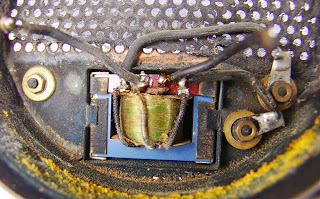
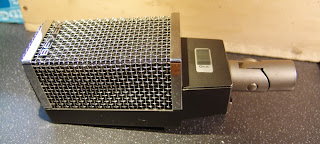
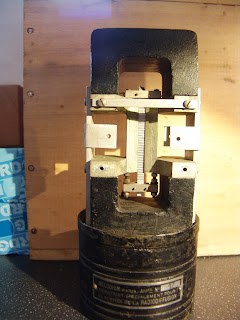
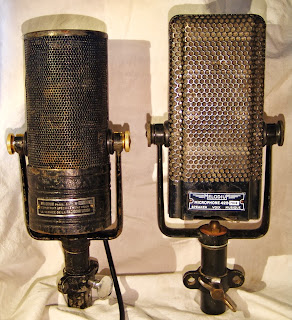
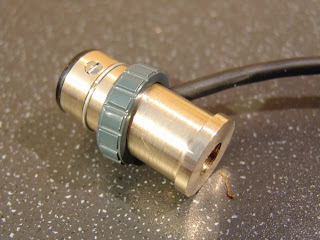
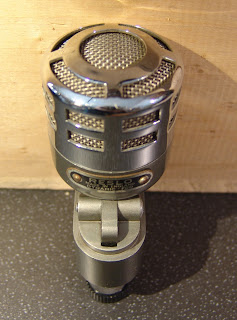
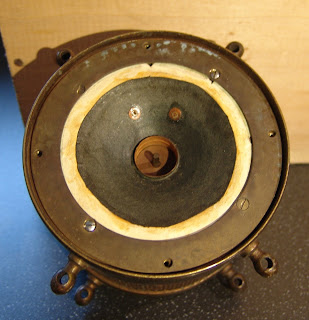
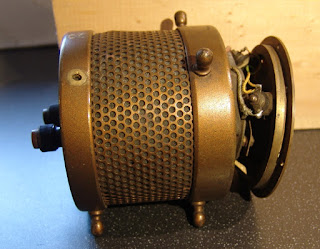
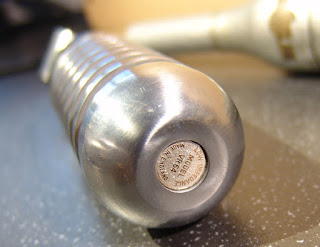
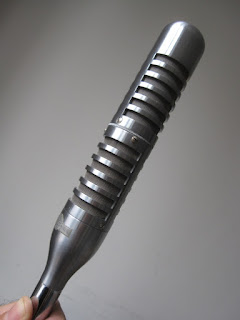
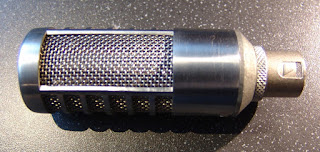
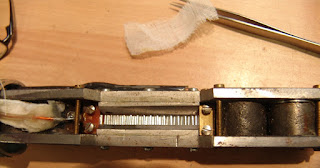
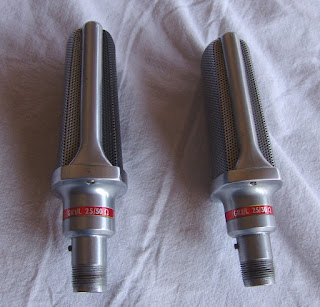
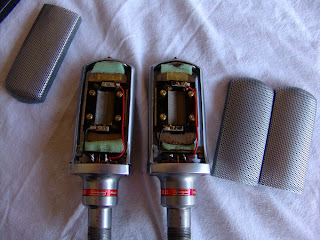
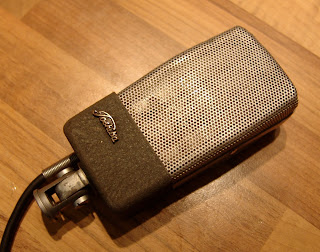
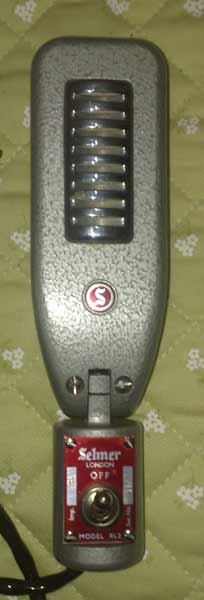
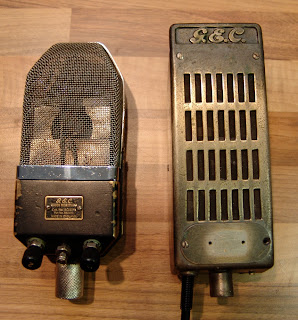
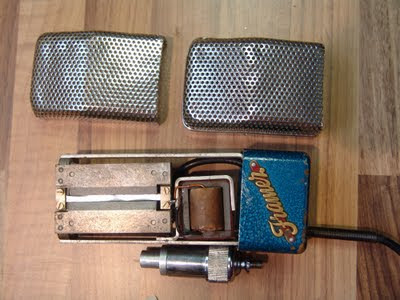
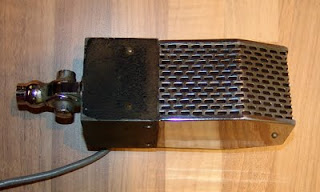
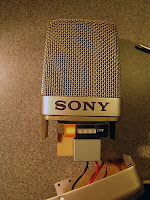
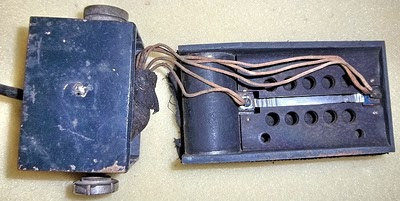
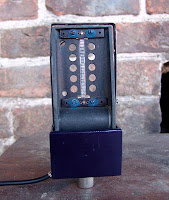
Or something like that. It is certainly true that AKG made some great microphones (too many to list) and a lot of nasty ones (also too many to list). The AKG BX10 and BX20 spring reverbs have become studio classics. And so if any company was well positioned to make a microphone with a built in reverb, it  had to be AKG. The result is the AGK BX11, which is a battery powered dynamic microphone with a built in single spring reverb and a battery powered circuit which uses five germanium transistors to amplify the signal and drive the reverb spring.

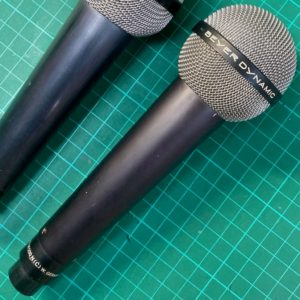
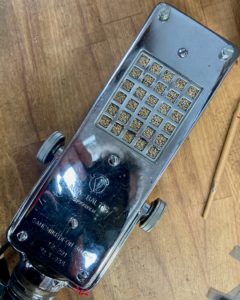
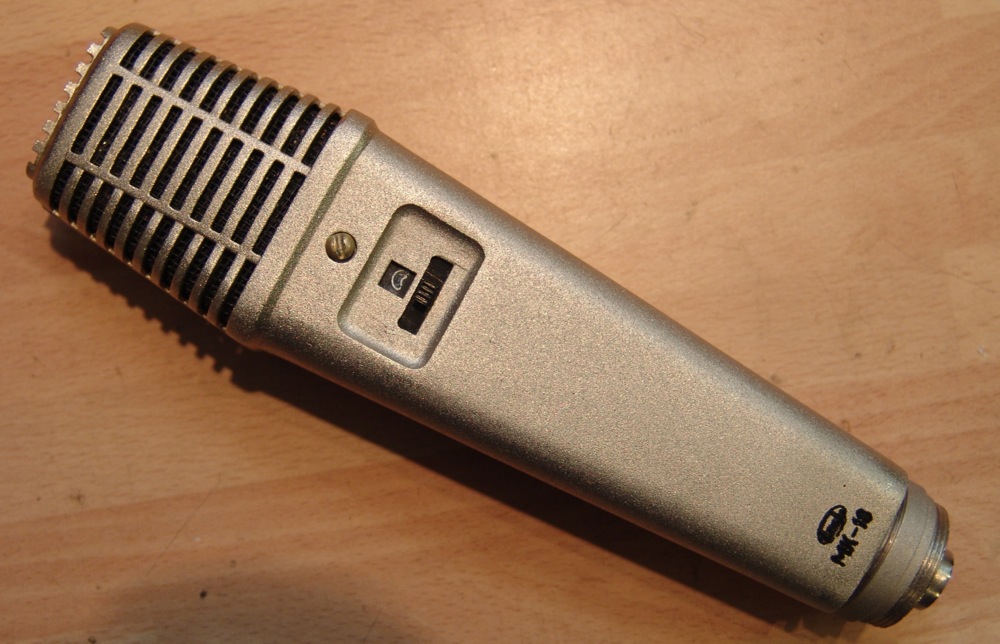
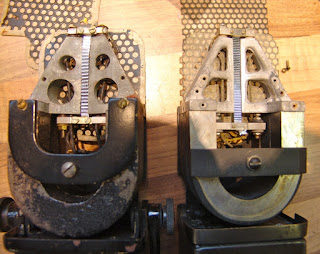
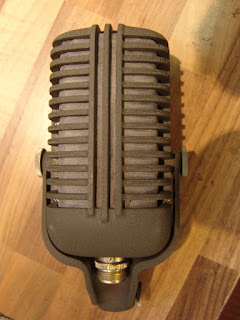
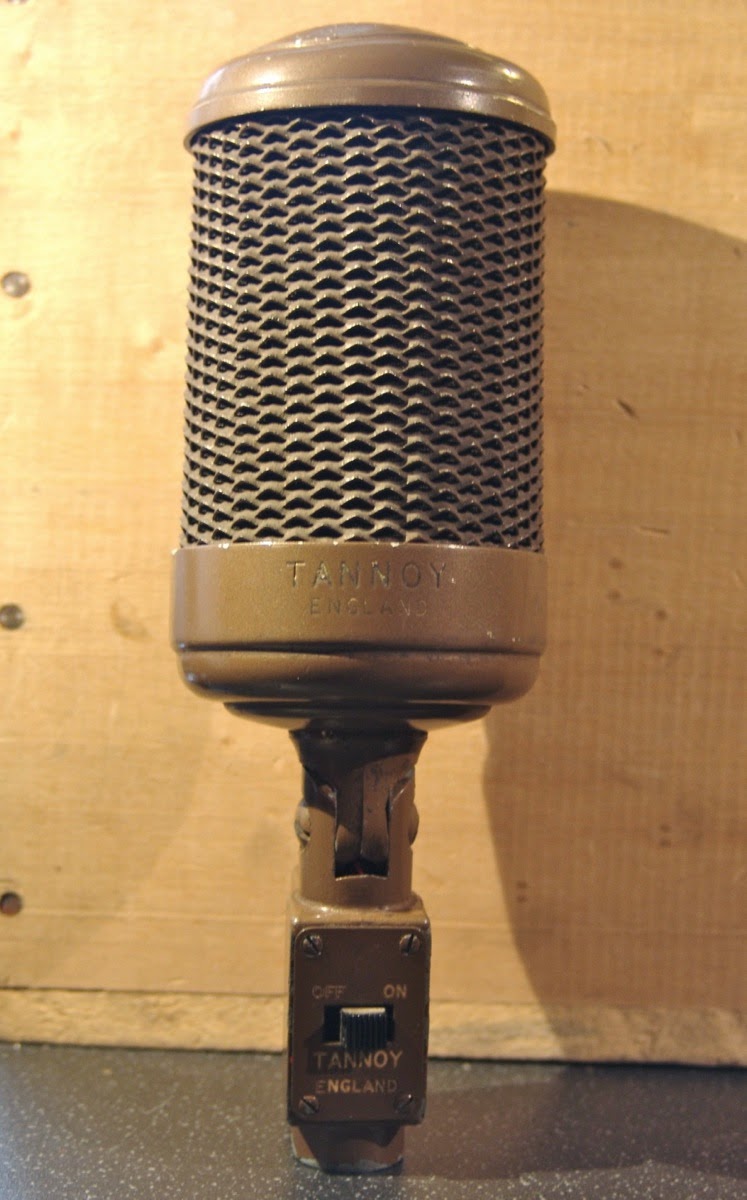
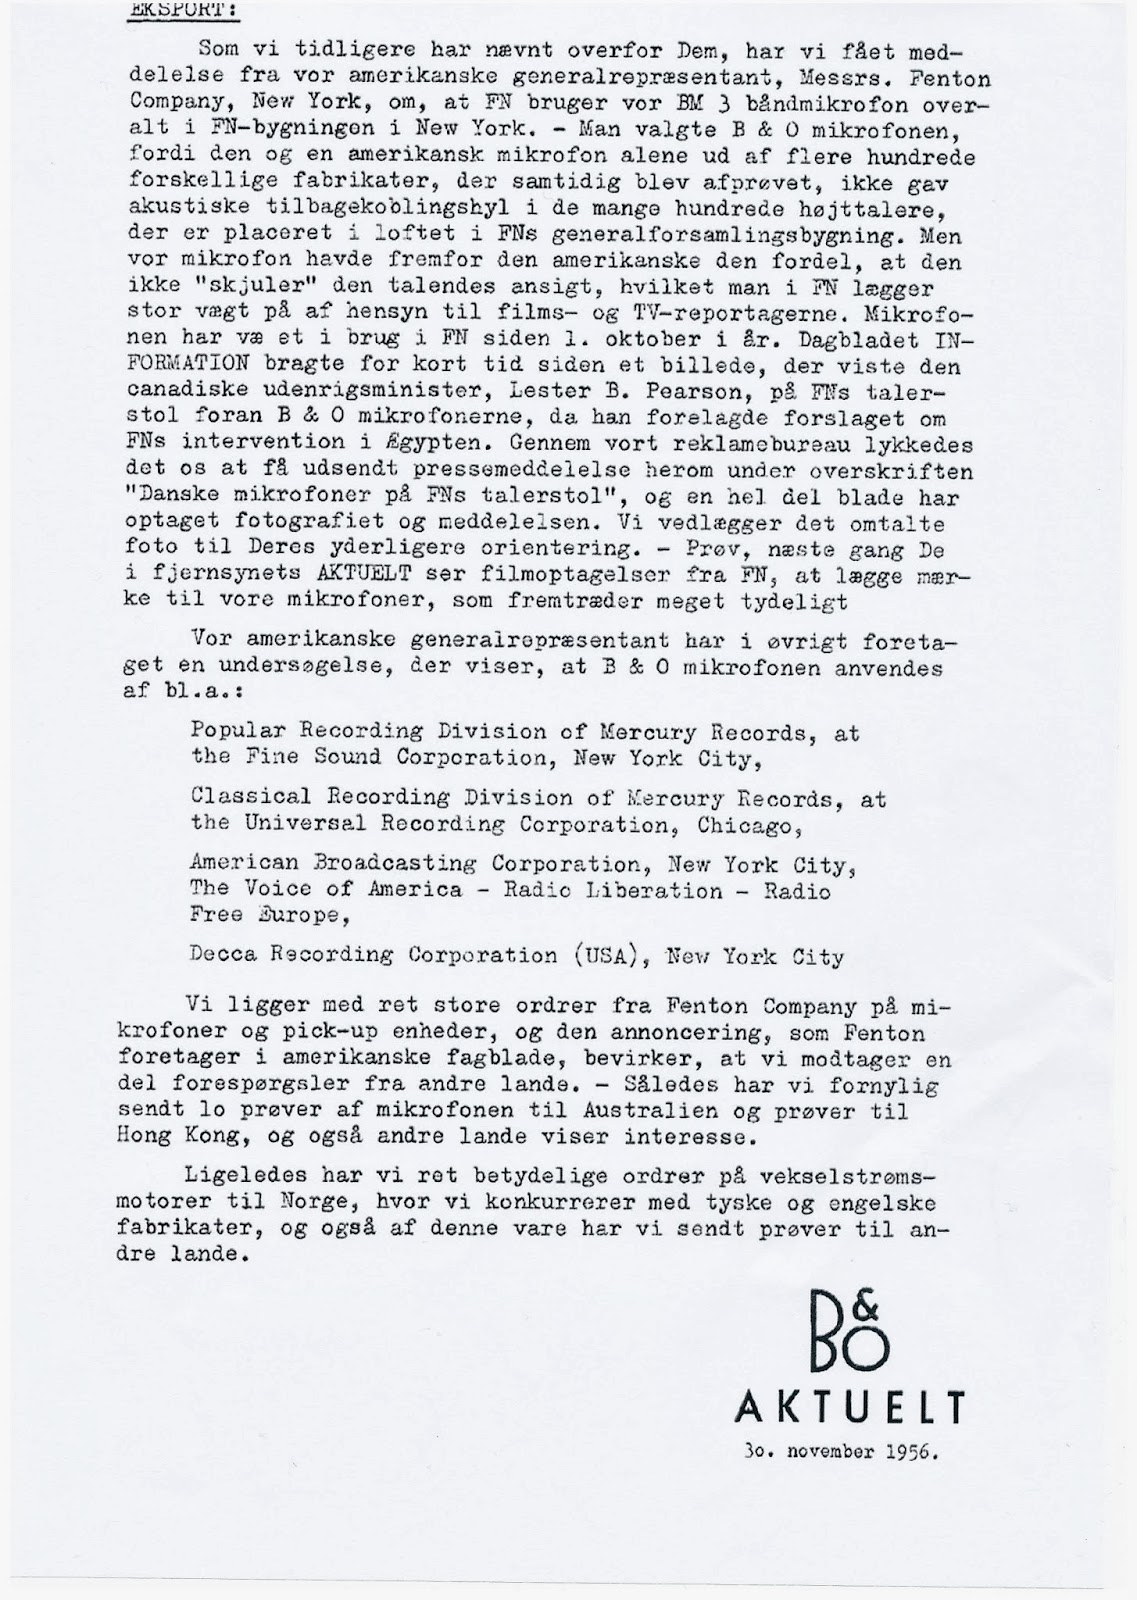
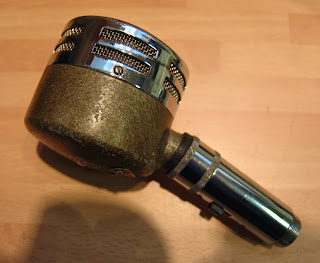
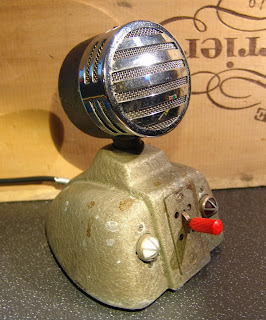
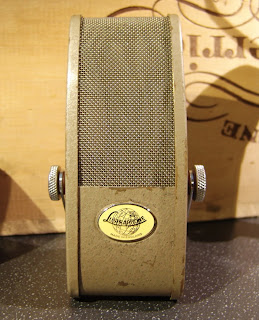
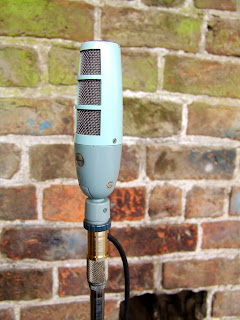
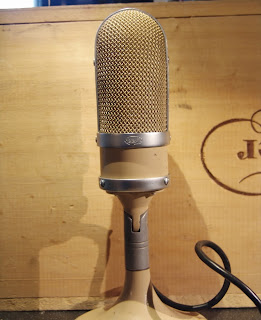
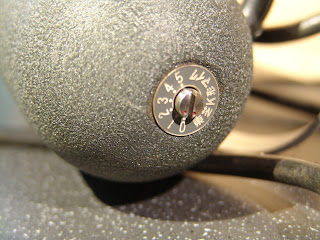
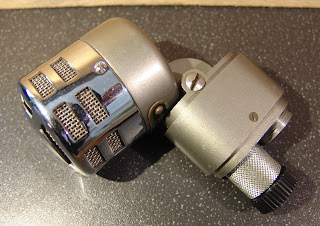
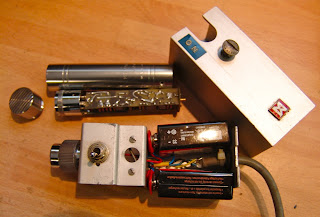
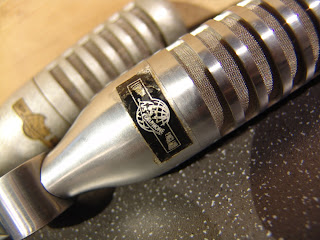
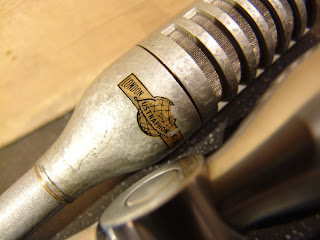
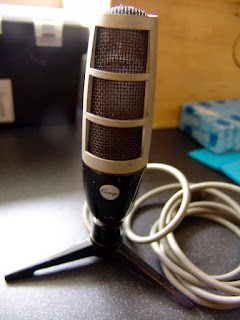
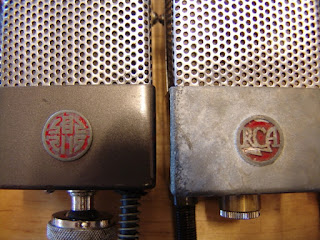
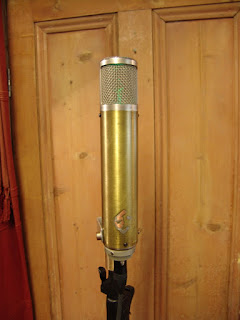
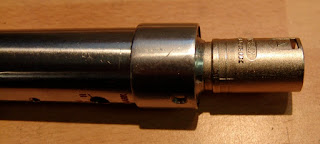
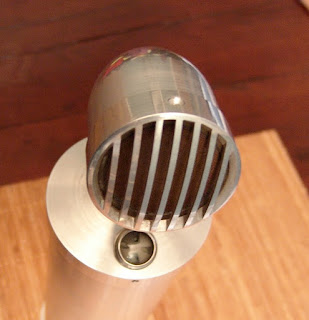
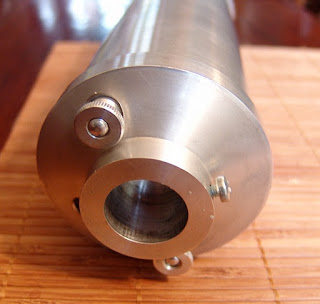
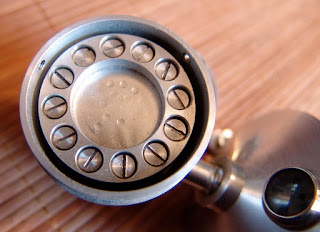
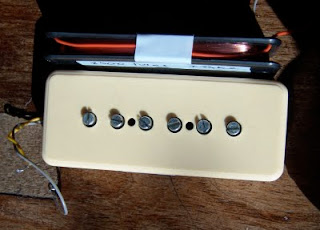
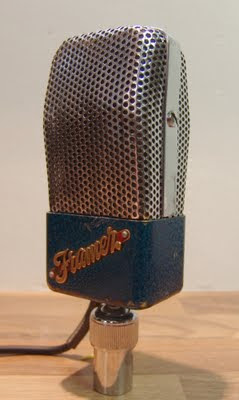
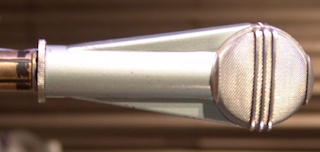
AKG DX11 echo microphone

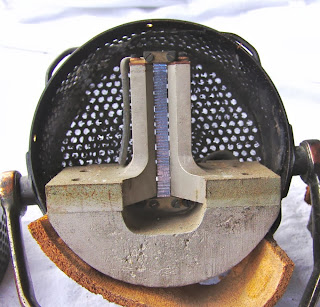
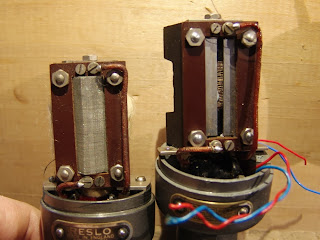
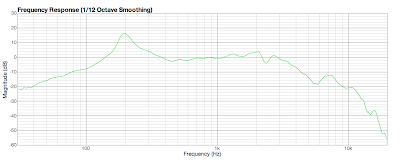
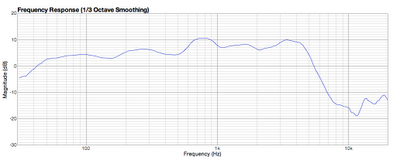
There are some major shortcomings to this design. It is impossible to use this as a hand held microphone because the spring just rattles around. The microphone capsule is not great quality, battery life is short and the germanium transistor circuit is noisy. And although the microphone element is certainly not of hi-fi quality, and the spring is ‘boingy’ rather than lush, none of that matters because it is quirky and fun and offers something unique. 

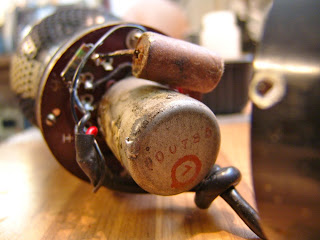
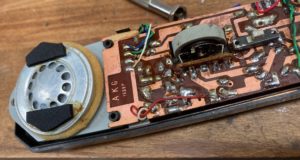
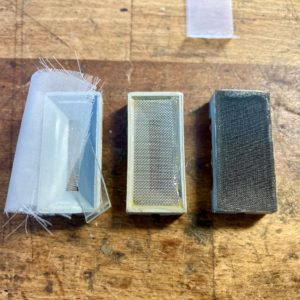
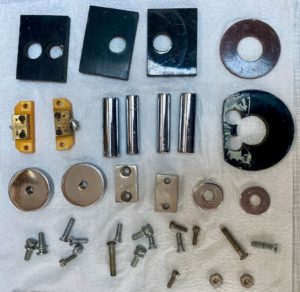
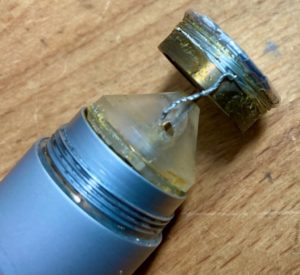
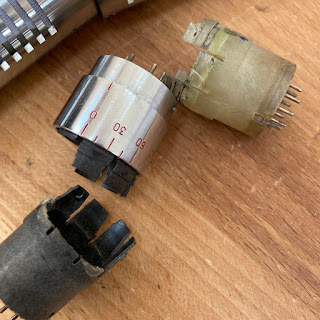
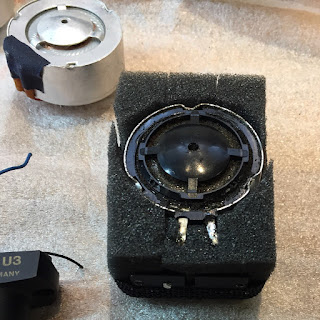
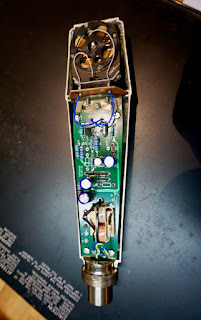
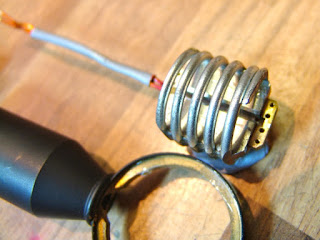
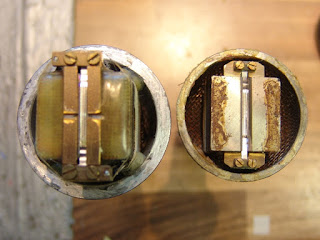
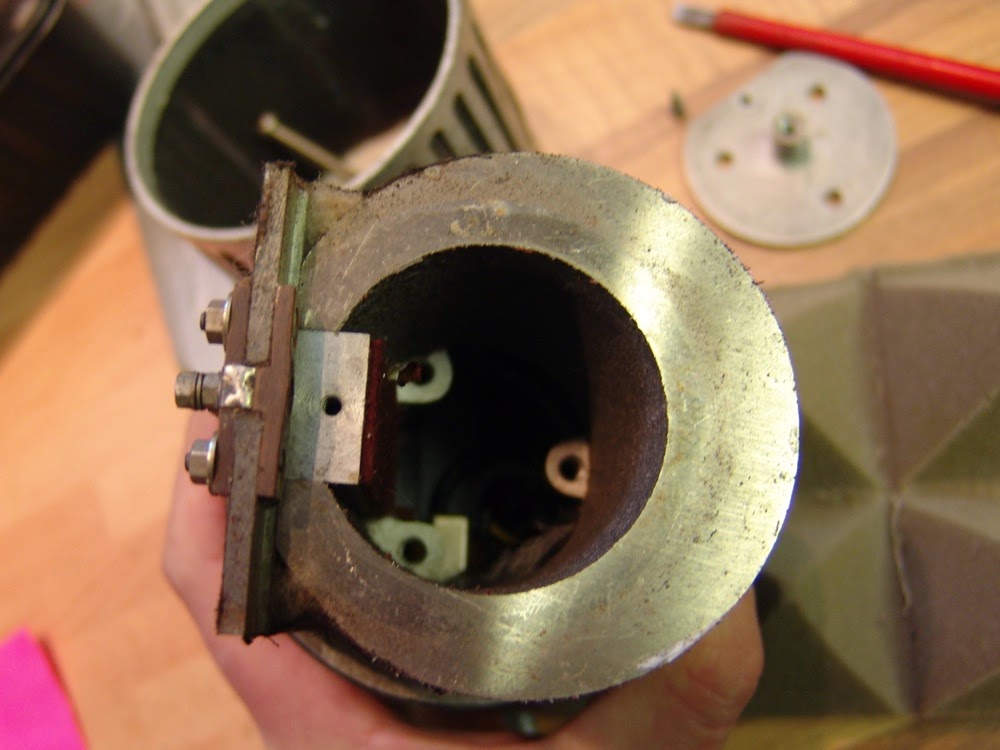
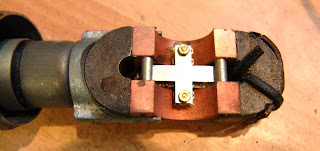
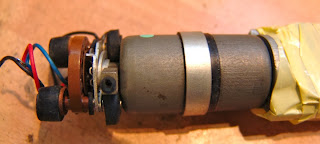
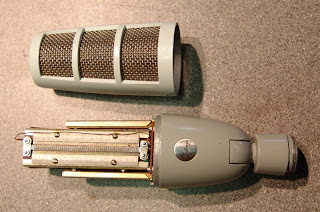
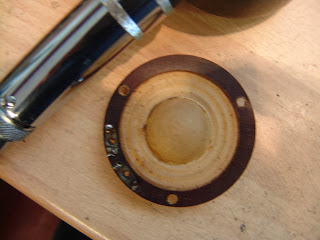
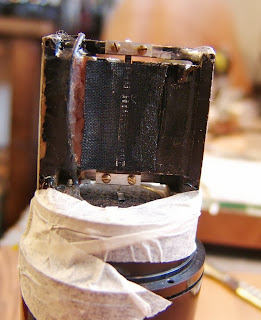
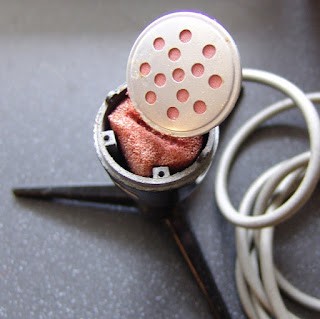
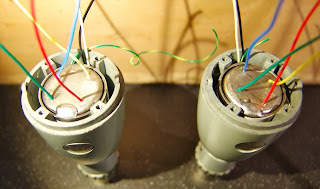
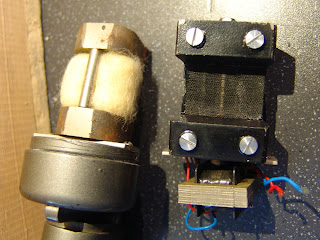
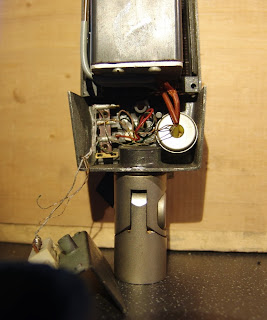
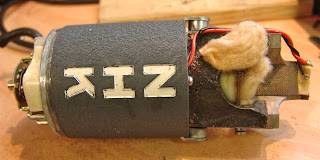
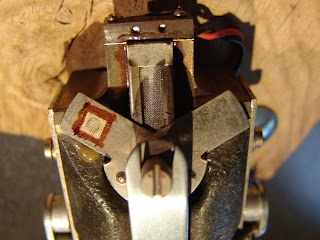
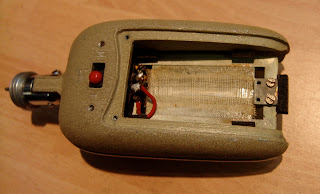
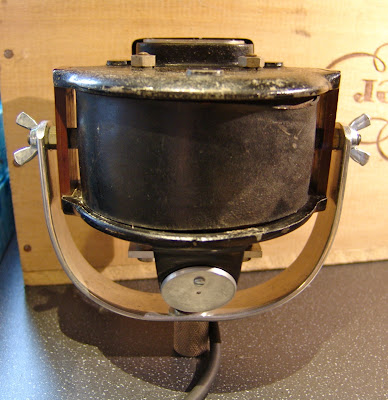
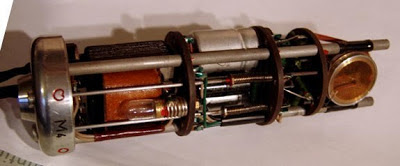
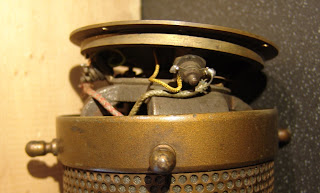
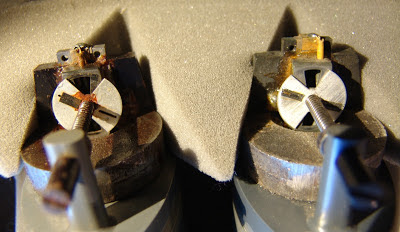
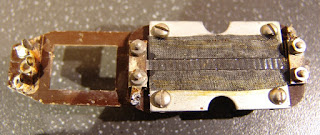
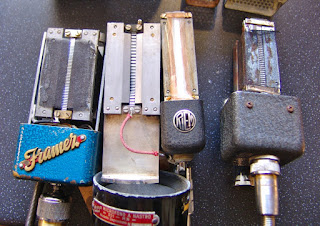
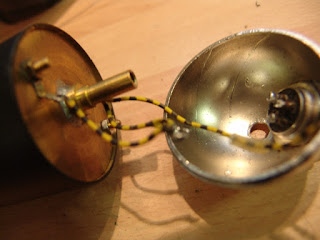
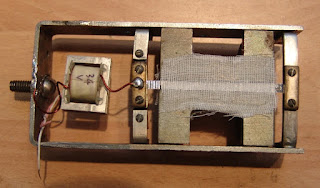
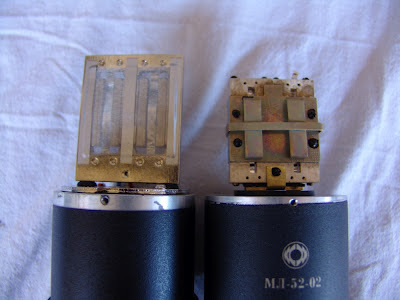
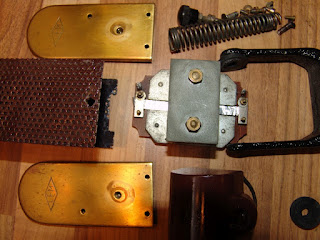
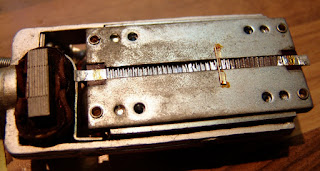
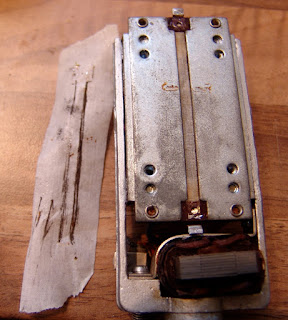
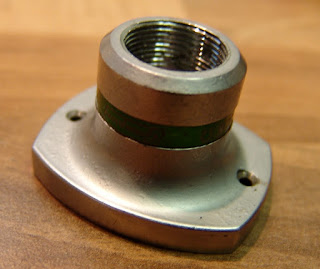
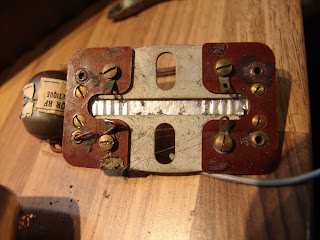
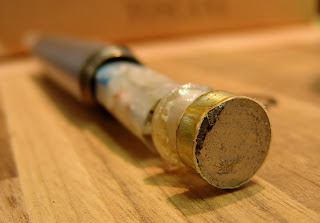
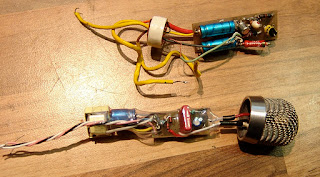
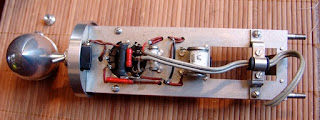
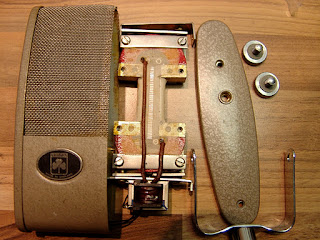
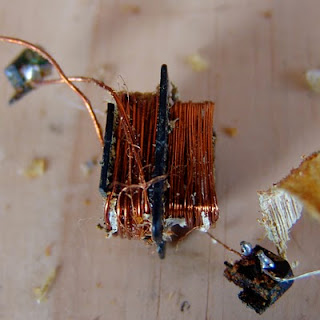
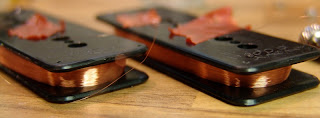
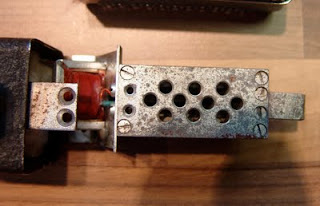
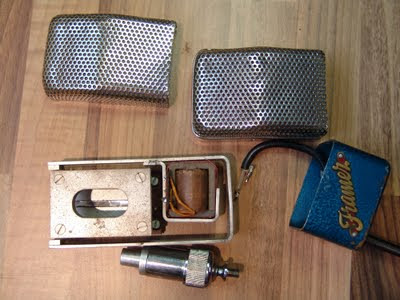
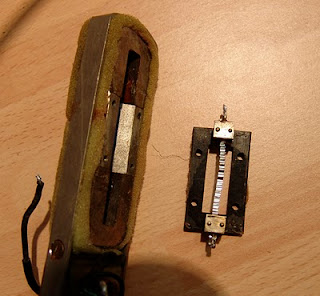
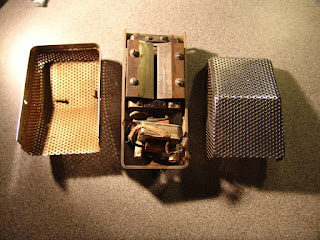
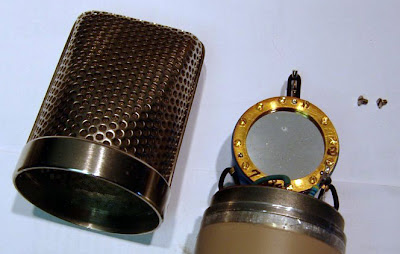
AKG DX11 capsule and circuit board

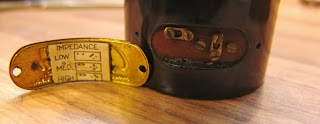
The owner of this one had enquired about converting the mic to run on phantom power, but that was not trivial because the circuit has a positive ground, and I also had doubts over whether we could supply sufficient current with phantom. The output of the microphone of the DX11 is unbalanced 15K ohms or unbalanced 200 ohms. 

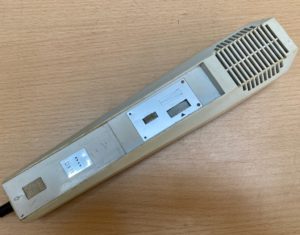
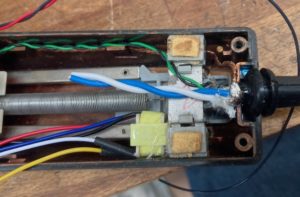
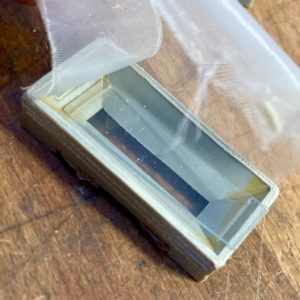
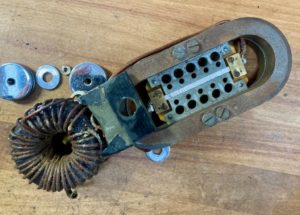
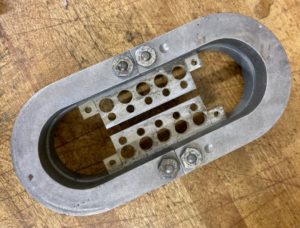
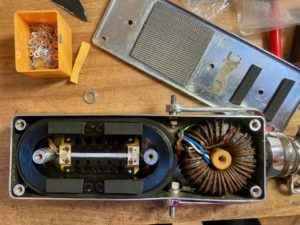
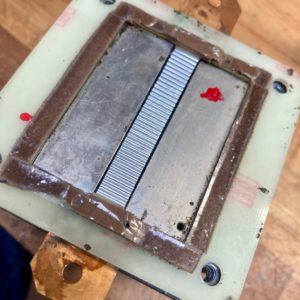
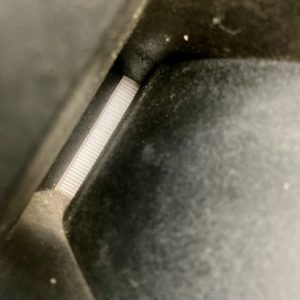
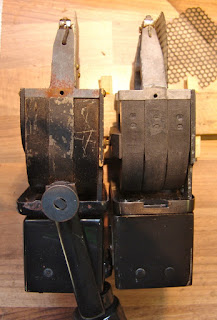
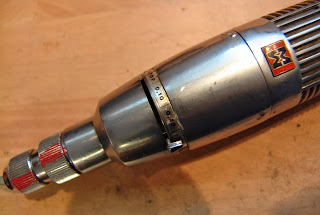
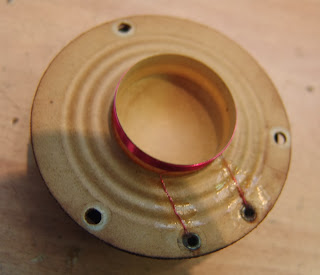
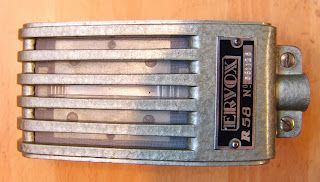
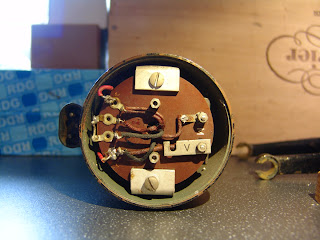
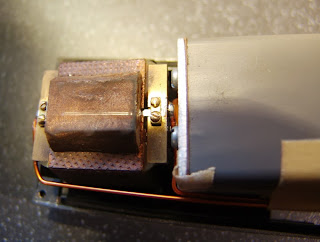
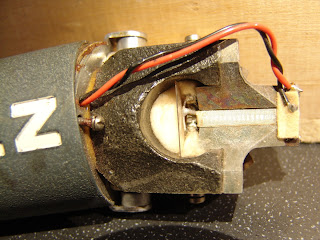
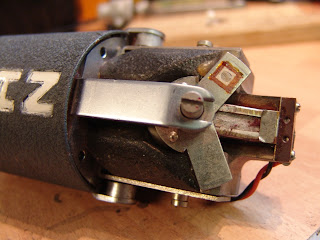
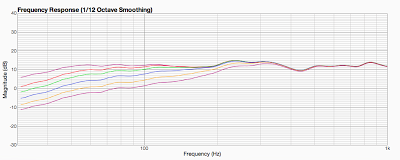
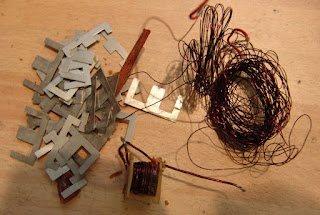
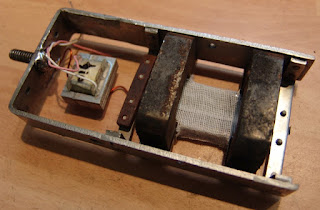
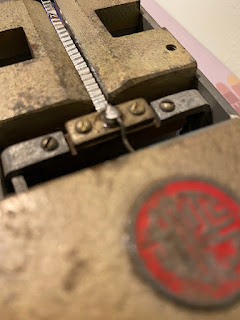
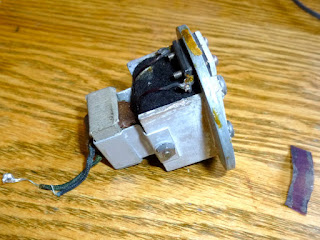
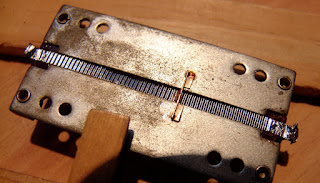
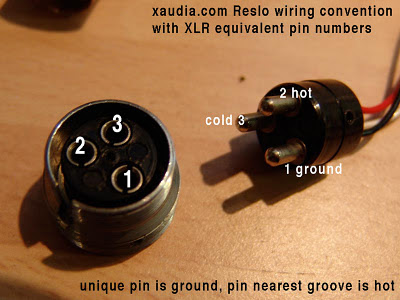
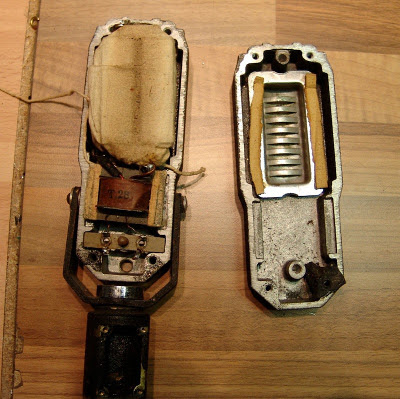
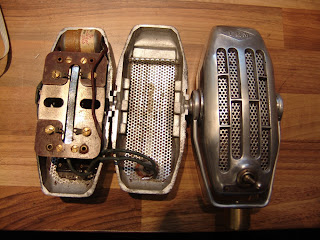
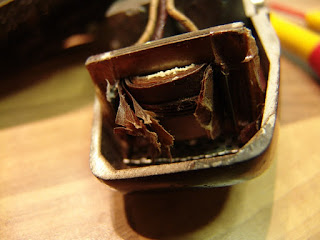
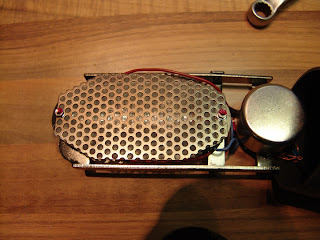
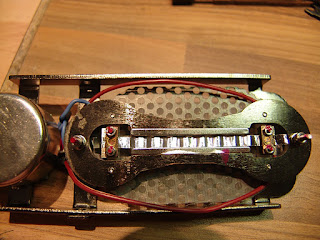
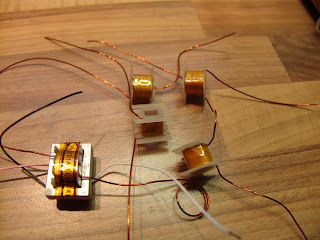
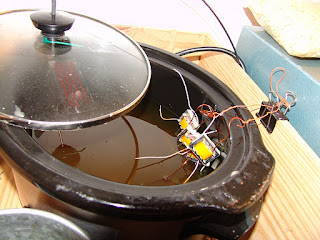
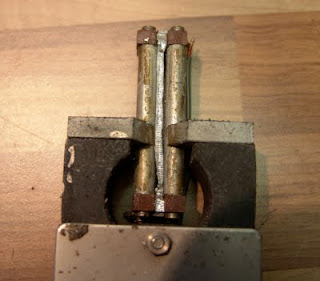
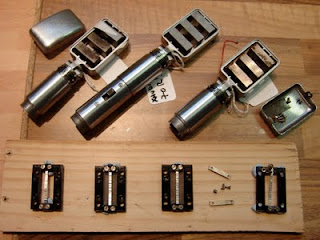
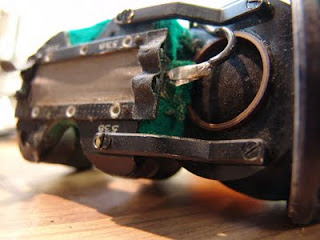
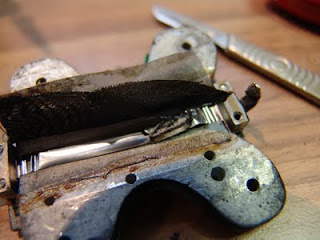
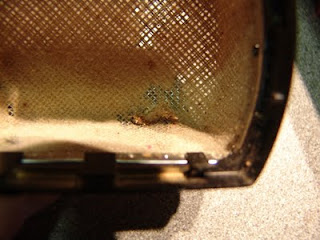
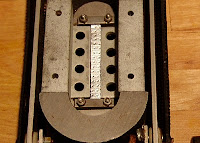
AKG DX11 spring reverb

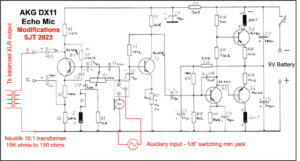
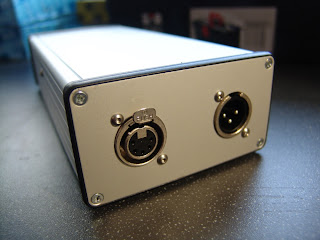
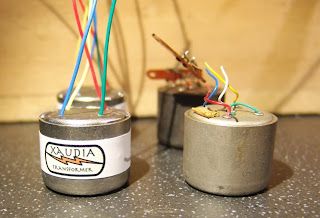
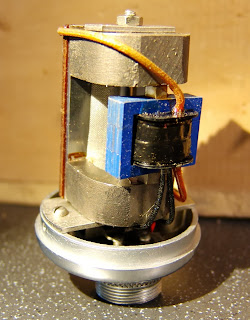
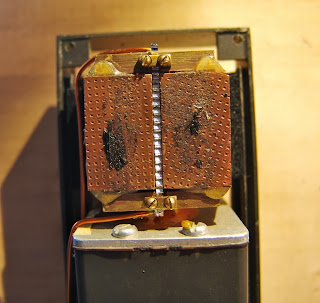
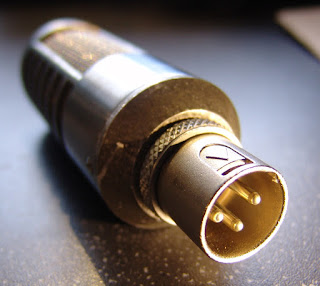
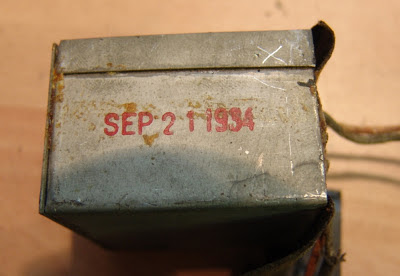
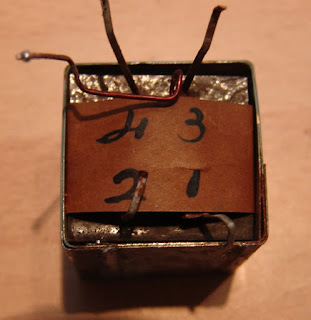
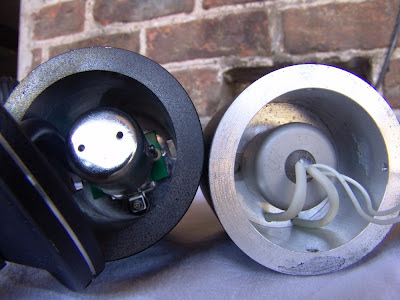
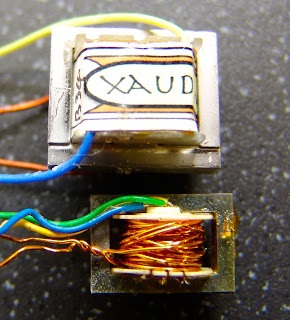
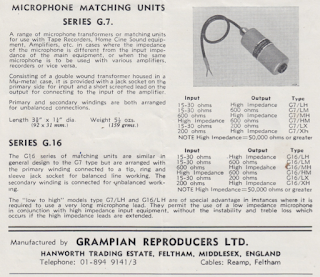
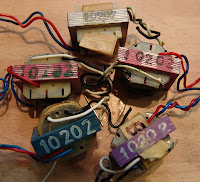
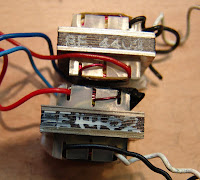
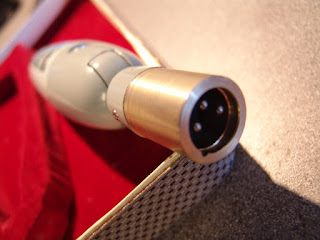
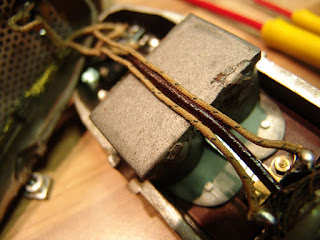
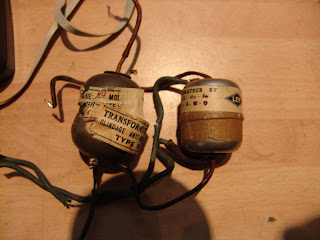
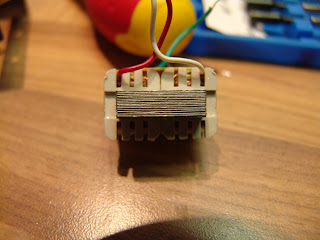
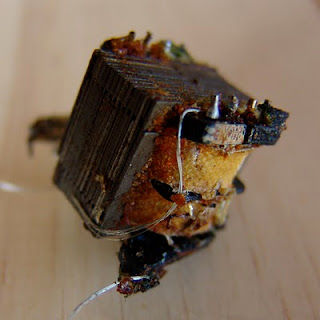
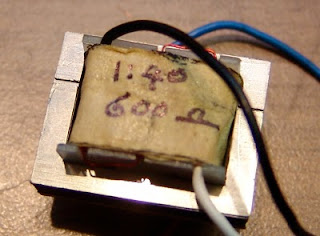
I added a small Neutrik 10:1 transformer to drop the unbalanced 15K output down to a balanced 150 ohms*, which makes it a bit more compatible with mic preamps and mixers, and wired to a normal balanced XLR output. The transformer fitted in neatly in the cavity behind the capsule. (*You could use a 1;1 transformer from the 200 ohm output).

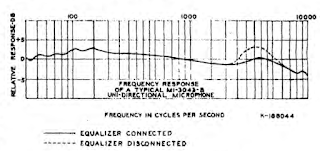
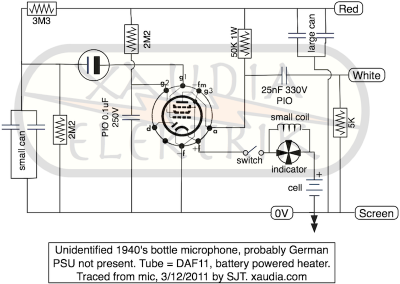
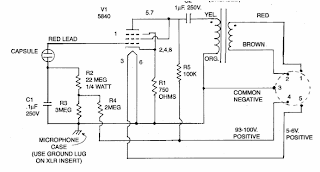
Schematic for AKG BX11 Echo mic
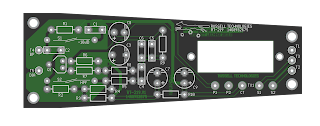
DX11 circuit hacks – Click on the image to see a bigger version.

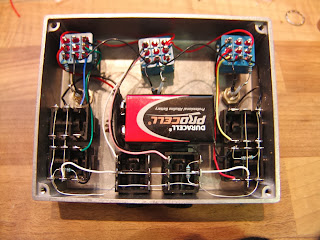
After a bit of initial testing, I came to the conclusion that reverb is better than the microphone, and so, after a discussion with the owner, we decided to fit a line input to the reverb circuit. The microphone capsule itself has a measured output of 250 ohms, so it was easy to hack into the circuit at that point, via a switched mini-jack socket. Now one can run other things into the reverb, such as a better dynamic or ribbon mic, a quiet line input or a guitar via a DI box. 

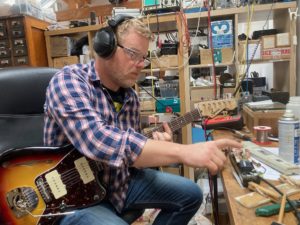
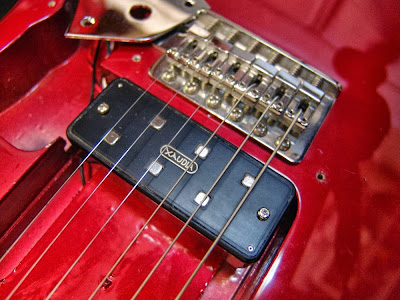
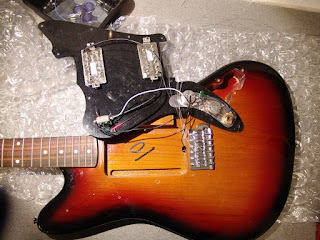
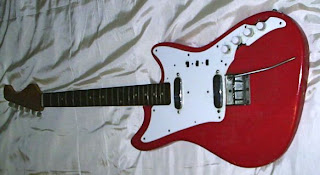
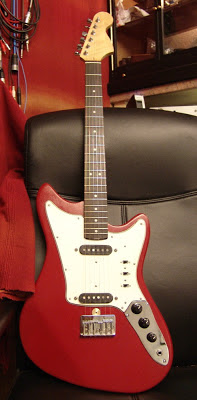
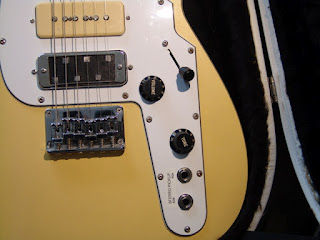
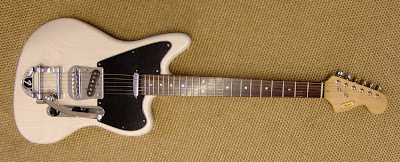
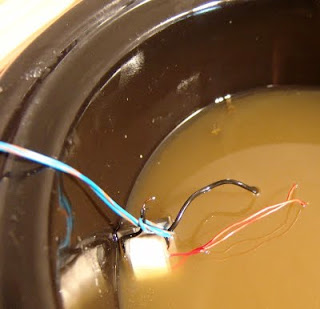
Here is a picture of Adam from Extinct Audio test-driving the DX11 reverb (on the bench) with a Jazzmaster guitar…

I hope to share some sound clips soon.

Further reading

Vintage Microphone World

Hi-Fi Archive – advert for the DX11

Review of the DX11 in EQ magazine

Review of Extinct Audio microphones – Amazona.de

This week we had a couple of nice reviews of the Extinct Audio family of ribbons microphones. I was involved in the design of these microphones and the start up of the business and it is nice to see them gaining some traction. This review was published on the German language site Amazona. You can read the original version here, which contains lots of useful sound clips and pictures. Below is an English translation.

TEST: EXTINCT AUDIO BM9 VIKING UND BLACK OPS, BÄNDCHENMIKROFONE

There are Englishmen that every child knows. Harry, Charles and William are currently the talk of the town, Ringo, Paul, George and John have written music history. Away from the limelight, there are four Brits, Stewart, Adam, Paul and Ant, who handcraft fine ribbon microphones in their small microphone forge Extinct Audio. Our author Raphael Tschernuth took a closer look at these fine British mics.

Ribbon mics have enjoyed unbroken popularity over the past two decades. While they were almost extinct until the early 1990s, they have been celebrating a resurgence at least since the Royer 121 and digital recording. The name Extinct Audio is an allusion to the fact that this type of microphone had almost disappeared from the face of the earth and was considered extinct. An old “Snake Stone” fossil, a local legend, serves as the company logo for the young English company.

Extinct Audio was founded by none other than Stewart Tavener of Xaudia.com, one of the reference addresses when it comes to ribbon microphone repair. In 2007 Stewart started to offer his service for ribbon microphones and since then the order book is bursting at the seams.

Some of you might be familiar with the microphone blog of Xaudia Elektrik, where you can find a lot of information about long gone microphone models of all kinds (links in the box below).

Since the founding of Xaudia, Stewart has had well over 10,000 ribbon microphones on his desk for repair. He knows them all – from great RCA classics to fancy designs from Italy or Denmark to modern China replicas. His experience over the last few years has finally led him to not only repair microphones, but to develop independent designs and bring ribbon microphones to the market himself.

Together with his friends Adam and Ant, he started Extinct Audio, with the goal of offering handmade ribbon microphones at a reasonable price. Stewart and Adam are musicians themselves and know how tough life can be with this profession. But not only did they want the mics to be affordable, they also wanted them to be responsibly made from local resources and meet the highest quality standards.

In fact, the company that builds the bodies is located just a few miles from the Extinct Audio workshop. The transformers required for a ribbon microphone are of their own manufacture. The wooden boxes of the microphones are made by a company that otherwise mainly produces wooden boxes for high-quality whiskey bottles. And yet the English somehow manage to keep the price in the €900 range, while other mics, such as the 121 from Royer or the Coles 4038, have seen huge price increases, especially in recent years.

The underlying design of the two Extinct Audio microphones under review is based on the Bang & Olufsen BM3 which was developed in Denmark in the late 50s. This microphone was at the time one of the smallest ribbon microphones, its form factor was only made possible by the development of an ever stronger magnetic materials.

Perhaps some of you are familiar with the really thick ribbon microphones from the 1930s, such as the Siemens M25 or the BBC Marconi, each weighing in at over 4 kilos. The high weight and the high mass were necessary at that time, because there were no magnetic alloys with which strong magnetic fields could be realized in a space-saving way, as today with modern neodymium variants.

The BM3 from Bang & Olufsen was a revolution in the 1950s and was and was an inspiration for the Royer R121 in the 90s.  The newly available neodymium magnet materials helped the Royer 121 achieve tremendous output. The Extinct Audio BM9 is also based on the concept of the BM3, even keeping the BM naming for “ribbon microphone.”

The BM9, nicknamed “Viking,” is a general-purpose ribbon microphone with a pure figure-of-eight characteristic. In terms of sound, it is clearly in the tradition of legendary ribbons such as the RCA 44 BX, Melodium 42b, etc. Its full-bodied bass range paired with brilliant highs gives voices and instruments an inimitable “Bigger Than Life Sound”. The proximity effect is, as typical for this type of microphone, very pronounced and therefore a little distance to the sound source is recommended.

No less than the great John Williams used various BM9s for the recording of his soundtrack to Star Wars for the orchestral recordings. And this for a production that can afford any microphone imaginable. This could almost be called an accolade for Extinct Audio (not to be overlooked from about 30 seconds on):

The Black Ops, on the other hand, is recommended for all applications where the microphone is to be positioned close to the sound source. It is particularly well protected against wind and air currents, and its specially adapted transformer ensures a well-balanced sound even at a very close distance from the sound source.

This allows the Black Ops to be positioned directly next to a guitar amp or snare drum, for example, without having to equalize the bass range by using an EQ. Like the BM9, the treble imaging is incredibly detailed and smooth for a ribbon microphone. The Black Ops was designed for harsh live use; among others, the English band Foals relied on various Black Ops for their recent live tours.

The “classic” BM9 Viking uses a 1.8 µ thick ribbon, the Black Ops uses a slightly thicker 2.5 µ. For comparison: the thread of a Spider’s web is about 6µ thick, a human hair even 50µ. Therefore, one should be as careful as possible with this type of microphone.

The frequency range of both mics is between 30 Hz – 15 kHz and sonically the foreground and rear are absolutely identical. While the BM9 has an impedance of 300 ohms, the Black Ops has an impedance of 250 ohms – in practice this is irrelevant, as both mics with these values will harmonize perfectly with current preamps. The sensitivity of the BM9 is 2.23 mV/Pa, a high value that does not demand too much from the microphone preamp. Thus, the BM9 delivers a higher signal than many a moving coil candidate. Nevertheless, it should be mentioned at this point that ribbon mics often benefit sonically from stand-alone, external preamps. For entry-level or mid-range audio interfaces, an inline amplifier is a good choice, and the market is now teeming with them. Alternatively, one can also fall back on an active variant.

While testing the two mics described above, the manufacturer posted on Instagram that development of the active variant was complete. Without further ado, I made an effort to get hold of one of the first series models for the test and I was sent the first available stereo set. The active circuit increases the output signal by about 22 dB of noise-free gain. This significantly relieves the preamp and the recorded signal is comparable to that of condenser microphones. We will also consider this model in the practical test.

Extinct Audio offers manufacturing character par excellence with its microphones. When unpacking the microphones, the testers can’t help but be amazed at how much love and attention to detail has gone into the work.

The wooden cases are, as already mentioned, not cheap barware from the Far East, but extremely solid and excellently crafted. They offer perfect protection for one or two microphones. A serial number is emblazoned on a metal plaque on the outside, and inside the casket a signed certificate provides information about the day on which the microphone was manufactured and which employee took care of which production steps. The microphones themselves are beyond reproach in terms of workmanship.

This is pure perfection, without compromise. Metal workmanship and are excellent, logo and metal gauze perfectly attached, all edges rounded, the serial number engraved on the back – that’s how it should be. With their 355 grams, the Black Ops and BM9 feel good in the hand and radiate their very high value. Due to their light weight, they can be securely positioned even with simple microphone stands and are easy to set up. A screw-in mount was also included with the review sample, but ordinary medium-sized microphone clamps can also be used.

If there is one application that one immediately associates with the Royer 121, it is the miking of a guitar amp. This ribbon mic has earned legendary status since its introduction in the late nineties. Compared to many classic ribbon mics, it delivers a somewhat thinned-out bass image and can be positioned relatively close to the amp. With an old, venerable Coles 4038, for example, the immense proximity effect would absolutely require the use of a high-pass filter. So with ribbon mics, it’s always a matter of finding the sweet spot and using it profitably in your work.

In the following audio sample, you can first hear the mentioned Coles 4038 at a distance of only 13 centimeters. The recording is much too bass-heavy due to the proximity effect. After applying a high pass filter (100 Hz, 24 dB/oct) the tide turns and the sound suddenly becomes usable, possessing a “creaminess” typical of ribbons:

In comparison, you can hear the sound of the Shure SM57 dynamic moving coil microphone, which is considered the “industry standard” for amp recording. This is much more “grainy” and garish to work.

In terms of sound, the Extinct Audio BM9 Viking ribbon microphone is on the “classic” side of power. Similar to the Coles 4038, it therefore requires the use of a high-pass filter to deliver a balanced signal at a distance of only 13 centimeters:

The Extinct Audio Black Ops, on the other hand, does not require an additional filter, since the bass increase was compensated for by the transformer used. As a reference, you will also hear the Royer 121 afterwards, unprocessed at a distance of 13 centimeters from the speaker. Again, an HP filter would suit the signal well. With Black Ops, on the other hand, the signal is immediately “mix-ready”.

The different proximity has a direct impact on the use. Positioning all microphones at the same distance in front of a sound source would therefore be extremely bad for a meaningful test report, since every microphone deals differently with the bass boost and has its own sweet spot. The BM9 is full-bodied, with the Royer 121 the proximity effect is somewhat reduced and with the Black Ops it is somewhat less than with the Royer. On the acoustic guitar I therefore decide on three different distances

Extinct Audio Black Ops: Distance 30 centimetres

Royer 121: distance 40 centimetres

Extinct Audio BM9 Viking: distance 50 centimeters

Many thanks at this point to the really impressive singer/songwriter Fabian Holland, who recorded the acoustic guitar for this test.

The test shows that the Extinct microphones can easily compete with the Royer 121 in terms of sound quality. This is impressive when you consider the price difference of almost 1000 €. Ribbon microphones are also excellent for imaging percussive instruments. One reason for this lies in the natural mapping of the transients, which are mapped very quickly and vividly.

In the following example you hear the drummer Achim Färber. The BM9 stands a few meters away from the drums. It is a mono recording without any effects. The Black Ops was positioned on the snare, also without any change in signal:

During the test period, the Black Ops has become one of my favorite microphones for the snare drum. The figure-8 characteristic makes it excellent for masking out adjacent toms or hi-hats. The strong attenuation on the 90- or 180-degree axis can be used excellently.

Last but not least, here’s a short sample I recorded myself with two BM9s as overheads and a subkick. As before: no EQ, no compressor… nüschte, as the Berliner says.

During the test period, I had the chance to use the Extinct Audio Mics on many other sound sources. They delivered excellent results on cello, as a stereo Blumlein set on piano, or on vocals with soft S sounds. The stereo pair was also perfectly matched before delivery, and the two measurement curves were absolutely identical.

By the way, the active version sounds exactly like a passive BM9, only louder. Sure, you could also loop in an inline preamp like the Fethead, but that makes the construction a bit unwieldy on the one hand, and on the other hand the shielding falls by the wayside. Unfortunately, inline preamps are prone to turning cell phone radiation into audible tones. When the network builds up, beeping and whistling can therefore be picked up unintentionally. The active version is well shielded in this respect and does not transfer any noise to the audio signal. And by the way, it looks much better…

Final Thoughts

Chapeau! The small microphone workshop Extinct Audio, delivers with the BM9 Viking and the Black Ops two ribbon microphones that leave nothing to be desired. The workmanship was done by hand with great attention to detail, the materials used are high quality, locally “sourced” and guarantee a long life. Each microphone is individually measured before delivery and stereo pairs as well as active +48 variants are also available. The latter brings the already high output to the level of a condenser microphone. Sonically, the BM9 is in the tradition of legendary ribbon microphones, while the Black Ops is predestined for close miking. Both reproduce percussive instruments with tangy transients, deliver vocals with smooth S-sounds, and are predestined for a wide range of applications and sound sources. In addition, they possess a remarkable top end for microphones of this type. Combined with a very good price/performance ratio, this leaves an unclouded picture that clearly stands out from many Asian competitors due to the high quality.

+

Excellent workmanship

Very good stereo matching, measured values

High output

Very versatile

Great, classic ribbon sound (BM9)

Balanced sound when positioned close to the sound source (Black Ops)

Durable design, handcrafted, made from local resources
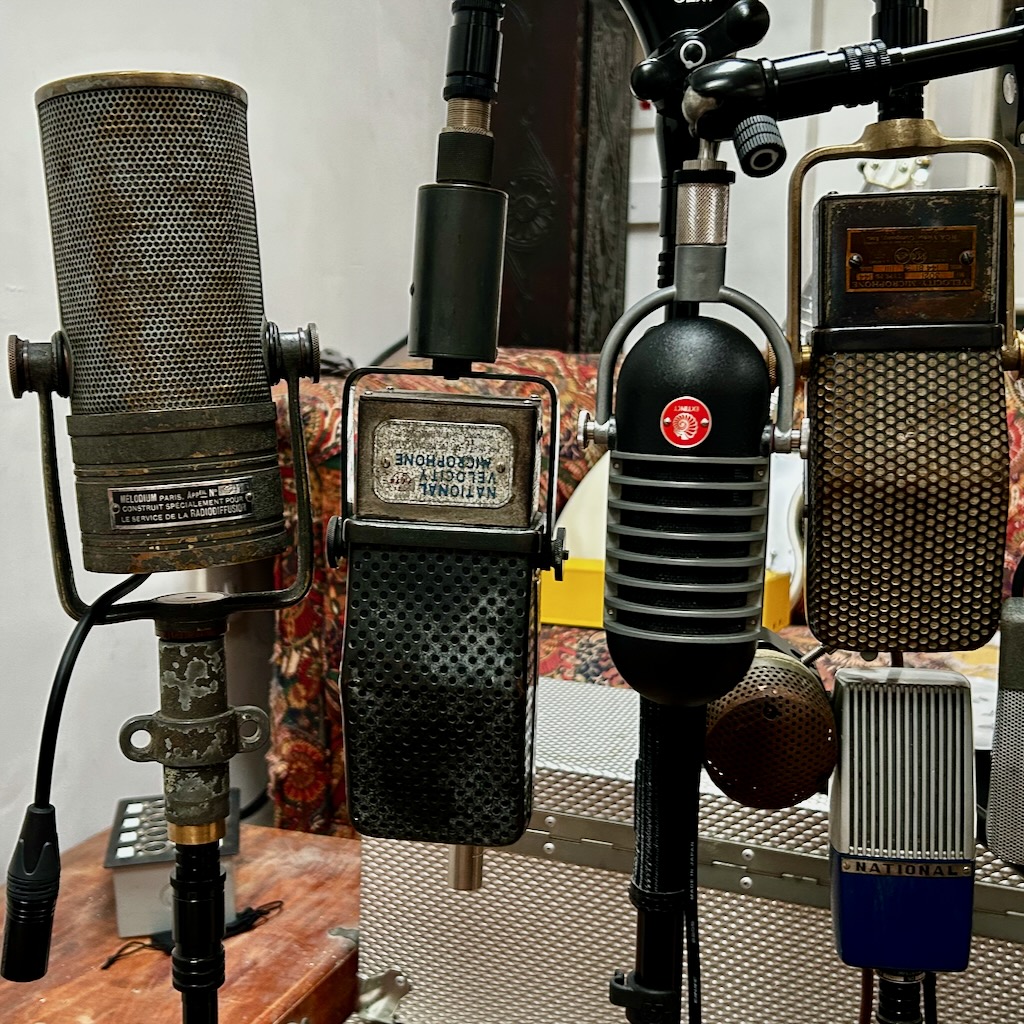
Beyer M500. A.K.A. Why does my microphone sound like a kazoo?

OK, this might be a little bit controversial: the M500 is my least favourite ribbon microphone from Beyerdynamic. This is for a number of reasons. I’ll list them.

  1. The transformer rolls off a lot of bass. More so than an M260.80.
  2. The grill has a dense cloth screen which also reduces the bass response.
  3. The internal baffle has a plastic plate in front of the ribbon which robs yet more bass and causes other problems, as I will explain in a moment.
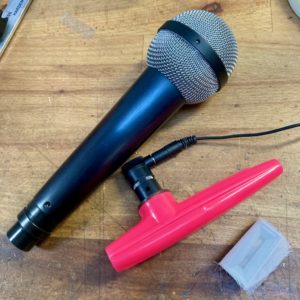
Beyer M500 and a Kazoo. Can you tell the difference?

These three points are all intentional parts of the design. The M500 was intended as a vocal microphone and designed to be used at point blank range. The severe bass cut compensates for the proximity of the ribbon, and the extra screening and baffle protect the ribbon from plosives and other blasts of air. So to some extent you have to take your hat off to Beyer and say ‘chapeau‘ for making a ribbon that can compete with an SM58.

But that’s my point really. Ribbon mics naturally have a big rich proximity effect, which is one of the things that we love about them.  In the M500 a lot of work has gone into removing that sound. To my mind, the M500 is good for one job only (close up vocals), and there are other microphones that do that job better. If you like to chew your microphone then you might as well use an SM58 (or better still a Beta 58), and use a ribbon for those places where it excels. 

These microphones are no longer made but change hands on eBay and Reverb at inflated prices. I think the biggest issue with them is expectations. Some buyers expect them to sound close to, say, an M260, and are disappointed when they don’t. In particular they sound very thin when used on instruments at a normal recording distance. At Xaudia we often get asked to modify these mics to have more bass and have more of a classic ribbon sound.

The motor and ribbon are more or less the same between the two mics, but everything else is different.  It is possible to get a better bass response from the M500 by swapping out the transformer for a full range model*, which helps a lot. But the mic can still sound odd because of what is in front of the ribbon.

So let’s get back to that baffle that I mentioned in item number 3. Here at Xaudia we call this the ‘Kazoo Flap‘. Let’s take a look at it.

The M500 “Kazoo Flap”. This bit of perspex causes trouble.

You can see that there is a flat piece of clear plastic in front of the ribbon. The problem here is that is can vibrate and come loose over time. I often see these come unstuck at one end and it can vibrate like the reed on a clarinet or saxaophone. It sounds like a kazoo solo has been added to every recording!

Luckily it easy to fix. The baffle can be re-glued or removed completely. I often do the latter and replace it with some fresh acoustic fabric and steel mesh. 

M500 baffle modifications.

Swapping the transformers and the baffle gets the M500 as close to an M260 as it can be. The grill construction and the acoustic chamber behind the ribbon are different between the two microphones so they can never be quite the same, but the changes improve the bass response by huge amount and, to my ears, make it sound like a proper ribbon microphone.

Beyer M500 – designed for close up use on vocals.


* We make a suitable full range transformer that will fit inside an M500.

AGA-Baltic T2 ribbon microphone

Xaudia has been running for about 15 years and we get a lot of repair work which now seems routine. We see hundreds of Reslos, B&O mics and Beyers in particular. When I started out, everything was new but it is now a rare occurrence to see a ribbon microphone that I have not worked on before. Sometimes I think I have seen it all and then something new comes along. These moments are exciting and a new challenge is always appreciated.

AGA-Baltic T2 Ribbon Microphone

This rare Swedish beauty came in for repair recently. Not only had I never worked one one before, I had never even heard of it! This was made by AGA-Baltic, who (according to Swedish Wikipedia) came into existence in 1928 after a merger between AB-Baltic and AGA companies. They made some rather elegant radio sets and, later, TV equipment. They clearly made microphones too.

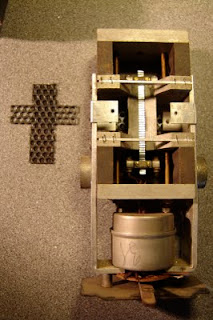
Motor and transformer assembly from AGA microphone

From the magnet and transformer technology, I would date this as an early 1930s microphone. The motor comprises two large steel pole pieces sandwiched between four large horseshoe magnets, and it uses a massive toroidal transformer to raise the output voltage and impedance to 30 ohms. The holes around the ribbon are most likely designed to increase the high frequency response of the microphone. The only comparably sized toroidal transformer that I have seen is in the Siemens / Telefunken M201, which dates back to around 1928. Transformer technology got smaller quickly!

AGA motor after corrosion removed

The magnets in this microphone have held their field well and I measured about 2500 Gauss in the ribbon gap, which is fairly respectable for a microphone of this age. For reference, a good Melodium 42B would measure about 3000 Gauss. However, the whole motor assembly was corroded, so I stripped it down, treated with Rust-Off and then re-painted to prevent further corrosion. Everything else was cleaned and new grill cloth and mesh fitted. With old microphones that have been out of service for decades it is often best to do a complete rebuild.

AGA hardware parts being cleaned.

With a new ribbon in place the sound was weak and disappointing. The old toroidal transformer has not aged well and the transmission of high frequencies in particular was attenuated giving a dark woolly tone with a lot of noise. It also seemed to be a good aerial for picking up hum too.

Impedance matching didn’t help so we were faced with the dilemma of keeping it all original or switching out the transformer and having a useful working microphone, but potentially losing some of the value to collectors.

AGA Baltic T2 – Half way back to working condition.

This situation is always a difficult choice, but after consultation with the owner we decided that the microphone should be a working studio tool, and the most sympathetic repair would be to fit a new transformer from a Coles 4038. This replacement is also a toroidal transformer so we keep the ‘toroidal sound’, if there is one*. (*There probably isn’t.) The old transformer will of course be returned to the owner and can be re-installed in the future for collectors value.

And the results were good! The new transformers has a much better high end response, lower noise floor and does not pick up hum. The microphone is quite useable and still sounds very much like a vintage ribbon microphone. A well designed transformer should be there for impedance matching purposes and should not be contributing too much to the sound anyway.

Restored AGA-Baltic ribbon microphone

I wonder what other rare and unusual microphones are out there waiting for me? Surprises and challenges are welcome!

Thanks to Raphael Tschernuth of Gear And Sound.  

Further Reading. There is not much information on the internet about these microphones but this does get mentioned briefly at the AGA museum

Decca Ribbon Tweeters part 2

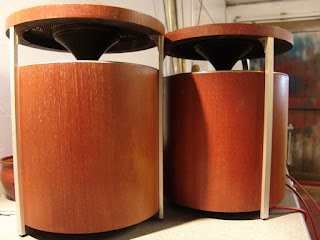
Last week I posted about repairing some vintage Decca London ribbon tweeters. I was confident that I had done a good job but was unable to do listening tests in context as I only had the tweeters to play with. These are now back with Andy, their owner, who kindly sent in his impressions and some photos. Overall I think we have done a good job and it’s a nice feeling to have helped get these back up and running.

Decca Volt speaker with ribbon tweeter

“The [new] ribbon sounds smooth, crisp and clear with no tizz or distortion. I ran it for a while at different volumes and with different music and it sounds excellent with everything I gave it. It is very close in sound to the original in the other speaker with the soundstage being in the middle and correct. I had to try hard to notice a difference, Bob Marley’s Is This Love has some high frequency cow bell drum noises and you could hear they were slightly crisper and louder from the new ribbon. The crossover point in the Volt’s is about 1200hz so any imbalance between the two tweeters is easily heard as the singer tends to move off centre.

New ribbon installation at Xaudia

“I think the differences could be classed as being between an old and new ribbon the sound from them is so close. I assume as the new ribbon breaks in it will soften in sound a bit. I am tempted to switch the other new ribbon in as well.

Andy’s impressive hi-fi setup.

“Considering the lack of info on the ribbons I thought getting a close match sonically was not good but it’s turned out to be very close indeed. It is a huge relief to know that if a ribbon gets damaged again I can get help.

“I am not sure but you might get a lot of interest, when I was trying to find someone to repair my ribbons I came across a huge amount of forum posts on the same issue dating back about 5 years. Nobody had managed to find anyone so in theory there are a lot of ribbons to repair out there.”

Thanks to Andy Mcgregor.

STC 4136 revisited

STC 4136 microphone

A long time ago I posted about the STC 4136 condenser microphone and how to modify it to work on standard 48V phantom power, using a small circuit built on perfboard.

STC 4136 microphone, in pieces.

I had another opportunity to work on one of these microphones. This one was a challenge as it had no circuit inside at all, just the capsule and bodywork, although that also gave free scope to start from scratch.

STC 4136 microphone capsule.

Space is tight in this microphone, but with a careful layout and small components everything will fit neatly. My solution for this one was to fit a small KM84 circuit and Neutrik NTE10/3  transformer. This transformer performs well, does not break the bank, and can be squeezed into tiny spaces where nothing else will go. 

New circuit board and transformer

This time I commissioned a printed circuit board rather than working on perfboard, which does save time and look more professional. The board will be useful for other projects too – I have a handful of other small microphones which would benefit from updated, lower noise circuits.

Made in England

Thanks to Robert at Russell Technologies for the board layout and advice.

Decca Ribbon Tweeters part 1

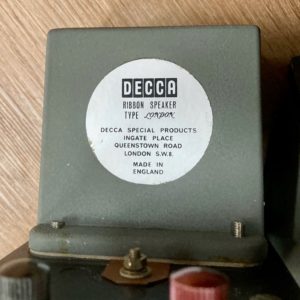
Decca London ribbon tweeters with huge transformers.
I have not repaired speakers in the past, but I recently had my arm twisted to look at some vintage Decca London ribbon tweeters. In theory they work in a similar manner to a ribbon microphone and should not present too much of a challenge…. right???? Anyway, it is nice to see something different on the bench and maybe I will learn something in the process.
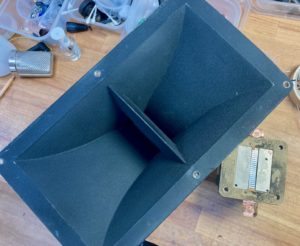
The horn of a Decca ribbon tweeter
The first challenge was to take the speakers apart and work out what is going on inside. They have a large horn with two vents, which is is held in place with six screws. With these out of the way it is possible to remove the large, powerful magnet assembly and ribbon frame.
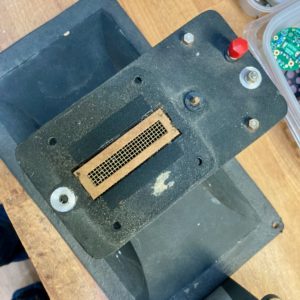
Brass mess behind the horn,
I received three of these ribbon tweeters but they are not all the same. Two have cast alloy horns and the third had a plastic horn. And the alloy horns have a brass grill that sits in front of the ribbon (shown above), whereas the plastic one has a nylon mesh, which would better protect against incoming metal particles.
These have large, powerful magnets
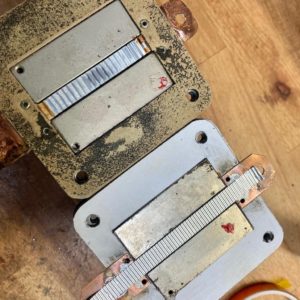
The ribbon is mounted in a square frame made from two slices of stiff material. All three frames were different and used combinations of cardboard, Tuffnol and what looks to be copper-less circuit board material. Some have silver plated ribbon mounts and others are bare copper.
Old ribbon (left) and new one waiting to be soldered.

The ribbon material in these speakers is stiffer and thicker than one would use in a microphone. The thickest foil I had in stock is 6.5 micrometer thick, supplied by Advent Research Materials, so that is what is going into these. That is about three to four times thicker than would be used in a microphone. The gap is 10mm and I cut the ribbons at 8.6mm, based on measuring a ‘good’ ribbon. Corrugating is routine, but the challenge here is making the electrical connection from the ribbon to the mounts. There are no ribbon clamps but I can see traces of old solder. 

New ribbon in position.
Soldering thin aluminium needs a special solder and I used Alusol, which worked well after a little practice. All the contacts need to be cleaned before soldering. The solder needs quite a high temperature and you need to work quickly. To make this easier, I lightly glued the ends of the ribbon in place with nail varnish, which helped keep everything aligned. The top layer of the frame are then replaced – I used double sided tape to hold them together, and then the speaker can be re-assembled. 
New ribbon as seen through the horn.

I was only had the tweeters, not the cabs or woofers, and so could not test with full range music. Instead I ran a sign wave through the speakers. They sound clear and without distortion down to about 500 Hz which is a good indicator that I have done a good job. In use they should only be working above about 7 kHz. Now they will go back to the owner for proper testing.
Thanks to Andrew Mcgregor.

Update 18/11/22

Further reading. 

There is an excellent article about Decca ribbon tweeters by Rudolf Bruil at Sound Foundation.

Reslo Beebs in Recording Magazine

Producer Marc Urselli has written a nice article about his love of ribbon microphones in the October 2022 edition of Recording Magazine. 

He discusses several vintage models in his collection, including RCA KU3, Coles, Melodium 42Bs and a nice mention of our upgraded Reslo Beeb ribbon microphones. Here are Marc’s words about the Reslos.

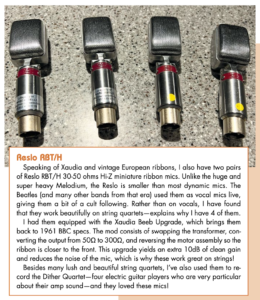
Speaking of Xaudia and vintage European ribbons, I also have two pairs of Reslo RBT/H 30-50 ohms Hi-Z miniature ribbon mics. Unlike the huge and super heavy Melodium, the Reslo is smaller than most dynamic mics. The Beatles (and many other bands from that era) used them as vocal mics live, giving them a bit of a cult following. Rather than on vocals, I have found that they work beautifully on string quartets—explains why I have 4 of them.

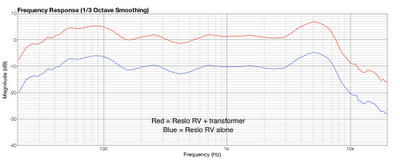
I had them equipped with the Xaudia Beeb Upgrade, which brings them back to 1961 BBC specs. The mod consists of swapping the transformer, converting the output from 50Ω to 300Ω, and reversing the motor assembly so the ribbon is closer to the front. This upgrade yields an extra 10dB of clean gain and reduces the noise of the mic, which is why these work great on strings!

Besides many lush and beautiful string quartets, I’ve also used them to re- cord the Dither Quartet—four electric guitar players who are very particular about their amp sound—and they loved these mics!

Syncron AU7a phantom power PCBs

Twelve years since first writing about the Syncron AU7a, I can finally offer a neat phantom power conversion. I converted a few of these in the past by hacking the original board or even building a tube circuit, but this is a better, tidier approach. A big thank you to Robert at Russell Technologies for designing boards and a better circuit from my sketches.

My Syncron AU7a converted for phantom power

The Syncron AU7a was one of the earliest transistorised condenser microphones, and was also sold as the Fairchild F-22. It ran on four mercury batteries, which had a tendency to leak after a few decades and are now obsolete. Conversion to run on phantom power seems sensible, but the original circuit used a P-channel JFET and positive ground, which are not compatible with modern phantom power supplies. A new circuit and a new PCB will make things a lot simpler. 

Syncron AU7a – circuit for P48 operation

We tried to stay close to the original philosophy, with a single transistor circuit which re-uses the Syncron transformer (above). The Syncron microphones that I have worked on did not use a source resistor bypass cap, but I had much better results with one in place. Dan Zellerman kindly supplied a version of the schematic which shows a 470 pF bypass cap, which was absent from my microphones. 

Working on these microphones is a bit of a pain because of the construction, and getting everything apart is the hardest part of this modification. The first job is to carefully remove the grill and capsule – put the capsule somewhere safe! The circuit is soldered inside a brass ring, and I needed to use a hot air gun and 80 watt iron to release that part. Some of the screws and mounting posts were also soldered in place. The transformer should be carefully removed, ready for re-use in the new circuit. 
New circuit board for Syncron AU7a

The board is then populated and soldered with the exception of R5, which needs to be adjusted to bias the JFET. Either a J201 or 2N3819 will work here. To find a suitable value for the source resistor, I connected a decade box and messed around until the junction with R1 was at 12 volts. (For this example, the value if R5 was 5K1 ohms.). Another way is to hook it up to a scope and inject a sine wave, checking for highest gain and lowest distortion of the waveform, or you can even do it by ear with a pair of headphones. You’ll get a similar value either way. Larger capacitors go on the reverse side of the board, along with the transformer.
Transformer side of the circuit board.

Some of the clearance is tight and care should be taken to avoid shorting to the ring that surrounds the circuit. And at some point that ring needs to be soldered to ground to ensure good shielding. I used an 80 watt iron on the outside of the ring and fed the solder in from inside. Any flux residue and other crud should be cleaned from the board when all the soldering is done. A drop of glue between the ring and board would also be sensible – be sure to keep the glue away from the high impedance components.

New AU7a circuit in place awaiting clean-up.

The capsule can now carefully be put back in position and connected to the circuit, followed by reassembly of the rest of the microphone. This updated Syncron AU7a sounds very nice and with the new circuit it has a useable output level and the signal to noise is good. The output impedance is approximately 200 ohms with the transformer secondary windings wired in series or 50 ohms if wired in parallel.

Inside the AU7a with the new circuit board.
Below is a frequency sweep compared with a Sony C48 in cardioid mode. The updated Syncron has a similar output level to the Sony.
Syncron (green) and Sony C48 (blue) responses compared.

I can convert your microphone on request. Please get in touch.

Sony Condenser Microphone Evolution – C37, C38, C48 and friends

Sony made a series of excellent large diaphragm condenser microphones, some of which have become studio classics. The earliest production model was the C37A, a tube microphone which may or may not have been used by Frank Sinatra – he has certainly been pictured with one – and it was definitely used to record the voices of Bugs Bunny and Daffy Duck. It has become sufficiently iconic for at least two clones to appear, made by Mojave and Tonelux.

On test – Sony C37p, C38b, C48 and C450

The C37P is the FET version of the C37, and is claimed to be one of the earliest production transistorised condenser microphones, although that honour is generally given to the Syncron AU7a. The C37p was followed by the C37Fet, and the C38 models. All of these microphones feature an unusual capsule design with an internal vent, which could be moved with a screwdriver from the rear of the microphone, changing the pattern from cardioid to omnidirectional. A very similar capsule is now made by Josephson Engineering, which is used in some of their own models and also rumoured to be supplied to other brands.

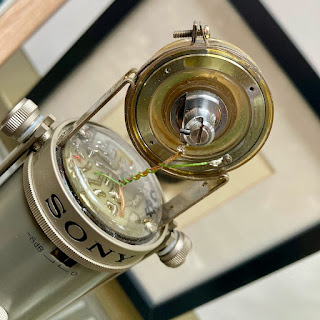
Sony C37 capsule – front
I am a big fan of the C38p and for the past 20 years have almost always used one for recording on my own guitar amplifier, often alongside a Shure 57 or whatever else is free after setting up for the rest of the band. The Achilles’ heel of this design is that the mechanism can become difficult to turn, and many the C37s and C38s are stuck in the cardioid position. For many users that is not a problem.

Sony C37 capsule – rear view

The later C48 and C800 models use a different dual sided capsule with centre terminals, which looks similar to those used widely by Neumann (and almost everyone else.) The C48 is a versatile microphone with three available patterns, bass cut and pad switches. 

Both the C38 and C48 models can run on 9V batteries and use a DC converter inside the microphone to generate the polarisation voltage for the capsule. These converters are tricky to repair when they fail.

Sam Inglis & I recently had an opportunity to compare a few Sony condenser microphones to see how they had evolved over time. On the day of testing we had access to a pair of C37p, one C38b, a C48 and a C450. In addition we looked at a Josephson C705 for comparison.

By comparing the microphones we hope to discover how these Sony LDC mics compare and are the new ones better than the old ones (or vice versa)? Does the capsule hold the key to the Sony sound, if there is indeed such a thing? And are the new capsules from Josephson good copies of the old Sony C37/C38 capsules?

As usual, the frequency sweeps are good for comparison purposes but are run in a small booth and should not be considered absolute measurements. The reference microphone is omnidirectional, which can cause a few inaccuracies when testing cardioid transducers. The dip around 12K is an artefact. Measurements were made at 30 cm distance from a concentric speaker. Measurements were made with a swept sine measurement and recorded using Fuzzmeasure Pro.

1. Comparison of C37p, C38b and C48

Comparison of C37p (lowest), C38(middle) and C48 (top)

As one would expect, the major change between models is the increasing output level (and signal to noise). The C37p is a very early transistorised microphone and transistor technology changed rapidly in those early years. It has a nice sounding bass proximity boost, and the mic is equipped with four EQ settings marked M, M1, V1 and V2 to compensate. (M is the unfiltered output).  The two C37s that we tested were very close, which is reassuring.

I own a C38b which I use it for my own recordings, and my perception is of a warm sounding microphone, without a harsh or hyped top end. I was surprised to see that it has a bit more of a top end lift than its predecessor.  It carries the M, M1, V1 and V2 settings through from the C37 and also adds a high cut switch. The M1 position acts as a high pass filter whereas the ‘V’ or vocal positions are more like a long shallow shelf. 

C38b filter – M (red),  M1 (blue) and V1 (green)

And the C48 is louder again. This is a more conventional multi-pattern microphone with electronic switching between cardioid, omni and figure-8. It also has bass cut and pad switches which are accessible via  a sprung panel on the rear of the microphone.

In my experience the C48 is a top quality recording tool and makes a good alternative to a U87 – I know a few engineers who prefer it to the Neumann. Barkley McKay at Valleywood Studios said “one of the reasons I like the 48 is it’s gentle roll off before 16k – it’s a little like an enhanced ribbon.


2. C48 vs C450

Sony C450 capsule, front. 

The C450 is a less well known model which looks a lot like the C48 but with some cheesy 1980s stickers applied. However, the C450 has a smaller capsule, around 24mm diameter, and runs on a single 1.5V battery.  We have not discussed or measured the C500 here because I don’t have access to one, but I have a hunch that this is a similar size to the capsule in that model. Can anyone confirm that or share a picture of their C500?

Sony C450 capsule – rear

The C450 has an average output level around 11 dB lower than the C48, but is significantly brighter at the top end. It is equipped with high pass filter and -10dB pad switches, although you won’t need the pad very often! The noise level is also a bit disappointing. It probably has a role on the right sound source but I haven’t found it yet.

Frequency sweeps of C48 (top) and C450 (bottom)

3. Does the Josephson C705 sound like a better C37?

Josephson C705 in the testing booth at Xaudia

The Josephson C705 is an excellent microphone with a reassuringly solid feel, and does indeed sound much like a good C37p, albeit 12 dB louder and with an even better improvement in signal to noise. It is a transformerless circuit and is cardioid only (like a lot of C37 and C38 once the capsule becomes stuck!). It lacks the high pass filter options of the Sony microphones. The C705 it is not trying to be a clone or tribute in any kind of cosmetic sense. I admire Josephson because they do their own thing and try to make the best products they can. In this case they have done some clever things with the grill and acoustic environment around the capsule, moving the vertical support struts further back out of the way of the cardioid capsule. At around £2500 this is not a cheap option, but is a professional recording tool which will get you close to the Sony C37 sound.

Sony C37p (purple) and Josephson C705 (green)

One final thought – Whilst doing some background reading for this post, I found that the older Sony mics were not highly regarded on internet forums back in the early 2000s, compared to Neumann and AKG. Here is a certain Mr K,.H.’s informed opinion.. 

“I never liked the C37A all that much, and would put it into the category “Post War Japan makes good” (as in their tiny late 1950s sports cars patterned after Fiats.) The C37A always struck me as a poor cousin of a ….?? Neumann mic: pretty poor craftsmanship, akin to what the Russians did in the 1970s; not much personality, pretty bad tube choice, cathode follower circuit with its associated gain and dynamic problems, etc… …and then Sony went downhill from there with its FET mics… so I think.”

I disagree. And the first thing I will do when I die and go to heaven or hell or Valhalla will be to march up to Frank Sinatra and ask him if he really did use a C37a! 

Electrovoice PL10

The Electrovoice PL10 is a cardioid dynamic microphone which looks very much like a cut down version of the popular RE20.  It has no transformer or filter circuit but it still sounds excellent. These omissions presumably kept the price down.

Just like the RE20, the foam that holds the capsule in place can cause trouble. Over time this can degrade into a sticky pulp and then the capsule becomes loose and rattles around and may eventually destroy itself. This microphone needs new foam and a good clean right away!

The microphone body is in three parts – grill, body and base – which are screwed together and some kind of glue applied. I had to heat the threads and apply more force that I would like to break the glue and get the microphone apart. That was the hard part of the job, and once opened it is easy to remove the foam with a bit of isopropyl alcohol. As always, care must be taken around the diaphragm to avoid damage. The metal parts went into the ultrasonic bath and cleaned up nicely. 

Once back together, the PL10 is an excellent sounding dynamic microphone. The PL10 should be a cheap alternative to an RE20, but in fact they are scarce, and prices on eBay and Reverb may be higher than an RE20, which is a bit daft. 

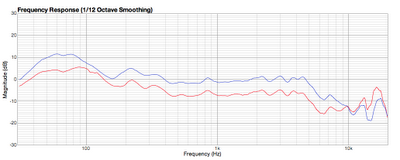
Here are some comparison frequency sweeps of the two mics conducted at around 25cm from the source (as usual take with a pinch of salt.)

Frequency sweeps for RE20 (red) & PL10 (blue)

AKG D99c manual


Here is the German language manual for the AKG D99c, also known as Harry.


An English translation courtesy of Google…

Our first artificial heads for experimental stereo listening were made in 1949

The Physics Institute of the University of Budapest conducted experimental tests. Many years of well-founded knowledge of the physical and physiological relationships of human hearing and the experience as a specialist company for electroacoustics have enabled us to make a noteworthy contribution to the artificial head stereo microphone, which has become current again, with the series production of a recording head within a short time. 

The interest of a large circle of committed tape fans and serious amateurs in an inexpensive one, which has recently been aroused by many press reports and extremely positively rated AKG demonstrations among trade visitors. We can now match the artificial head for stereo recordings with the AKG D99c stereo recording head, which is available now.

The material structure of the head and shape of the ear cups, in conjunction with a simplified but acoustically effective simulation of the ear canals in connection with the two special dynamic transducer systems integrated in the head, are tailored to an optimal recording [which is] analogous to human hearing.

When listening through high-quality headphones – regardless of whether closed or open earphones are used – the listener experiences an intensive acoustic sense of space that cannot be achieved when recording with two individual microphones. 

The artificial head as a physical structure itself is above all a prerequisite for the natural occurrence of the factors that determine the spatial impression, such as the difference in intensity, the difference in transit time and the frequency-dependent shadowing effect from one ear to the other. 

The AKG D99c stereo recording head, with its optimally designed frequency response (it must be viewed with different criteria than usual microphones), always ensures consistent objective recording properties and can be used as a “double”, so to speak, where you need to keep your own head free for directing.

The stereo artificial head recording is particularly interesting where moving sound events are involved. For example, playing, singing children, lively design of radio plays or reports; also outdoors, for example with passing cars, noises in the background and much more. 

A further aspect: when recording conferences, it is easily possible for the listening recording clerk to concentrate on a specific speaker and to record his words due to the acoustic-spatial localisation. The spatially lively playback effect of the AKG stereo recording head D99c can be achieved with any AKG stereo headphones of your choice, regardless of whether the recording comes to the listener live via an amplifier or, as a tape recording, is listened to afterwards.

Technical specifications:

Frequency Range: 50-12500Hz

Sensitivity: 2.0mV/Pa = 0.20mV/ubar/channel

Impedance: 600 ohms per channel

Channel deviation: <3 dB for the entire transmission range

Optimum recording height by using an AKG floor stand.

Harry the Head – modification to condenser mics

The AKG D99C is a binaural dummy head microphone, often known as ‘Harry the Head’ or just plain Harry. Like me, Harry was born in the 1970s and still looks good for his age, albeit with a slightly fuzzy finish (which presumably is to reduce reflections). Inside his head there are two rather basic dynamic microphone which point upwards towards the vents in his ears.Harry may look good but many of his kind sound disappointing and the sensitivity is low. My own D99C sounded particularly poor with a lack of low end response and a sort of crunchy mid range. 

Harry the Head, or AKG99C to his friends

And so here is an easy way to improve the sound and sensitivity – fitting two small omnidirectional condenser mics inside will make Harry much more useable. What is more, this modification is completely reversible. You can go back to the former crunchy lo-fi tones or retain the vintage value for a collector in the future. 

Audio Technica ES945. Remove the grills and mounting nuts

For the upgrade I used two Audio-Technica ES945* boundary condenser microphones, which can be found used for reasonable prices (I paid £33 each on ebay) and I made up two short and skinny XLR cables. You will also need some needle-nose pliers and a screwdriver.  Let’s go!

Microphones, cable and aluminium strain relief 

Carefully peel off the base of the head, using a scalpel if needed to remove the glue. You can see two screws that secure the cable strain relief. Undo these. Remove the two circlips which hold the microphones in place. Then pull out the whole assembly of cables and two dynamic microphones.

End view of the AKG dynamic mics.

Undo the three small screws that hold the grill of the boundary mic in place and remove the grill. Also take of the big nut and rubber mounts if they are still attached. The mic is a little too narrow in diameter and I put a layer of heat string around it, but you could use some tape here. This stops the mic from rattling and moving around.

Then fit the cables and push the microphones into the holes in the head. You will notice that the mics are at 90 degrees to the ear-holes.

New mic with shrink sleeve and XLR cable attached.

The next thing to note is that the position of the microphones is critical to the sound. If you push them too deep past the ear vents then the microphone is essentially blocked and sounds tinny and horrible. But too gar below the vent it will sound hollow. I placed them by ear (sorry for the pun), listening as I moved the mics up and down, and settling for an optimum position. just below the ear vent.

Approximate position of the microphone inside Harry’s head.

Once the mics are in position, thread the cables through the channels in the bottom of the head. You can replace the cable clamp if you wish, although that will require unsoldering the cables. (I used a hacksaw here to liberate the cables!). Then stick the base of the mic back on and the job is done. Now it is time to go out and record something.

Routing of the XLR wires under Harry

Personally I think that the AKG D99c, with it’s cubist styling, is the best looking binaural head microphone, although the Neumann KU100 at £6800 GBP must surely be a better microphone!  

Whether binaural recordings sound better or worse than spaced pairs or every other kind of stereo recording is a discussion for another day. 

* I am sure that other models of boundary mics would work here just as well or better. I can imagine using a couple of Oktava MK012s with omni capsules, or even a pair of 451s if you want to stay with the AKG brand. Perhaps we should consider Harry to be a microphone holder, rather than just a microphone.

Here is the German language manual for Harry, along with a translation (by google, sorry).

You can read more about Harry at Vintage Microphone World.

Update 26 August – this post has been called ‘Sacrilege’ by Heinbach… “I call sacrilege. The grainy tone of Harry is part of its Charm.” 

Xaudia Active Dynamic Microphone (ADM)

The ADM is my take on the ‘Speaker as microphone’ concept. You may have come across this idea elsewhere, in certain vintage microphones, perhaps using a larger speaker as a sub-mic for kick drum, or in some boutique models, some of which are a bit low fi, but can be surprisingly good. 

A small speaker and a dynamic moving coil microphone operate on the same principles, with the differences being in the details such as mass of the coil and diaphragm. Ideally a speaker should be robust and handle some power, whereas a microphone element might be as light and sensitive as possible. Headphone speakers are generally small and light and can make decent microphones. One classic example is the Beyer M380 which uses the same element as (older) DT770 headphones.

The ADM uses a genuine new-old-stock Sennheiser headphone speaker which sounds very nice when reversed and used as a microphone. Like the Beyer M380, this has a figure-8 pickup which means that it also has a decent proximity effect and good side-rejection. The impedance of this speaker is a little higher than most microphones, and so I have fitted a phantom powered balanced buffer circuit to lower the impedance, reduce the noise floor and increase the common mode rejection, as well as increasing the output level. Overall it works very nicely.

I have a limited supply of parts and so this will inevitably be a limited run. 

Further details and sound clips to follow soon. Available from September 2022 at £199 plus postage.

Calrec 6-series Microphone Upgrades

These Calrec small diaphragm condenser microphones have been kicking around in the workshop for several years. They sound nice but the noise floor was always too high to be of much use, and they also need a specific power supply rather than standard 48V phantom. And they are difficult to service because the high impedance section of the circuit board is potted in what looks like epoxy resin – including an electrolytic capacitor. If anything goes bad in there then it is near impossible to replace.

Consequently these never got used and nobody wanted to buy them.
I decided to hack them and my approach to these was to do a full rebuild using a new circuit board from Russell Technologies. The new circuit is based on designs by Okatava and Schoeps, and is a simple two stage transformerless design. It works well with the Calrec capsules and sounds nice and full without being overly bright.
A couple of things to note. The connection to the capsule is made by a copper spring, This needs to be removed from the old circuit board, cleaned and soldered onto the new board. The rear of the capsule should also be cleaned to remove any oxidation.
Top – New circuit board with spring and locking ring..
Secondly, there is an internal locking ring which holds the circuit in place. This is expanded using a grub screw. This ring needs to be re-used here to ensure a little compression of the spring and good contact with the capsule back plate.
Xaudia can offer this as a repair upgrade service. Please get in touch if you need further information.

Swapping the motor in Beyer ribbon microphone.

Beyer sell replacement motors which allow repair of some of their microphones although the cost in the uk is rather high. Swapping the motor is a bit fiddly but can be done with patience and care. This is more or less how I do it, although the models do vary a bit and you may need to improvise.

Beyer M160 motor with rounded edges (left).

First note that Beyer motors may have round or square edges at the rear of the magnets. For many microphones this won’t matter, but the M160 grill will only accept motors with rounded magnets. In the picture above it looks rather crude like it was rasped down with a file! It is probably possible to make a square edged motor fit an M160 but the magnetic filings would surely wreck the ribbon,

Also worth mentioning is that Beyer M160 and 130 have two ribbons whereas M260s have a single ribbon.

To exchange the motor, first one needs to remove the socket and unsolder the connector and transformer.  The socket may be glued, screwed and/or pinned in place. Remove the screws or pin. If the socket does not slide out then it is glued and will need heating until the glue fails. Do this at your own risk! 

Then unsolder the socket, remove any rubber grommets and unsolder and remove the transformer.

Beyer M260 with socket and transformer removed

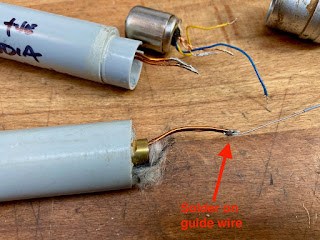
The next job is to pull the motor through the acoustic labyrinth but keep in mind that you will need to reverse the process in a few minutes. I usually solder an extra piece of wire into the end of the motor leads which will let me pull the new motor wires back into place.

Remember to solder on a guide wire before you remove the motor

Once this is done you can pull the motor out and then unsolder, leaving the new wire in place.

Pull the motor and guide wire through the body

Unsolder the old motor and then reverse the process. Solder the new motor wires onto the guide wire, pull through the labyrinth and then unsolder. That parts is easier said than done because you are pulling some stiff wires around a bend that you can’t see. Reattach the transformer and socket. 

The only job left to do is to check the polarity of everything. Beyer do not always colour code their wires so you have to guess. Compare the microphone to a good modern mic. If your repaired Beyer is out of phase then simply reverse the wires at the XLR or din plug.

As a final warning, I have found that Beyerdynamic parts vary a lot and they do love to glue stuff together – why spend money on a screw or two when a tube of glue will do?  Be prepared for a certain amount of frustration and keep the swear-box to hand.

Synchron / Vega S10 Microphones

The Syncron Corporation are generally credited with launching the first transistorised capacitor microphone back in 1964 – the AU-7a, which was priced at $169.50 USD. In their own marketing, the manufacturer claimed to have built “the first microphone to successfully employ the Field Effect Transistor.” At the time, competitors such as Neumann were selling microphones with tube circuits such as the KM64 and U67 which required a separate power supply. The Syncron mics ran on batteries which saved lugging around an extra box and cable. I know we all love and revere the old Neumann tube microphones, but few would argue that they take longer to set up and warm up than a solid state mic.

Syncron-Vega S10 microphons

Following the AU7a, Syncron launched their second and final microphone, which was a rather nice small diaphragm condenser known as the S-10. By this time, the brand was owned by ‘Vega Electronics Corporation’ and had the address on their documents had moved from Connecticut to Santa Clara in California. The price for new microphones was $260.  

I was sent three S-10 microphones to clean, service and convert to phantom power for a customer. These mics were badged ‘Vega’./ Like the AU7As, they were designed to run on two obsolete batteries, and so being able to run on standard +48V would be make them much more useable.

Vega S-10 original circuit and transformer, 

The mics were a bit of a mess. They had been stored damp at some point and showed corrosion inside and out. I wanted to be sympathetic to the original simple circuit  They are a one-transistor circuit with an output transformer, much like a Neumann KM84, and so for the phantom conversion I decided to re-build with a KM84 style circuit, keeping the original transformers. 

KM84 type circuit – Russell Technology board

With a bit of improvisation I was able to rebuild the circuits using circuit boards from Russell Technologies, utilising the space freed by removing the batteries to house the phantom circuit and the transformer. The circuit boards were originally designed as an upgrade for the AKG C480B, and uses a smaller transformer than the Vega. To accommodate the larger transformer I hacked off the end of the board and wired the transformer directly.

PCB from Russell Technologies – rear

S-10 with new PCB and transformer in place.

These microphones used a 4-pin XLR output. The fourth pin was used to make a connection to the battery within the plug of the connecting cable, which means that the batteries would not go flat so long as the microphone was unplugged between sessions. I swapped these for standard 3 pin XLRs of course.

Is four better than three? No.

Although we started with three microphones, one capsule was bad and one transformer was open circuit, so we have two nice condenser microphones, which are well balanced and sound good. The sound is a little less bright and a touch warmer than a KM84. I liked these microphones and was sorry to see them go home.

Syncron-Vega S-10 microphones

Update.

 Jason at Crunch studios kindly shared the photo below and sound clip of his Vega S-10 in action.

Recording drums with the S-10 at Crunch Studios

Sound clip of the S10 in action:

You can read more about Syncron microphones at the Coutant website. 

Thanks to Jason Baldock at Crunch Studios

Testing the Sennheiser MD409 family

I recently had the opportunity to test a bunch of Sennheiser MD409 and related microphones. These small dynamic microphones command eye-watering prices because they were used by a couple of famous rock bands in the 1970s. 

Devices under test – five MD409s, BF509, MD609 and another.

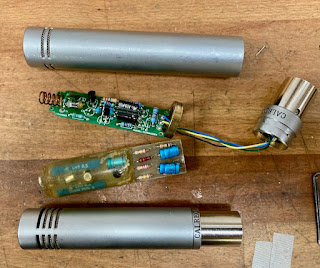
The prices seem high for such a simple device – the microphone consists only of two grills, stem with an XLR socket, frame, and capsule, along with some foam and a couple of screws to hold everything in place. There are no transformers in these microphones, and the output runs straight from the capsule to the XLR socket.

Inside the MD409. Photos by Lester Smith at Abbey Road.

All of those parts except from the capsule are also found in the current e609 model, which is not revered in the same way and can be found new or used for less than the price of a Shure SM57 .

So the magic must be in that capsule…. right?  Similar looking capsules were used in various other Sennheiser and re-branded models, although there can be subtle differences especially in the baffle at the front and the vents in the rear. The 402/3 capsule is often mentioned in internet chat rooms as a close alternative, and so I tested one for comparison, wired into the body of a similar looking Chinese mic.

Sennheiser 402/3 capsule

For the test I had access to five MD409-U3s, one BF509 and one e609, as well as a 403/3 capsule in a replica body. 

The questions I wanted to ask are as follows….

Firstly, do MD409s age well and remain consistent? In other words, if we have a conversation about “the 409 sound”, are we even talking about the same sound? 

Secondly, is the BF509 really the same microphone?

And thirdly, (for those of us without deep pockets), how close can you get with either an e609 or a reportedly similar alternative like the 402/3 capsule?

Tests were performed in the booth at Extinct Audio, with a swept sine wave method. Here’s what we found.

1. Frequency sweeps of five MD409-U3 microphones.

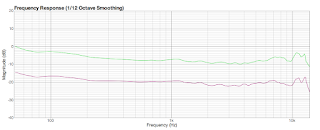
1. The MD409s are very consistent. We tested five used MD409s and four of them were very close to each other, with a fifth mic showing just a little less bass. The signature sound of these capsules is a 5dB presence bump in the 100 to 200 Hz region, with a dip below 100Hz.

2 & 3. MD409, BF509 and e609 microphones compared.

2. The BF509 sounds similar and the sweep and falls within the range of the five MD409 that we tested. 

3. The e609 is another nice microphone but is a little different to its predecessors. It also has a low end bump, a bit broader than the MD409, and has a broad lift around 5KHz. The top end rolls off a bit earlier than the older mics, which you may notice if you haven’t stood in front of a guitar amp for a couple of decades. Your dog will know. 

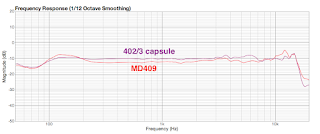
4. MD409 compared with a 402/3 capsule

4. The 402/3 capsule tested lacks the low end bump but shows a very flat response. It is nice but not the same.

In summary, the MD409s were consistent and the BF509 seems to be the same microphone. The e609 is a little different, but with a touch of EQ it makes a good substitute for those who can’t afford the current vintage prices, or who don’t want to take their precious artefact on tour.

Thanks to Sam Inglis for help with this article.

We have a Reverb store!


We have opened a store on Reverb.com for Extinct Audio parts and accessories.

The motivation behind this is the recent changes to import laws from the UK into Europe.

For orders of new goods under €150, we can ship direct without any additional taxes to be paid on import to the EU. The customer still pays the tax but it is collected by Reverb at the point of sale. This means that there are no unexpected bills to pay when you receive the order.  Consequently we would encourage our friends in the EU to buy accessories though our Reverb store.

The store sells our thread adapters, transform boxes and splitters.

This only works for lower value orders and so the shop will just be for parts and accessories. If you wish to order Extinct Audio microphones then you will still need to either buy direct from the Extinct Audio web shop, or from one of our international dealers.

Beyer M30 – a super-rare early ribbon microphone

To the best of my knowledge, this M30 is the earliest production model Beyer ribbon microphone. (Do please send me a message if you know of an earlier one). Here it is pictured with a modern M160 for scale.

This microphone came in for repair with most of the original piston ribbon in place. The first thing that leaps out is that, from the outset, Beyer went in their own direction for corrugating the ribbon. 

I have heard a couple of suggestions about why this may be. Pistonic ribbons are in theory more efficient as the ribbon moves through the magnetic flux in a flat manner although my own measurements suggest that it only gives a couple of dB at best. Perhaps the most convincing one was Wes Dooley’s suggestion that they were circumventing RCA patents for the more common wiggly ribbons. 

The magnetic circuit itself is a work of art, bringing the field from the large block magnet to the sides of the ribbon through four arms. The body of the microphone is chromed brass with one of the most substantial grills that I have ever seen. And the output transformer is a large toroidal type similar to those found in the earliest Oktava microphones and also old Siemens M201 ribbon mics.

I have talked to a lot of customers about this subject and there is a roughly equal split on which type of ribbon sounds ‘better’, with some preferring RCA style and others insisting that pistonic is best. The reader can make their own mind up about that! However, from a technical perspective, I have the equipment to make the wiggly ribbons but not the pistons. 

From a historical perpective, it was nice to see the old ribbon. But it was somewhat damaged, a little corroded and stuck to the side of the motor. I took lots of photos and asked Marco, the owner, if he wanted a museum piece or a working microphone. It can be hard to make these decisions but we went ahead and repaired the microphone, which sounds rather lovely with a new ribbon in place.

Marco kindly shared a recording he made with the M30. The microphone was positioned around 40-50 cm from the singer, and the band performed in a ‘small shack’ of about 4,5 x 3,5 m.  There is naturally some spill from other instruments in the M30 but it gives a good indication of how well an old ribbon microphone like this can perform. 
Listen to “Old Devil Moon” by Binky All Stars

Thanks to Marco at Vintage Microphone World for sharing his insight, microphones and recordings. His book ‘Witnesses of Words‘ is well worth checking out.

Update 31 July 2022

Thanks to Raphael and Carsten at Echoschall in Germany for sharing this page from an old Beyer catalog. The page shows that the M30 was priced at 700 Deutschmarks which was a lot of money at the time. There was also an M31, which I have never seen. The term “Geschwindigkeitsmikrofon” translates as “velocity microphone“.

B&O BM5 stereo collet repair

This is a really common problem with B&O stereo microphones. They snap in half! At the time of writing I have over ten broken BM5s in my inventory and some repairs for customers, and so clearly something needs to be done.

The rotating mechanisms were (usually*) made from plastic. With time and use, the plastic parts become brittle and the teeth break away. First the mic becomes wobbly and then can break away completely. These parts are also make the top part of the microphone difficult to service because it can be impossible to remove the collet without causing further damage.

And so I commissioned some replacement collets and can now offer repairs for this problem.

Brass collet for BM5

The replacement part is machined from brass and won’t break easily. There is some re-wiring to be done. The BM5 used a 9 pin socket which was not easy to replicate. And so we simply run the wires through a hole in the collet and solder together. The socket can get oxidised and noisy anyway, and there is no real need to remove the top part in general use. 

Using a brass collet has the additional benefit of making a good electrical contact between the top and bottom mic, which means better grounding.**

Here is the repaired rotating mechanism which should be good for another few decades of use.

These parts are made specifically for Xaudia in the North of England.

Notes.

* Some later BM5s used a different design with steel parts. B&O clearly realised that they had a problem. 

** I have addressed the grounding issue in an earlier post.


Yuchain Wang, musicial and producer from New Taipei City in Taiwan, shared this cover version of Joni Mitchell’s ‘A case of you‘.

The vocals were recorded using an upgraded Lustraphone VR53 ribbon microphone. I fitted the microphone with new ribbon and magnets.  The Lustraphones are a bit notorious for having a weak output signal and a very dark tone, but the changes make a big improvement to their usability. 

You can read more about the magnet upgrades in a previous post.

Andrew Cadie – Down Where the Drunkards Roll

Andrew Cadie recorded this great version of Richard Thompson’s song, ‘Down where the drunkards roll’, using just a pair of B&O BM6x microphones to pick up his voice and acoustic guitar.

You can hear more of Andrew as he will play some recent compositions and a handful of cover versions, on Thursday 3rd December 2020 at 20:00 (Ger) / 7pm (UK) – all from his cozy studio couch. You can tune in at his facebook page or  youtube channel. 

Andrew’s microphones were upgraded here at Xaudia, and fitted with new ribbons and magnets, and an upgraded transformer. These changes raise the output level and reduce the noise substantially, turning them into very fine ribbon microphones.

Melodium 42B replacement magnets

Eleven Melodium 42Bs in for service at Xaudia

We now stock magnet assemblies to replace weak or cracked magnets in Melodium 42B ribbon microphones. *

Replacement magnet assembly for Melodium 42B ribbon microphones

The horseshoe type magnets found in some of these mics tend to hold their field well and rarely fail. However, I have occasionally encountered examples where the magnets have cracked and lost some of their strength. This may happen if the mounting screws are overtightened or the microphone has been abused.

Around half of the 42Bs use block magnets with a carrier bar to complete the magnetic loop. These are more prone to losing their field especially if they are removed from the microphone for some reason. It is hard to predict how these will behave. Luckily we can measure them and see if they are up to scratch. A healthy microphone should show above 3000 Gauss in the ribbon gap to give good signal to noise performance.

In this example, the field is down to around 2400 Gauss, which is at about 80% of where it should be. That amounts to 2dB loss of output – not yet a disaster but may be heading that way. With the new assembly in place we measure around 6000 Gauss, which is up + 6dB on a ‘good’ stock Melodium 42B.

*Magnet failure is rare. A bad ribbon is the most common cause of a weak signal in these microphones, and would be worthwhile testing the ribbon before embarking on any kind of magnet service.

Sennheiser MD409 foam failure

This seems to be a common issue with old Sennheiser MD409 and similar microphones.

Sennheiser MD409 foam failure

The capsule is held in place by a block of polyurethane foam, which slowly decomposes over the decades, especially if the microphone has been in use in a sweaty rock venue.

Sennheiser MD409 new foam

If left for too long, that capsule will rattle around and there is a risk of more serious damage. the foam can also become sticky and contaminate the capsule diaphragm. If things have not gone too far, it is an easy job to cut some new foam, clean the grills and then the mic is ready for another shift in the studio.

MD409 pair with new foam cleaned and ready to rock

Lustraphone VR53 upgrade

It has been a long time since my last blog post!

This is mainly because the launch of Extinct Audio took up much more of my time and energy than I had ever imagined. But I have missed this blog and will be posting a bit more often in the coming weeks and months. Thanks for your support.

Lustraphone VR53 ribbon microphone

This week I have been working on a few Lustraphone VR53 ribbon microphones. I have never been very enthusiastic about these mics because generally they have a weak output and can sound dark and flabby. Replacing the ribbons and transformers will get the mic so far, but they never quite get up to the performance of other British ribbon mics like the Reslos and Grampians. Which is a shame because they have a unique vintage design and look as though they should be good!

Part of the problem is the magnetic circuit. The two horseshoe magnets provide the field which is conducted (rather inefficiently) around a steel structure to the ribbon. This gives a field around 1500 to 2000 gauss. (For comparison, the field in a healthy Reslo would typically be around 4000 gauss.)

Milling the pole pieces to make room for new magnets.

The steel pole structure is the limiting factor here and so swapping the horseshoe magnets gives only marginal improvements. For this upgrade I made a decision to mill out the pole pieces and fit some strong magnets right next to the ribbon.

The difference is impressive, bringing the field across the ribbon to 6000 gauss, which should provide about +9 to +12dB increase  in output voltage. With a new ribbon fitted. the output and signal to noise were improved overall by 20dB. Now it can give the other microphones a good run for their money.

Before and after… new magnets and ribbons.

As an aside, the stock 200 ohm transformer in this example is actually pretty good and don’t need to be replaced. The 30 ohm and high impedance models are not very well suited to a modern studio and in those cases it is worth swapping them out for a more sensible tranny.

You can read my earlier post about the Lustraphone VR53 microphones here.

Xaudia XM10 ribbon microphone (discontinued)

I occasionally get asked about the discontinued XM10 model, usually when one comes up on the second hand market,  and so here is a little bit about them. I don’t have any sound clips of the XM10 and it was never sent out for review.

The XM10 was intended to be our budget offering, with the ribbons and transformers made and fitted here at Xaudia, and the bodies made overseas. The transformer is the same as in the BM9, and the ribbon is a little narrower. It has a big bottom end with a large proximity effect,

In the end we only produced a small run of perhaps 20 of the XM10 in 2017 to 2018.

They were excellent at the price point, but in a way not very different from, say, a fully upgraded SE ribbon or something of that class, We won’t do another run as all of our resources were funnelled into starting Extinct Audio as a new business and producing the BM9 family of microphones.
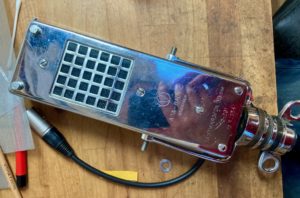
David Broad’s LEM ribbon microphone

I re-built this old LEM ribbon microphone for David, with improved magnets, new ribbon and a medium impedance transformer. You can hear the results on David’s videos.

Reslo Beeb drum recordings by Joe Montague

It’s always great to see and hear how our customers use the microphones we send out.

Joe Montague was kind enough to share these recordings and video of our Reslo Beebs in action. The microphones were set up as a stereo pair in front of the kit.

The recording in the video/sound clips is just the Beebs, no other mics at all, and just a touch of EQ and compression. It is an impressive result from just two microphones. Of course, you need a good kit as well as good microphones, and being a great drummer helps too!

Here are some further sound clips from Joe.

Drum groove 1
Drum groove 2 
Drum groove 3 
Drum groove 4
Drum groove 5

Joe can be found at joemontague.co.uk

BM9 Ribbon microphones from Extinct Audio

I haven’t had much time to blog this year, which has been partly due to working hard on a new project. Finally, after years of fixing, testing, upgrading and procrastinating…. Adam and I finally launched our own brand of ribbon microphones. 

Introducing the BM9 from Extinct Audio. I have been heavily involved in all stages of the design and manufacture of this baby. It is a general purpose ribbon microphone with a true figure-8 pattern, low noise and a big proximity effect. The aim was to produce an excellent blend of vintage sound and modern utility.

https://xaudia.com/SoundClips/BM9_SmallAcousticStereo.mp3

Electric Guitar


https://xaudia.com/SoundClips/BM9_GretschStrum.wav


https://xaudia.com/SoundClips/BM9_FramusElectric_Vibrato.wav


https://xaudia.com/SoundClips/BM9_FramusElectric_Clean.wav


https://xaudia.com/SoundClips/BM9_FramusElectric_Chorus.wav

Drums


https://xaudia.com/SoundClips/BM9_Drums_OveheadsOnly.wav


https://xaudia.com/SoundClips/BM9_Drums_OveheadsOnly_RollingFloorTom.wav


Update
– there are now many much better recordings over at the recordings pages of the Extinct website. But these were the first recordings that Adam and I made with the first production microphones, so let’s leave them here for a little bit of history. 

Oktava MK18 vs Russell Technologies Mod

Oktava MK18

A pair of Oktava MK18 condenser mics have been knocking about the workshop for a few years. Both mics had similar faults, with weird inconsistent dropouts especially when changing patterns. I suspected leakage somewhere but could not track it down. The capsules seemed OK but the mics were unusable as they were, so I put them to one side and waited for inspiration to strike

The MK18 is an ancestor of the MK219, so when I came across some circuit boards from Russell Technologies designed for the MK 219, it looked like the perfect opportunity to revisit and rehabilitate these microphones.

Oktava MK219 PCB from Russell Technologies

The boards are nice quality and arrived with full instructions, which makes assembly very easy – or at least it would be with the intended MK219. In the case of the MK18 there is some hacking to be done.

Inside the MK18  – the PCB is smaller than that of the MK219

The capsule mount in the MK18 is longer than that in the MK219, so it needed to be chopped, milled and drilled to fit the board. The MK18 also has a 5 pin DIN output, which was drilled out on the lathe with a 19mm bit to make room for an XLR socket.

That done, I discovered that I had lost, sold or binned the original transformers. However, I found a pair of spare BV107s (from Neumann KM84s), which fitted nicely.

MK18 with Russell Technologies mod

I omitted the pad and high pass control switches. And I went for cardioid pattern, using just one side of the MK18s double sided capsule, although it would be easy to wire both sides of the capsule in parallel to have an omni pickup.*

Against the popular tide, I also added a layer of fine stainless mesh, to keep dirt and damp air away from the capsule. These mics are bright enough, so I am happy to risk losing a fraction at the top end.

Modified MK18s – ready for overhead action

The result is good. I like the sound and I think they would make a nice pair of overheads or stereo instrument mics.

*Or even figure-8. I will let the reader think about that one. 😉

Inside a Beyer M130

Here is the motor from inside a Beyer M130 figure-8 microphone.

The mic has two ribbons, similar to the M160, and the metal spiral acts as a magnetic return path.

Reslo Beebs in action with Layla Lane

Pop duo Layla Lane kindly shared their video of their cover of ‘In My Life’ by the Beatles, which which extensively used a Reslo RB microphone with Xaudia’s ‘Beeb’ upgrades. 

The guitar, piano and all the vocals were recorded with the Beeb connected into an Ampex 350 preamp and Urei 1176 compressor. You can read more details about the recording at their youtube page.

Layla Lane are Heday Ikumo and Valerie Stern, who together have written music for Coca-Cola and Mello Yello commercials, recorded a song for the Ashton Kutcher film Killers, toured Japan, and produced/wrote songs for big Japanese artists such as Sunplaza Nakano-kun and Yoko Oginome.

Ribbon Mics in Action: Tidal Love by Nothing Places

Thanks to Oswaldo Terrones, who works in Madrid and Barcelona in Spain, for sharing the album Tidal Love by alternative rockers Nothing Places.

Oswaldo made extensive use of ribbon microphones for the recordings, using a B&O BM5 stereo set for the drum room mics, an RCA 74B for guitar cabinets, Coles 4038 as the overhead and Beyer 160s on the lead guitars, percussion, etc. The music itself defies description, but you can listen for yourself at their bandcamp page.

The album was released on Spanish indie label Foehn Records, which champions new artists and “the less traditional facets of pop, rock and electronics.”

Having myself once tried (and failed) to run a little record label, I have the utmost respect for those who have the tireless enthusiasm to make it work!

Witnesses of Words by Marco C. van der Hoeven. (Book Review)

This beautiful book arrived in the post last week. There aren’t enough good books about the history of microphones, so it was a pleasant surprise to discover that Marco van der Hoeven had written this wonderful volume. Marco is a musician, engineer and historian, and he has a very impressive collection of microphones too.

But Marco’s book is much more than a history of the microphones themselves – it is also a potted history of the 20th Century, as witnessed by the microphones of the era. Whenever and wherever a crowd was rallied, a war started or a peace brokered, there was a man or a women addressing the public – with a microphone and some kind of PA system.

A large part of the first half of the book shows how microphones were used by some of history’s heroes and villains –  scientists and singers, actors and astronauts, dictators and comedians alike are shown with the current technology.

Marco identifies who used which microphone, and gives little discourses about them and why they did so. Perhaps many readers may already know that Hitler favoured the Neumann bottle-shaped microphones, but here you can also find the microphones used by Mahatma Gandhi, Margaret Thatcher and Marilyn Monroe, amongst many others.

And often the choice of equipment would have made a political statement: for example, Charles de Gaulle is shown addressing a liberated crowd through a Melodium 42B. It was very important for the new leader of a country recently freed from occupation during WW2, to be pictured with a French microphone.

The book is rich in detail, anecdotes and Marco’s unique perspective, showing his passion for the history of recording and broadcast, and a wider view of its global context.

All the microphones shown are part of his own impressive collection, which includes everything from rare examples that would be at home in a museum, through recording studio and broadcast classics, to numerous small, cheap microphones that might have been used for amateur radio, taxi ranks and tape recorders.

This reminds us that most people who needed to communicate did not always need a Neumann or AKG recording classic, and had probably never even heard of them!

The latter pages of the book show numerous, diverse examples, along with various microphone-related paraphernalia such as advertising documents, stamps, toys and record sleeves. It is the combination of the social, historical and technical perspectives that makes this book unique. And it would make a great Christmas present for the microphone lover in your life!

Witnesses of Words is available for €27.95 from WitnessesOfWords.com 

Microphones of the Month: Toshiba type A vs RCA PB144 / 44A

Toshiba are well known for making mid-range consumer electronic equipment. Once upon a time they used to make some fine ribbon microphones too! 
Toshiba A (left) and RCA PB144 ribbon microphones

The microphone on the left is generally know in internet-land as the Toshiba ‘Type A’, although it is labelled SN-1631. It is a very close copy of the RCA 44A and its relatives. I have been informed by a Japanese expert that this was made under license by RCA, most likely in the post-WW2 era. Having looked carefully at the Type A and compared it to my own RCA PB144 (right), I have no reason to doubt this assertion.

The mics look similar outside – my PB 144 has a film set style hanger mounting, whist the Toshiba has a simple cast yoke, and the grill hole size differs.

Inside the microphones there are many similarities and few differences. Both use three large horseshoe magnets to provide the magnetic field, and and the ribbon dimensions are very close.

Perhaps the biggest difference is that the RCA uses cast pole pieces, whereas in the Japanese version they are milled. This probably reflects the tooling and machinery available at the time. Casting is an expensive process for low quantity products.

Beyond the cosmetics, the Toshiba has a 200 ohm output transformer whereas my PB 144 is a 50 ohm microphone, with these no doubt being in line with the broadcast standards of Japan and USA at that time.
(Thanks to Takayoshi Sumitomo for his expertise) 

Is the MB301 Cardioid ribbon microphone a Beyer in disguise?

I recently had the opportunity to service a pair of MB301 cardioid ribbon microphones. I had always understood these to be rebranded Beyer M260s with a custom grill, but this is not the case.

The MB301 does use a Beyer pistonic ribbon, but the motor is completely different. The Beyer M260 uses four glued rectangular magnets to make the motor,  but the MB301 employs a single large cast ferrous horseshoe magnet. In this respect it looks more like an RCA BK5 or Oktava ML19.

MB301 (left) and Beyer M260 (right)

I think it more likely that the magnet is taken from the Beyer M320 / M360 models, with different pole pieces, although I have not had the chance to compare these on the bench at the same time. Either way, the MB301 is a microphone in its own right, and not a copy of something else.

Despite the ugly oversized grill, they sound pretty good with plenty of top end and bass, and the big magnets give a stronger output signal than the early M260s.

Beebs in action: Aria ca Spira by Cordasicula

Thanks to Saro Tribastone for sharing his band Cordasicula‘s new album Aria ca Spira.

Cordasicula come from south-east Sicily and are inspired by the traditional music of their own island, as well as the southern Italian regions of  Calabria, Campania and Puglia.

Saro explained to me that “all these styles, mainly defined by their rhythm, are coming from those areas where 2500 years ago we had Greek people living there, globally known as Magna Grecia (Big Greece).” Their songs are a mixture of original compositions with some traditional tunes, and collectively they have a beautiful, haunting and slightly melancholic quality.

Many of the instruments were recorded with one of our customised Reslo ‘Beeb’ ribbon microphones. The Beeb was used to record the Greek Tzouras, violin, cello, double bass and Battente guitar for the album. For those who like technical details, they were tracked through a DAV BG1 preamp and Mytek Stereo 192 ADC converter.  It is nice to hear the Beeb working so well with these traditional acoustic instruments. Here is a photo of the  Pier Paolo Alberghini playing double bass, with the Beeb microphone up close to the sound hole.

Marilena Fede’s voice was recorded with an AKG C414B, again using a DAV BG1 preamplifier.

Saro has kindly allowed us to share the Spotify playlist for the album, which should appear below.


Beebs in Action: Majetone calfskin drum heads

I have said many times before that we have fantastic, creative customers, and it is always nice when someone takes the time to share what they are doing. Sometimes their stories are amazing!

James Yates makes custom hand-made calfskin and vellum drum heads, under the guise of Majetone Industries.

Here’s a video clip of James playing his drums and skins, recorded using two of our Reslo ‘Beeb’ microphones as top & side mics in a Glyn Johns arrangement, along with a CAD M179 in cardioid in front of the kick drum.

I think these really do sound fantastic, with a classic yet contemporary tone. I could imagine these sliding very easily into a mix without need for much processing.

You can find out more at the Majetone Industries website.

Melodium RM6 XLR conversion

It’s nice to keep things original, but better to make them usable. Let’s face it, the definition of a microphone is ‘something that records sound’, and not ‘a chunk of metal that lives in a box’. 🙂

Like many old connectors, it is hard to find good quality used Melodium connectors, so here is a nice simple XLR upgrade for a Melodium RM6.

I removed the base of the microphone and cut off the old connector on the lathe. Then I turned a Neutrik XLR socket to fit into its place.

Solder three wires back in place and this RM6 is now ready to record music!

MOTM – Unknown French Broadcast microphone

The Microphone of the Month column has been sadly neglected this year, simply because a record number of mics came in for repair, and it has been a challenge to keep up. But some rare and fascinating microphones have passed through the workshop this summer, amongst them this broadcasting beauty from France.

I don’t know the make or model of this one and it has no markings or badges on the outside or within, but it looks fantastic. The body is made of two cast metal grills, with a cast yoke.

The connector is an unusual three pin affair, which the owner informs me is a SOCAPEX model which was common in France in the 1960s.* The yoke would sit on a custom mic stand adapter, secured by the thumb wheel.

The motor is nicely machined and uses four large wide U-shaped magnets to provide the field through custom pole pieces.

One quirk of the design is that the magnets must be removed to fit the new ribbon. This takes an extra couple of minutes, and on the plus side this means that one’s tools are not pulled by the magnets. Care must be taken to get the magnet polarity right when putting it all back together.

The transformer sits in a (presumably) mumetal can at the base. This one is a 50 ohm model, like most of the Melodium broadcast mics of the era.

If King Midas had a microphone…

…this would be it.

Good BBC-Marconi Type-A ribbon microphones are scarce, and perhaps one reason is that too many were decommissioned, mounted and given away as gifts or ornaments, for retirement, achievement and occasionally as trophies.

Here’s a good example. This one was gold plated and became a trophy for the winner of the ‘Radio One Production Saloon Car Championship’, which ran in 1975 and 1976. They may look great on a mantlepiece, but they are even better in a studio!
Luckily in this instance the internal parts are present and in good condition, so it just needed a very thorough cleaning and new ribbon to become a working microphone once more.
As for gold plated microphones – the jury is still out. It would perhaps look great in a certain genre of pop video, but for my tastes, the classic bronze finish has more class and style.

Stereophonic Star Girl!: Katy Bødtger with her BM3.

Here is an advertisement for B&O equipment, including the BM3 ribbon microphone, which appeared in the Danish publication Se og Hør (See and Hear), 11 December 1959.

Photo captions
(Main photo) 
Katy Bødtger with her B&O microphone which is engraved with her name.
(Top photo)
Using a B&O stereo gramophone with the new stereo pickup and stereo speakers, Katy Bødtger -the first national stereophonic singing star- listens to the results (of her recording session) from London.
(Right Photo)
Even when Katy Bødtger’s busy life calls for a visit to the hairdresser to style her frisky locks before the evening’s performance, her indispensable B&O Beolit all-transistor reciever is always nearby.
The sweet and fresh Katy Bødtger, who provided the vocals for the new B&O stereophonic test record, has sung her way to success in only 2 years
Many thanks to Ben Cahill for sending this in and for the translation from Danish.

Repairing an STC 4033 with a cracked casting

The STC 4033 cardioid microphone was a stalwart of British broadcasting and an early solution to the the challenge of making a cardioid directional mic. The 4033 contains both dynamic and ribbon elements, and in cardioid mode the microphone blends the two transducers together via a capacitor and inductor – you can read more about the filter and switching circuit at the wonderful Coutant.org website. The mics are still quite popular with some recording engineers, but of course there are no spare parts available after half a century or so.

Omni and Figure 8 suming to a cardioid pattern – from SOS website

I was recently asked to repair a 4033 with a cracked bottom bell, which is made from some kind of zinc alloy. When I took the microphone apart it became clear that the casting had collapsed into several pieces, only held in place by the rest of the microphone. The job looks like a challenge, and we like a challenge.

It isn’t clear how this became so damaged but it is possible that the alloy itself was at fault. Zinc Pest is a notorious cause of failure caused by impurities in zinc alloys, particularly those from the 1930s and 1940s. Like this one.

The alloy is pretty much impossible to solder or weld back together, and I don’t believe that any glue would be strong enough to hold when the mic is bolted back together. A new part is required but impossible to find, so we need to make one, or at least persuade somebody else to make it. Metal casting requires specialist skills and equipment, so I asked Abbey Casting to copy a good part from another 4033, and they did a fantastic job to produce this part in bronze.

The raw casting needs various holes drilling and tapping, but with a little work we have a perfect fit.

The 4033 is not the easiest thing to work on – everything is tightly packaged and the transformer is set in wax into the stem of the mic, so I had to use a hot air gun to dismantle it. Whilst the mic is apart it makes sense to replace that Hunts capacitor* with a nice NOS Mullard, and re-solder all the old joints to lower noise and improve future reliability.

With the new part in place I can put it all back together again.  The casting could be painted or powder-coated to match, but in this case the owner prefers to see the bronze.  These are 50 ohm microphones and work nicely with our impedance matching transformer boxes.

Thanks to Liam at ToeRag Studios & Richard at Abbey Casting.

MOTM – Tannoy Ribbon Microphones Part 2. Cardioid ribbons

Tannoy’s Cardioid ribbon microphones

As well as the bi-directional microphones described in my previous post, Tannoy also produced several cardioid models. In the picture below, the mic on the left is the MD422. I don’t have a model number for the centre and right hand microphones, but they are the same basic microphone inside, with very different grills and bodies.

The internal design of these two microphones is very simple, with a huge heavy horseshoe magnet providing both the magnetic field and creating an internal cavity to help control the pattern. The ribbon pole pieces are simple rectangular steel plates screwed into position.

There is a layer of felt behind the ribbon. I also expected to see the cavity behind the ribbon stuffed with horse-hair or cotton wadding, but in this example it was completely empty. There is a small transformer in the base of the microphone – in this example the output impedance was 2000 ohms, but I’m sure that other output options would have been available.

Despite the size, the output level is rather low.

The MD422 uses the same ribbon motor as the Type 2 bidirectional mic, and we can safely assume that they were contemporary models.
As well as these large cardioid microphones, Tannoy also produced this smaller directional model which looks rather like a dynamic mic:

The motor inside this mic is reminiscent of that from the STC 4104 lip microphone. It uses the same base and connector as the MD422 and MR425 models.


Update March 8th 2015

Tannoy were developing directional ribbon microphones from the mid 1930s onwards. I have never seen this model on the bench, but this sketch appears in Wireless world in September 1937:

Tannoy and the Houses of Parliament

Tannoy ribbon microphones were used in the British Houses of Parliament. According to Chris McClean’s article for the Institute of Professional Sound, twelve ‘brass barrel’ microphones were fitted by Tannoy in 1951, and the system was further upgraded in the 1970s, again by Tannoy, with a system than lasted until 1991. 
Here’s the problem: I have seen several of these brass-barrel Tannoy mics on sale that claim to be ex-Parliament. Too many, certainly more than twelve, and some at very inflated prices. Either Parliament kept a huge number of spares (which is possible, I guess), or this model was not exclusive, and was sold elsewhere. I have heard anecdotally of these being salvaged from church PA systems, and also the Canadian government.
Additionally, I have seen, and bought, Type 3 bidirectional Tannoy mics that claimed to be ex-HOP., although when I asked for documentation as proof of the claim, the seller was unwilling or unable to do so. Were these fitted in the 1970’s refurbishment? Again, it is possible, but I have yet to see any proof of this claim. If you know better than please get in touch and show me!
The lesson here, as always, is Caveat Emptor, particularly when buying used microphones.

Update March 8th 2015
Thanks to one of our readers for sending in a link to this announcement in Tape Recording magazine (1962, issue 5). This adds to the Houses of Parliament microphone debate.


The article announces two new ‘Slendalyne’ ribbon microphones from Tannoy – a cardioid and a bidirectional version. Yet the cardioid version looks very much like the brass-barrel mic that was supposedly installed into the Houses of Parliament 11 years earlier! This sentence is particularly intriguing: ‘Although they have manufactured microphones for internal use before, this company has never made their instruments available to the public before‘. The statement is not quite true as their earlier models were widely available. But this implies that these specific models had previously been supplied to select customers, and became available widely from 1962 onwards.

……………..
Thanks to Tom McCluskie, Jamie Neale of Real World Studios, and Marco van der Hoeven of Vintage Mic World, and everyone else for sharing information and photographs of their microphones.

Tannoy Ribbon Microphones Part 1

Introduction

This is my attempt to round up and discuss the various ribbon microphones that were made by Tannoy. I have split this survey across two posts, with part 1 describing Tannoy’s figure-8 microphones and part 2 focusing on their attempts at cardioid ribbons. Finding firm dates and model numbers is a little tricky as they are rarely marked on the microphones themselves, and so there is a certain amount of educated guesswork involved. If you know more, please get in touch!

Update 8th March 2015
Several kind and knowledgable readers have sent in links and articles with dates and model numbers. I have added these where possible. Thanks to all!

Figure-8 ribbon microphones
Over the years Tannoy produced three main models of bidirectional ribbon microphone, with some variations around those types. I have called these types 1, 2 and 3 in order of production.

Type 1
The BBC technical team reviewed this mic in 1947 and applied their usual exacting standards, rejecting the mic for broadcast use. But as usual the benchmark mic for comparison was the BBC Marconi AX model, which cost many times more, and in fact these mics can sound warm and rich, with an overtly vintage tone.

These mics are heavy with a cast body and large cylindrical magnet. I have come across mics with different output impedances, usually 50 ohms, 600 ohms or high impedance.

Type 1 variant
In response to the BBC comments, extensive changes were made to the motor design, although the body remained the same. The magnet structure is completely changed, with what looks to be a single cast magnet. I have never actually seen one of these on the bench, but Seth at the 2 Track Mind blog has written a nice post about his microphone here.
Type 2 – MR425
The Type 1 mic was succeeded by the type 2 or “Pitchfork” model, which is much smaller and has a completely new motor design. This model seems to date from the early 1950s and was available in different colours with different mounting options.

Most of these models have a 600 ohm output, and give a full well balanced sound. This is my favourite figure-8 Tannoy, partly because this was the first Tannoy mic that I owned, but also because it has a good response and a very usable signal / noise output.

The type 2 motor is simple but nicely made, with two tapered magnets either side of the ribbon, and the adjustable pole pieces allow one to set the ribbon tension.


Update – this model has been identified as the MR425, and it was briefly mentioned in Wireless World in May 1952:


Type 3 – Slendalyne
These mics are smaller again and use a lot of plastic in the body, which can be prone to cracking. The grills are stamped metal, and the connector is a simple DIN plug without a locking ring. They are a lot less common than the types 1 and 2, although perhaps not as rare as has been suggested by some sellers.

The magnets in these mics are made from a ceramic material which allows a smaller, lighter microphone than its predecessors.

Update: This microphone has been identified as the Tannoy Slendalyne model which appeared in Wireless world in June 1962:

In my next post I will describe Tannoy’s cardioid ribbon mics.
Stay tuned!

Very early tube ribbon microphone inspired by the RCA PB17

Ev of Vashion Island sent in these pictures of his wonderful tube ribbon microphone and has kindly agreed to share the photographs and description on this blog. The mic is a little bit of a mystery as it appears to be similar to an early Marconi design and the RCA PB17, yet has no maker’s mark and is different in many details.

The mic is clearly influenced by Harry Olsen’s design as described in his 1932 patent and the magnetic field for the ribbon is provided by an electromagnet, which is very rare and only usually found in the very earliest ribbon mics; this approach became redundant very quickly as strong permanent magnets became available.

As I have not inspected this microphone myself I will use Ev’s description and photographs – Ev’s comments are in italics:

“The outside diameter of the cylinder is 4.75 inches or 210mm. The  cylinder is aluminum. the top end cap and plate are machined aluminum. The hemispherical bottom cap is also machined aluminum.

The yoke mount is steel flatbar (I believe the PB17 yoke mount is made of cast metal).

There are three transformers including the one for the electromagnet.

Instead of having three UX864 tubes it uses two unknown tubes, one has 5 pins with a wire attached to the top, and the other is 6 pins. 


The resistors are made by Morrill, Germany. The transformers and capacitors have no makers marks that I can see. Whoever made this microphone obviously knew what they were doing. I wonder if this was a prototype made by RCA, or perhaps it is European (because of the German resistors)?

The bell…. is definitely cast aluminum. The inside plate at the connector end of the mic is also cast. The acorn nuts at the connector end fit a 7/16″ SAE wrench perfectly and the bolts with the wing nuts are US threads. 

Note the tiny piece of threaded stainless steel pipe bolted to the plate (to the left of the connector in the picture). I thought it might be a jack, but I think it is only a pipe. There is what appears to be a ground wire soldered to it inside the mic.


The number 13 etched beneath the bottom right connector blade corresponds with the number imprinted on the connector itself inside the mic.”

If any of our readers recognise this microphone or have any more information, we would love to hear from you.

Mic of the Month – Shure 508 Stratoliner

Here is our first Microphone of the Month for 2015. This Shure Stratoliner looks like a Zeppelin airship or perhaps Flash Gordon’s space ship. But is it a crystal, ribbon or dynamic microphone?

I had always thought that the Shure Stratoliner series were crystal microphones, and indeed the 708 model does have a crystal element. But although this 508C uses the same body, it is quite a different microphone inside.

This one says ‘dynamic’ on the label but it is really a rather strange ribbon microphone. Here is the business end of the mic with some kind of flat ribbon in place, possibly made from kitchen foil.

Once we remove the ribbon and clean the motor, we can see a series of slots right behind the ribbon. These make an acoustic cavity and help to control the directional pattern.

The motor design is quite basic, with two cylinder magnets behind the ribbon, covered in felt. The transformer is mounted behind the magnets.

This construction and slots behind the ribbon also do odd things to the frequency response. Here is the published response chart from the Shure 508a user manual:

Even the published chart is pretty bumpy, and it seems that Shure were willing to sacrifice fidelity for directionality. And the mic does sounds peaky – definitely one for the vintage / special effects shelf in your microphone locker.

HMV 2350 ribbon microphone documents

These HMV and EMI ribbon microphones show up quite often for repair. The models are identical, just branded differently, and very often they come complete with wooden box, which survives decades in a damp shed or attic better than cardboard.

It is rare to find any paperwork with these but I was lucky enough to come across an HMV 2350 complete with brochure and manual

The manual confirms that they were designed to drive a 20 ohm line. I have found that most of these mics measure around 15 ohms and have really low output. A suitable matching transformer makes a big difference to the usability of these microphones.

HMV 2350 brochure

HMV 2350 manual

PS, some of you might recognise this mic from Marvel’s Captain America movie – it was used by Howard Stark in the scene where Steve gets his treatment!

Review of the Reslo RB by F.C. Judd

Here is a scanned review of the Reslo RB miniature ribbon microphone,

The review is written by Fred C. Judd, who was an early champion of both electronic music and DIY audio electronics. You can hear and buy some of Judd’s creations at this bandcamp page.

This article arrived with a microphone but I am unsure which magazine it was originally published in. Perhaps “Amateur Tape Recording”, of which he was technical editor. If you know more, please let me know.

Shure Unidyne 545 transformer bypass switch mod.

I have read a few posts on internet forums wherein the transformer is removed from Shure mics such as the SM57. This will inevitably reduce the output level and also reduce the impedance to that of the capsule alone, and will of course remove any chance of overloading the transformer! Which means that the result is a quiet mic with low output, perfect for putting close to a drum head.

I decided to try it out. I had a Shure Unidyne 545 with a faulty transformer, so I took that out and wired the capsule directly to the output socket. The result was absolutely ideal for close-micing snare drum.

One of my regular customers asked about making this into a switchable feature. Well why not? With a double-pole double-throw switch it should be possible. The only challenge was finding a switch small enough. In the end, after trying several brands, I found that a spare switch for a Fender Jaguar would fit… but only just!

Firstly the capsule needs to be removed, unsoldered and new wires attached to the capsule. I also ran new wires to the XLR socket to be safe. The mic is filled with quite a lot of sticky brown gunk so that slows down the work.

The trick is to fit the switch from the outside of the microphone, and so the wires need to be fed out through the switch slot. It looks a mess in this state, so they are trimmed back to roughly equal length and soldered to the switch, and it all goes back together. I marked the transformer position with an X. (‘Trans’ in Latin can mean ‘cross’ or ‘across’, and X is a cross!).

Here is my sketch of the circuit, with the capsule on the left and the XLR on the right. Note that the black and white transformer wires are a high impedance winding and are not used in this circuit. Transformer wire colours may vary for other models and examples, and need to be checked before starting work.

The final job is to check the polarity of the mic against a known reference. If it is out of phase then the wires need to be swapped either at the capsule or the XLR socket.

With the transformer bypassed, the mic measures around 15 ohms at 1 Khz. The transformer brings this up to 200 ohms, and increases the output level by 10 to 12 dB. but also introduces a little bass cut. The plot below shows the difference the transformer makes. I am uncertain if the bump at around 800 Hz is real.

With the transformer bypassed, the mic can be placed close to loud sources and there is also a bass proximity effect, so the mic sounds really nice and fat!
Thanks to Lee Mouatt.

2-Track Mind’s Tannoy mic restoration

Here is a nice article by Seth at the 2-Track Mind blog, describing how he restored a very early Tannoy ribbon microphone. Seth went to great lengths, building his own corrugator and refinishing the mic, and the results look great. I played a tiny role here and was able to supply a little brass mount so that he could put it on a stand.

The mic itself is quite unusual, and the motor assembly (above) is different to most of the other Type 1 Tannoy ribbon mics that I have seen. Below is the more usual look of these mics inside, with a large cylindrical magnet and simple flat pole pieces:

It is becoming clear that Tannoy made many different variations on their ribbon mics. I feel a big Tannoy blog post coming on…

Syncron AU7A schematic (again)

Many thanks to Dan Zellman, a former Syncron employee, who sent in this schematic for the AU7A condenser microphone. This was the ‘last issue’ diagram.

Syncron AU7A factory schematic
There are a few differences from my traced circuit that I posted in an earlier blog entry, most noticeably I had the 42V battery supply reversed.  Also, I have worked on several of these mics, but have never seen one with the 470pF capacitor present. 
SJT 25/10/14

Mount-a-Mic assembly instructions

Here is a step-by-step guide to assemble an Xaudia Mount-a-Mic cable:
1. Make sure you have all the parts.

2. Strip and prepare the cable ends ready for soldering. Push through the Mount-a-Mic adapter

3. Solder the female XLR connector. We recommend connecting the barrel lug to pin 1.

4. Fit the plastic strain-relief

5. Slide the metal barrel over the plastic parts

6. Slowly screw the barrel into the adapter, allowing the cable to rotate freely as you go. 

7. Fit your choice of connector to the other end, and enjoy!

Mount-A-Mic adapters from Xaudia

Have you ever struggled to find the right clip or mount to put a microphone on a stand? Here is a solution: the Mount-a-Mic adapter from Xaudia.
Xaudia – Mount-a-Mic assembled cable

This simple yet cunning gizmo is designed to convert XLR plugs so that they can be screwed onto a 5/8” mic stand.

Mount-a-Mic adapter from Xaudia

The Mount-A-Mic adapter simply replaces the cable gland on Neutrik XLR plugs. The cable now exits through the side, and the assembly can be attached to the mic stand.

Then just plug the mic in, and go! You can now put almost any microphone on your stand, so long as it has an XLR plug.  Great for Geffell….

And a Neumann is no problem!

Here are some assembly instructions for those who wish to make their own cables.

New RCA thread adapters

We have some shiny new thread adapters for RCA microphones.  These thread adapters fit most of the ‘big’ vintage RCA microphones, including the 44, 74b, and 77 ranges, and also are perfect for Sony professional mics, including the C38b and C48 microphones.

We have been selling thread adapters for a while but the latest batch are a step up in quality. They are machined from solid brass and have a standard 3/8″ female thread that will fit most modern mic stands. They can also be supplied with 5/8″ on request.

It fits this RCA77B perfectly.

These fit the following microphones….
Most RCA 44, PB140, PB144, 74b, 77B, 77DX, MI-4010-A, BK-11.
Some (but not all) models of the RCA Varacoustic.
Sony C38, C48, FV300, Some C37s.
Many Aiwa, Toshiba and Matsushita ribbon mics
Syncron / Fairchild AU7a
Some older Amperite mics

Please ask about your microphone.

Electrovoice V2 revisited

These old Elctrovoice ribbon mics look great but sadly the sound rarely lives up to expectations.

I have worked on a few of these over the years and there are several things that let these microphones down – happily they can all be sorted out with a bit of thought.

EV V2 clamp with through-ribbon bolt!

Firstly, and perhaps most annoying are the ribbon clamps. EV used thin plastic clamps to insulate the ribbon from the body of the mic, and the ribbon is secured by a central screw that goes straight through the ribbon. The old EV ribbons are quite thick and were supplied with (even thicker) copper end terminals,  so that they could just be screwed in place. One problem is that tightening the screw twists the ribbon, pulling it into the side walls of the motor. It also does not make very good electrical contact, especially with a new thin aluminium ribbon. And the clamps are flexible too so the ribbon is not held securely.

New ribbon silver clamp

A better solution is to make new stiff metal clamps. These could be made from plated brass but I tend to use solid sterling silver to avoid the need for a plating process. One clamp must still be insulated from the body of the microphone to avoid shorting out the ribbon.

Rusty old magnet.

The next problem is the weak magnetic field. Replacing the old magnet with a new neodynium one can boost the field around five-fold, which gives a corresponding increase in output. With stronger magnets the steel screws can jump into the ribbon gap and wreck a new ribbon, so it is best to swap the screws out to some brass or stainless ones.

EV V2 transformer.

The old transformers are not great and lack bass but that’s an easy thing to sort out! And finally the old plugs are getting hard to find so we can put an XLR on the rear.

XLR fitted to EV ribbon mic

Voila! With new clamps, ribbon and magnet we have a healthy signal with plenty of bottom end!

The world’s smallest ribbon mic?

Is this the world’s smallest ribbon microphone mechanism?

The Beyer M560n(c) has a motor measuring just 33 mm long and 10 mm deep, which fits into the mouthpiece of a headset.

The tiny transformer is mounted at the other end of the microphone. The mic is clearly designed for close speech and the transformer has a very low inductance (35 µH at 1 kHz), which gives a bass roll off to compensate proximity effect.

Despite its small size, it was not much more difficult to repair than some other Beyer mics. Here is the motor with a new ribbon, ready to go again….

If you know of a smaller ribbon motor, then get in touch!

Pimp my microphone!

Here are some upgraded, modified and generally pimped mics that we have put together for customers.

In each case the microphone gets a new ribbon, upgrade transformer and a few other tweaks, along with a shiny new badge.

I will leave the reader to guess the identities of the donor mics. 
🙂

Transformer boxes

Here are our updated transformer boxes, looking smart with a new metal badge and hammertone paint. They come in a rugged metal box with Neutik XLR connectors at each end for easy use.
These little gadgets are perfect for interfacing old 30 and 50 ohm microphones to modern equipment that expects to see 200 to 600 ohm microphones, and can give an increased output of up to around 12 dB, which is welcome for older ribbon mics.

They are available in a range of ratios, and our most popular model is the 50 Ω to 600 Ω box, which is ideal for Melodium 42B, STC 4033, and Western Electric /  Altec 639 ‘birdcage’ microphones.

These can be supplied to order in almost any required ratio to match your microphone. 

Melodium 42B XLR mod

The old Melodium 3 pin plugs are getting very hard to find, and quite expensive when they do show up. This is a pragmatic approach to the problem, and allows an XLR to be connected directly….

The Switchcraft connector could be painted to match the mic, but I don’t mind the nickel either.

A mount for an STC 4017 dynamic mic

A customer asked me to make a mount for his STC 4017 dynamic mic without modifying the microphone itself. Often these come with a handle or a threaded stud for mounting, but this one came with nothing at all.

My first thought was to make some kind of ring clamp, but that would require a large diameter brass tube and was starting to look quite expensive and bulky. So I came up with this…

It is simply a folded strip of aluminium screwed to a threaded brass cylinder. The bass of the cylinder is threaded to fit a 5/8″ mic stand. The mic slides into a slot in the aluminium and is held by its own ground clamp.

Some shrink sleeve ensures that the signal outputs are not shorted by the new mount.

Voila!

What’s inside a Beyerdynamic M260?

This is what happens when one dissects a couple of Beyerdynamic ribbon mics: bodies, grills, motors, transformers, XLR or DIN output connectors. Nothing surprising there….

But what are those grey plastic tubes?

These are in fact acoustic chambers that provide back pressure to the ribbon, changing it from its natural figure-8 pattern towards being hyper-cardioid. It is also critical to the microphone’s sound – if you make an M260 without one, it sounds pretty awful.
There is one more important ingredient to the mic, and that is a piece of string. This is stuffed into the chamber to break up internal reflections. Sometimes simple works!

MOTM Tannoy MD422 cardioid ribbon mic

Here is Tannoy’s cardioid ribbon microphone – the MD422.

Tannoy MD422 ribbon mic, front

Firstly, Tannoy lose a point for the name. ‘MD’ should surely mean “microphone dynamic” in any sensible society! Perhaps the D stands for “directional”? Who knows, but it puts them at odds with other the Sennheiser MD421, and it is just plain confusing.

Tannoy MD422 ribbon mic, rear

Whatever the D stands for, the mic itself has an industrial look, and this one is finished in a bronze-ish coloured paint. To the best of my knowledge this is the only cardioid ribbon model that Tannoy ever produced, and it uses an acoustic labyrinth to provide the necessary back pressure to the rear of the ribbon. The chamber is the black cylinder in the photo below.

Tannoy MD422 ribbon mic, chamber
Some of the parts were made to a budget, or perhaps a short production run, with thin stamped metal for the base and top cap, along with two layers of off-the-shelf mesh to protect the mic from dirt and wind.

The ribbon assembly and magnets are the same as found in the type 2 Tannoy ‘pitchfork’ microphone, which would have saved costs by sharing components.
Tannoy MD422 inside, showing ribbon motor

The MD422 was subject of a BBC technical report, which concluded:”..this microphone has nothing to commend it for use in the Television Service“. That assessment seems rather harsh, but at the time the Corporation’s selection criteria were flat, uncoloured responses and good signal/noise performance.

In the report, the bi-directional BBC-Marconi AXBT was used as a comparison, which was much more expensive, a different pattern, and therefore a tough benchmark. Cardioid (and non-directional) ribbon mics generally use an acoustic chamber on one side of the ribbon to apply pressure, and this damps the ribbon motion, reducing the output compared with its natural bi-directional response.

Drawing of the Tannoy MD422 from BBC technical document.

Unlike my mic, the BBC’s example had a yoke mount rather than a fixed base, although there are mounting screw holes in the side of mine.

Despite my irritation with the model number, and the BBCs damning assessment,  I like this microphone very much. It has a gentle warm tone. More importantly, it was an attempt at technical innovation, which is always to be celebrated.

Reslo Dynamic microphones

Reslo are of course best known for their ribbon microphones, particularly the RV and RV models, However, it should not be forgotten that over the decades they made many dynamic microphones, and even some condensers too.

Reslo VMC with base station

The earliest Reslo dynamics seem to be the VMC and VMC2, with the initals standing for Velocity Moving Coil. These had a big heavy permanent magnet and a paper diaphragm, and are really rather lo-fi devices. These two models are more or less the same inside, although the VMC was hard-wired, and the VMC2 had a new grill and an output plug.

Reslo VMC2, with output connector.

In the late 1960s Reslo made a range of more modern light hand-held dynamic mics. The UD1 used a Japanese-made capsule which sounds rather good, of comparable quality to the Shure mics of the era. I have seen transformerless 200 ohm models, and also a dual output 30 & 600 ohm version with a transformer in the body to convert the impedance.

Reslo UD1 microphones

The UD1 was apparently used by Bob Dylan at the 1969 Isle of Wight festival!  Here is an advertisement scan from the Reslosound blogspot….

The advertising also mentions a high impedance model, although I haven’t come across one yet.

Some of the UD1 mics were hard-wired to the cable, and it was also supplied with a Reslo connector, and later a 3-pin din plug, with different impedance options available through the different pins. They are wired like this, with one side of the capsule and transformer primary wired to the output socket.

In addition to the UD1, there was a short stubby version that used the same components, and would often have been used with a gooseneck adapter. Pictured below is also a smaller dynamic mic for use with a tie clip.

These models appear to have been replaced in the 1970s by the Reslo Superstar range, which were essentially the UD1 with an updated body and grill. The Superstar was supplied with a DIN plug – I have converted this one to XLR.

Reslo Superstar 80 dynamic mic.

SJT, May 2014

Film Industries M5 dynamic microphone

Film Industries Ltd. are perhaps best known for their M8 ribbon microphone, but what about models M1 to M7? Well, here is 14.286 % of the answer: the M5 moving coil microphone.

Film Industries M5 moving coil microphone

This model was likely to be a competitor to the Reslosound VMC, and like the Reslo, the M5 features a paper diaphragm driving a moving coil in a magnetic field. The output is wired to a pair of screw terminals, for easy wiring without the need for a custom connector. It does not have a separate ground connection.

The large black rubber cylinder at the base is supposed to give some vibration damping, although perhaps not enough to make a major difference.

Although a 30 ohm mic, this one at least has a strong output, due to the large strong magnets.

And here’s a somewhat wiggly frequency sweep of the mic:

Reslo Beeb Commando!

Here is a custom edition of our popular ‘Beeb’ modified Reslo ribbon mic. This is the first, and so far the only one we have made in these colours.

Like all of our ‘Beeb’ mics,  this features an upgraded 300 ohm output transformer, new ribbon and XLR socket. This special edition as well as a switchable high pass filter inductor to balance the proximity effect when used close to sources.

The custom camouflage colours makes it suitable for undercover operations, and even better for guitars and drums!

MOTM: Reslo NC-RB Lip microphone

Our Microphone of the Month for April is this rare oddball from Reslosound: the NC-RB.

This was Reslo’s attempt at a commentator’s lip microphone, and appears to be cobbled together from spare RB parts. The upper body and head are from an RB, but the head is rotated through 90 degrees and screwed to another chopped-down head.  The lower body-stroke-handle is a straight aluminium tube with a switch which terminates in a normal Reslo output socket.

Inside the head is a rotated  RB-style motor.  The magnets face the speaker, to provide some pop protection for the ribbon at the rear.

Behind the ribbon I found this metal baffle, which should control the pickup pattern and tweak the frequency response. There is also fibre glass and felt wadding for more protection.

Overall it is a strange little mic. The ribbon runs horizontally, which is generally considered a bad plan as, if it sags, it will droop into the metal pole pieces. They must have been a way of producing a lip mic without the expense of re-tooling for a completely new design. I have only ever seen this one, although I know of a customer who owns another.

What does NC stand for? “Not a Coles”, perhaps?

B&O BM5 and BM6 magnet upgrades

A while ago, I blogged about some magnet upgrades for the B&O BM3 and BM4 ribbon mics that greatly improve the signal-to-noise performance of the mics. We have similar magnet upgrades for the later BM5 and BM6 models.

Dirk at V76 Studios in Hamburg was kind enough to share some sound files of his BM5 stereo set, recorded before and after we fitted new magnets and ribbons. Here they are…

‘Blackbird’ recorded with his stock BM5, before the modifications


Download file

‘Blackbird’ recorded with the upgraded BM5, with new magnets and ribbons

These are Dirk’s impressions of his recordings…

“The difference is amazing. The mic sounds awesome now. It’s about 10-12 db louder (needing only 52 db for the front for finger picking now) and it has got much more treble and presence. Still it sounds smooth and wonderful rich, without losing the transients. This mic is killer for acoustic guitar now, and also as a room mic. I also compared it to my modified RB500 Mics (with cinemag 9888 Transformers) and the BM5 now has 6 db more output and is sounding so much better. Also the Beyer M130 doesn’t match it by far, IMHO.

“Both were recorded with the BM5 (60 degree angle pointing towards neck and bridge) into a TRP Ribbon Mic Pre direct into RME Converter into my DAW. No lowcut. The older recording would have been 10-12 db lower with the same TRP-Gain. For a better comparison, I choose to normalize both files. Still the new one sounds louder, brighter and more detailed. The noise floor of the older recording is clearly audible, and unnoticable with the new one – due to the 12 db more output of the mic.”

Update 21 Feb 2015.
Here are some comments from Andy at Superfly Studios in Nottinghamshire, UK, about his B&O BM5 with magnet upgrades and new ribbons.

“I’m so happy with these microphones. They have been absolutely fab to use over the past few days.
First session in was an acoustic folk duo, I used the B&O BM5 on one of the guitars and it just sat straight into the mix and sounded great. Picked up all the detail of his picking and sounded nice and rounded on the full-on sections. Just the right amount of highs for my taste as well, I normally use a 414 for acoustic and cut some of the top end, but I’ve got a new favourite now.

Also used the B&O for the drums today and it sounded great in the room, I love using room mics on drums and had the beeb reslo’s as a spaced pair about 8 ft away (10ft apart). Seems to always do the trick in the live room and the B&O just in front of the kit at waist hight. Sounded fantastic lovely sustain to the cymbals and picked up the natural ambience of the room.”

MOTM: Gaumont-Kalee Type 1492 ribbon mic

This month’s MOTM is the Gaumont-Kalee model 1492,

….made by British Acoustic Films Ltd. 
Both GB Kalee Ltd. and BAF Ltd. were subsidiaries of the parent Rank Organisation, which owned various other companies associated with the film industry, including Odeon Cinemas.
Back to the microphone – this specimen comes in a nice wooden box, and although is painted in a rather drab shade of mustard yellow, there is something pleasing about its proportions and utilitarian design. The grill has a coarse outer later and a very fine layer of woven wire inside.  It is designed to sit on a boom mount, like this (nicer looking) gold-painted example from Pinewood studios. 
Sadly we don’t have the mount, but as this shares a connector with the Reslosound mics, we can use a Reslo stand mount for it. None of the other parts are common to the Reslos, so they must have just sourced the connector from them.

Inside, the mic is a fairly conventional figure-8 ribbon mic, but has added baffles both sides of the ribbon, and thick wires run from the top ribbon clamp, giving some blast protection along the way.

The ribbon motor uses tapered triangular pole pieces, which compensate for the decrease in magnetic field with increasing distance away from the two block magents, and ensure a more even magnetism along the length of the ribbon.

And of course there is a suitable transformer in the base to convert to a sensible impedance – in this case 50 ohms. The mic sounds rather nice, rich and dark close up – it may make a vocal session very soon! 

Lustraphone Lustrette – dynamic mic

Here is a little Lustrette LD/61 – a charming little egg-shaped desk microphone by Lustraphone.

I picked this one up with a couple of crystal microphones, and for a long time I had wrongly assumed this to be a crystal too. But when I opened it up I found a dynamic capsule and step-up transformer. I should have guessed from the model number – ‘D’ usually means dynamic.  In fact it features in a Lustraphone product catalogue that I posted earlier – so I have no excuses!


Lustraphone LD/61 inside

The mic comes in a stylish box, with a picture of the mic, so you know what you’re getting.

The dynamic element looks similar to the one found in the more common C51 model, and it is possibly the same mic in a different package.

…I’m gonna take my Ribbon to the United Nations….

Back in 1954, Bang and Olufsen BM3 ribbon mics were installed in the United Nations building in New York . The mics were chosen for their lack of feedback, and are clearly visible in these video clips of  Lester Pearson speaking about the Suez crisis.

Lester Pearson speaks into two B&O mics at the UN

Pearson later won the Nobel Peace prize for his work, and became president of Canada. Perhaps those little Danish microphones played a small part!

B&O were justifiably proud of their mics being chosen for the UN – here is a document from the time…

And a translation from the Danish….

“As we previously mentioned to you, we have received a message from our US representative, Fenton in NY, that the UN uses our BM3 microphones throughout the UN building in NY. They chose the B&O mic and an American mic because only they, out of several hundred different manufacturer products that were tested, did not give rise to any acoustic feedback in the several hundred loudspeakers that are mounted in the ceiling of the UN general assembly building. Our mic also had an advantage over the US product as it didn’t hide the speaker’s face, which is important with regards to film and TV reporting. The microphones have been in use in the UN since 1st October this year. The newspaper INFORMATION recently had an article with a picture that depicted the Canadian foreign minister , Lester B. Pearson , at the podium in front of B&O microphones when he presented his suggestion for involvement in Egypt. Via our advertising bureau we managed to send out a press release under the title “Danish microphones at the UN podium”, and a whole selection of magazines included the picture and advertisement. We have attached the picture for your information – Next time you see the program AKTUELT in TV with recordings from the UN building, take note of our microphones, they are clearly visible.

“Our American representative has also undertaken an investigation that shows B&O micophones are used at, amongst others:
[Mercury, ABC and Decca]
“We have large orders from Fenton conmpany for microphones and pick-up units, and the advertising that Fenton performs in the American technical journals has the effect that we receive requests from other countries. This has resulted in that we have recently sent 10 samples to Australia and samples to Hong Kong, and other countries are also showing interest.
“Likewise we have significant orders for AC motors from Norway, where we compete with German and English manufacturers, and samples of this product has been sent to other countries.


30th Nov. 1956

Bang and Olufsen BM5 grounding issue

Some Bang and Oulfsen BM5 stereo ribbon microphones are prone to hum on one channel. This is because the top half of the mic rotates around a plastic collet ring, but is only grounded through contact to the lower half of the metal body. With time and use, the contact between the two halves becomes loose, and the upper body is no longer grounded properly.

B&O BM5 stereo mic

The problem only occurs with early versions of the mic. Later, B&O recognised the problem and re-designed the mic’s rotating ring giving it an additional metal lip, so that the upper mic rotates around metal, ensuring good grounding contact at all times.

If you have a an early mic, in most cases the hum issue can remedied by improving contact between the parts as follows. Here are some tips, but remember that there is a delicate ribbon inside, so go slowly and if in doubt send it to someone more experienced!

1. Carefully remove the top half of the mic, and loosen the two grub screws at the base with a screwdriver of the correct size. Don’t lose these little screws – if you do then they are M2 thread!

2. Slide off the ring and put the rest of the mic somewhere safe.

3. Flip the ring over and rub over some fine abrasive paper to remove any dirt and oxidation.

4. Gently run the fine abrasive paper around the bottom of the metal tube that will make contact with the lower ring.

5. Replace the lower ring and tighten the screws, making sure that the metal parts are properly aligned and make good contact. You want a close fit between the tube and ring.

6. If that doesn’t work, addition of a strip of copper tape to the plastic collet can improve the electrical contact between the two parts. The tape will eventually wear out if the mic is constantly rotated, but many users tend to keep the same angle for most applications.

SJT, Feb 2014

RCA 74A and 74B ribbon microphones

Happy 2014!

Here is a lovely pair of RCA junior velocity ribbon microphones awaiting service, a 74A and a 74B. We see a lot of ‘B’ models, but the earlier 74A (left) is quite rare by comparison.

RCA 74A (left) and 74B

Externally, the mics are similar in size and shape, but the 74A has a yoke mount and looks more like a baby 44BX, whereas the 74B has a fixed or swivel mount at the base of the mic. The ‘A’ model also has larger grill holes.

RCA 74A (left) and 74B ribbon mics inside

Inside, the ribbon motor assembly is the same although the mounting arrangements differ. The 74A motor (left) is screwed directly to the frame, whereas the ‘B’ is suspended by four small rubber mounts. The yoke would absorb some vibrations transmitted through the mic stand, and so the rubber parts were possibly introduced to compensate for the loss of the yoke. The earlier transformer has two outputs at 50 and 250 ohms, whereas the 74B transformer also has a high impedance output for public address use.

One can only guess about the reasons for the evolution from ‘A’ to ‘B’ models, but these things usually comes down to performance and economics, with fashion and marketing also playing a part. Losing the yoke might reduce costs, but adding the suspension and the swivel joint would probably balance this, so it is hard to tell.

Both mics need new ribbons!

The amazing Coutant website has a scan of a data sheet for the 74A.

Ribbon mics in action

I am lucky to have many great customers, and some are kind enough to take the time to share their music and other projects. It is always gratifying to see how these mics are used once they go back out into the ‘wild’.

Hewdie is a long-standing customer who was kind enough to send in a copy of his excellent new album.  I have serviced many of his ribbon mics over the years and these feature extensively on the recordings – including a B&O BM3, RCA 74B, Lustraphone VR53 and a couple of Beeb Reslos. The album is well worth a listen.

Andy Wright used his Beeb Reslos to record The Kimpton Players in their radio play production of Noel Coward’s “Brief Encounter”. Here is a photo of the Beebs in action…

And Jose Estragos was kind enough to send in these photos of his band Los Brandys, in action with their fine Reslo CR microphones. I will let you guess their influences!

Producer Tony Fitz used a pair of our ‘Beeb’ modified Reslo RBs for the drum overheads in this track..

And here’s how the drums sounded in the final track Stay by Free Manhattan

Have a great Christmas & New year – and good luck with all of your holiday projects.
Stewart
Xaudia

‘The Beeb’ Reslos – also in black!

It is time to down tools for the holidays – this year we are part way through preparing a new batch of modified ‘The Beeb’ Reslo ribbon mics. The Beebs get a new ribbon, new transformer and XLR upgrade, along with a few other small tweaks. These will be available in January.

This batch now have their own metal badge, which looks great. In addition to the usual chrome and hammertone mics, we also have some rather smart looking black microphones, which have a tough powder-coating finish.

The sound is still the same 🙂

I thought this was a switch… but it isn’t!

I had expected the red thing on the rear of this Amperite RB ribbon mic to be a simple on-off switch:

Amperite RB – switch on rear
In fact the knob is connected to a cloth-covered metal plate which slides up and down, blocking the rear of the mic. This is a mechanical method of altering both the pickup pattern and the frequency response.
Inside the Amperite – sliding plate, blurry photo 🙁

When open, the mic will be a normal figure-8 pattern. Closing the vent will reduce pickup at the rear, and also make the mic sound brighter by reducing the proximity effect.

Open and….
… closed

The mechanism is not as sophisticated as, for example, an RCA 77DX, but at least they made an early effort to offer engineers a new flavour.

Well done Amperite!

MOTM – Melodium RM6

As promised (or threatened), MOTM is back, and December’s microphone of the month is the Melodium RM6.

Although much much smaller in size than the Melodium 42B, the RM6 takes some of its design philosophy from its predecessor. The motor assembly has horseshoe magnets above and below the ribbon (like a tiny RCA 44BX), and an inductive filter with multiple cut-off frequencies. It also has an obsolete and hard to find proprietary connector, albeit a different one from the 42B.
The body is made from cast metal which has a tendency to crack, and the first challenge is to get inside the mic without damaging it. There are three tiny metal pins pushed through the mic that fix the grill to the lower body of the mic. These need to be pushed all the way through the mic so that the grill can be removed, and usually these can be found stuck to the magnet, although one will inevitably go missing!

To remove the mic completely, the connector must be unsoldered and the switch tip removed. Once inside, we see something that looks like the Easter Island statues!

The ribbon is hiding behind the baffles, and the motor requires quite a lot of disassembly before the ribbon can be accessed. The ribbon itself is about 1.8 mm wide, so a bit fiddly to fit. Like most mics of a certain age, half the problem is that the ribbon has become oxidised and stiff, and the other half is small particles of wild iron that that have become stuck between the pole pieces, preventing the ribbon from moving freely.

Removing the strong magnets made cleaning and re-ribboning a lot easier! The transformer and filter inductor are housed in a mumetal can, screwed beneath the motor assembly and above the filter switch.

As usual, the mic sounds best without the high pass filter engaged, although I can imagine it being useful to compensate for proximity effect when close micing some instruments.

There doesn’t seem to be much information about this mic available on-line, but I have scanned an old Melodium catalog featuring the RM6. There is also a French language review of the RM6 over at Audio Fanzine. They seemed to like it, and gave the mic 9 out of 10!

The Dead Zone….

Here is some amusing copy from the box of a Grundig GRM1, a.k.a.  Lustraphone VR53. Above the nice diagram of the the figure 8 pattern, it proudly states “There is virtually no sensitivity at right angles to the microphone front, and this we call the “Dead Zone”. Now we know what to call it!

The Xaudia blog has also been a bit of a dead zone in recent weeks, due to lots of repair work coming in. Things are getting back under control, so more microphone related posts and info will be coming soon!

Lustraphone desk mic or speaker?

Here’s a funny little thing from Lustraphone, found on ebay…..

This was sold as a desk microphone, but it may actually be a small speaker. Or both! It looks very stylish, with tolex covering and brushed nickel finish.

The ‘device’ measures 600 ohms at 1KHz, and 50 ohms at 100 Hz. Inside, the dynamic element looks more like a small speaker than a mic element, although of course the two things are fundamentally the same technology. When wired as a mic it is pretty lo-fi with a narrow bandwidth. And it does transmit as a speaker too. My guess is that it was part of an intercom system and serves both purposes.

Whatever the intended purpose, one can easily imagine this on a gentleman’s desk, so that he could talk to his secretary whilst smoking a pipe and considering important, worldly matters… like this chap!

Microphone Impluse-Response Project (MicIRP)

I have created a new blog called MicIRP, which is a contraction of The Microphone Impulse-Response Project. 

MicIRP will run in parallel to the Xaudia microphone blog, and aims to share impulse-response (IR) data from the many interesting old mics from our own collection and that come in for repair

The IR files can be used with convolution reverb programmes or plug-ins such as TL Space or Waves IR1 to simulate the sonic characteristics of the microphones. So they can be considered as filters or tiny spaces to modify your sound.

I have uploaded files for about 35 microphone to get things started, and will be adding many more mics as and when the opportunity arises.

And it is all completely free so have fun!

Stewart

Cadenza microphone patent

Here is a UK patent by Eric Thompson of Simon Equipment Ltd, from 1959, that relates to the Cadenza ribbon microphone:  Cadenza Patent

Drawing from patent for Cadenza microphone

The novelty in this patent is that the ribbon is fixed in the middle and clamped at either end. The inventors claim that this allows the two halves of the ribbon to be tuned to slightly different frequencies to give a flatter overall frequency response. I had suspected this for some time, but had never seen it written down! It also has the advantage of supporting the ribbon and giving it some protection against stretching. And here is a photo of the design in real life, from an earlier post.

Upgrades for B&O microphones.

Bang and Olufsen BM3 ribbon mic

Regular readers will be aware that I am a big fan of B&O microphones, and have serviced quite a few of them over the years. Whilst these mics are stylish and look great, the output levels can often be disappointing, restricting use to sources like guitar amps and drums. The low sensitivity is usually due to weak magnets and the fact that the early microphones have an output impedance of 50 ohms – an older standard. With some work we can make these handsome microphones sound as good as they look.
B&O BM3 deconstructed

Firstly, a replacement transformer can be used to convert the microphone’s output impedance. The stock transformer in the early BM2 and BM3 microphones has a ratio of about 1:20, and with the thick wide ribbon gives an output impedance of 50 ohms. Switching to a 1:40 transformer will give  an increase of 6dB and raise the impedance to about 200 ohms – Xaudia make such a replacement. With a thinner and lighter replacement ribbon, the output and impedance will both be a little higher.

New magnets!

We also commissioned a batch of custom magnets for BM2, BM3 and BM4 microphones* which greatly increase the magnetic field, and therefore the output level. The magnets in an old BM3 typically have a field strength of 1000 to 1600 Gauss, whereas the replacements give a field of around 6500 gauss – a three or even four fold increase in magnetic field strength, which translates, at least in theory, to a 9dB to 12dB increase in output.

Here are some frequency response plots from three B&O BM3 microphones.

B&O BM3 with new ribbon (blue), new transformer (green), and new magnets (red)

Red = new ribbon, upgrade transformer, new magnets.
Green = new ribbon, upgrade transformer, stock magnets
Blue = new ribbon, stock transformer, stock magnets.

With the full upgrade, the output level is raised by about +18dB, which transforms the mic into a much more versatile recording tool that can be used for acoustic instruments as well as the usual louder sources. If your B&O mic needs a new ribbon, then it is well worth considering a magnet and transformer upgrade at the same time.

*We have similar magnet upgrades for the BM5 and BM6 mics.

Reslosound VMC2 Velocity Moving Coil

Here is a nice looking Reslosound VMC2 microphone, successor to the VMC, which (probably) stands for Velocity Moving Coil.
Reslosound VMC2
As far as I can tell, the only real difference between the original VMC and this VMC2 is that the newer model has a slightly different grill, and a three pin Reslo output socket instead of a fixed cable. Inside, both mics have the same heavy paper diaphragm and coil.
Reslosound VMC2

The badge proudly declares that this specimen is a low impedance 15 ohm model.

Reslosound used a fibrous paper to manufacture the diaphragm, and the coil is simply glued to the paper tube at the rear. In fact the technology looks very similar to early speakers.

Reslo VMC2 coil and diaphragm.

When I plugged it in, the mic gave a very lo-fi sound – even more distorted than one would expected for this era. On investigation, there were some metallic particles sticking to the diaphragm, preventing it from moving freely. The paper cone had also become detached from the diaphragm.

Diaphragm from a Reslo VMC2

The remedy in this case was to carefully unsolder and lift the diaphragm and coil. Then I used a magnet and paint brush to flick and drag the dirt away, both from the diaphragm and from the magnet below.

Reslosound VMC2 magnets
Once the obstructions have been removed, the cone was then lightly glued back using some clear nail varnish, and then replaced in the magnet gap, ensuring that it was centred and free to move. This greatly reduced the distortion.


In use, the mic is slightly boxy sounding, with a steep roll off at the bottom end and some dramatic peaks and dips in the response. It very obviously sounds like an early dynamic mic!

Reslo VMC with base station

For comparison, here is a Reslo VMC with announcer’s base station. Note the difference in the grill, with five horizontal slats, as opposed to three vertical.

Reslo microphones in disguise

Reslosound sold numerous microphone models under their own name, and also made microphones for other brands. This Reslo RV was made for GB Equipment Ltd, and has a funky maroon logo on the top.

This one is labelled RVH – the ‘H’ means high impedance output.

I have also seen and serviced RV models with a Philips badge.

VOX badged Reslo RB

The common Reslo RB models were also sold under the VOX and GEC brands. This Vox mic is identical to the Reslo badged model, apart from the badge.

GEC badged Reslo RB

The GEC mics are painted black and given the model number BCS 2378, but it is simply a Reslo
RBS.

In addition to these re-branded models, many Reslo mics were sold as parts of sets with Ferrograph recorders, and it is common to find Reslos in a Ferrograph box, usually with a matching transformer.

Update January 2015: Here is one more for the collection – a rather scruffy Philips badged Reslo RV seen on eBay.

A few thoughts about ribbon mic transformers… part 1

Film industries ribbon mics

When describing ribbon mics on this blog, I often note the output impedance of the mic, and possibly the transformer ratio too. Occasionally I receive messages asking how the impedance relates to output level, so here I will try to outline the role that the transformer plays in a ribbon mic. A ribbon mics is a very simple device, and if we consider how it works we will see just how important the transformer is.

In the beginning…. Let there be mics!

If we place a thin, light strip of corrugated aluminium* foil in a magnetic field, it will move in response to sound waves, and, just like an alternator, will induce an electrical potential that oscillates with changing velocity. We have a ribbon microphone!

Tannoy mic – ribbon, magnets and transformer

But to get a useful signal out of the ribbon, we must complete the circuit and connect it to something. Because the voltage of the signal is too low to connect directly to a mic preamp, a transformer is used to increase the output to a more usable level**. So far so good, but what kind of transformer do we need? That depends on the destination of the signal and how far it has to travel to get there.

The Good Old Days
In the early days of sound recording with ribbon mics, the destination would usually have been a tape recorder of some kind, with a tube preamplifier to receive and boost the signal from the microphone.

The mic could be connected in two ways: the budget option would be a high impedance connection using an unbalanced screened cable through a capacitor and straight to the tube grid, just like a guitar! The drawback is that unbalanced, high impedance connections are prone to picking up noise, and parasitic capacitance will limit the length of cable that can be used before the higher frequencies become significantly attenuated.
A better approach is to use a balanced cable to a second transformer in the preamp. The balanced connection will give better rejection of noise and long cable runs can be used. With 30 to 50 ohm microphones it is possible to run cables for hundreds of meters, which was ideal for broadcast and film recording. For these reasons the early impedance standards for microphones in the UK were 30 to 50 ohms for professional use,  and high impedance for consumers. Broadcasters in other countries had different standards which just compounds the confusion – for example many Japanese microphones are 600 ohms.
The impedance can be set using the output transformer:  Let us make an imaginary ribbon microphone for some thought experiments! In our imaginary microphone, the ribbon in the magnetic field might produce a signal of 1 mV for a given sound level, and the aluminium itself might have an impedance of 0.2 ohms. But the transformer primary winding also has some resistance, and that would add another, say, 0.1 ohms to the impedance of the primary circuit to give a total of 0.3 ohms.

Film Industries transformer dissected

So we will make the transformer with a 1:10 ratio. This increases the impedance by a factor of the ratio squared, so in this case we need to multiply our 0.3 ohms from the primary circuit by 100, which gives 30 ohms.  The secondary winding also has resistance, which might be of the order of 2 ohms, and we need to add that in. So overall we have a 32 ohm impedance for our microphone, which is suitable for older 30/50 ohm equipment.
What about the output level? The 1mV signal is multplied by the transformer ratio, so we now have 10 mV output, which equates to a 20dB increase in signal.

This Is The Modern World
Over the decades, broadcast and recording equipment has become more standardised, and most modern mixing desks and dedicated mic preamps are made to work well with microphones of up to around 600 ohms.

Ribbon microphones tend to have low outputs compared to modern dynamic and condenser mics, so it is advantageous to squeeze out as much level as we can. So, let’s go back to the transformer in our imaginary ribbon mic and re-design it for use in the today’s recording environment. We can keep the same primary winding, but change the secondary winding to one with a higher turns ratio.

Xaudia ribbon mic transformers being assembled

Let’s make it a 1:32 transformer, so now we need to take our 0.3 ohms from the ribbon and primary winding and multiply it by 32 squared, which gives 307 ohms. Once again we need to add the resistance from the secondary winding – in this case the wire is not only longer from the extra number of turns, and also will be thinner because we have squeezed the extra turns into the same space. A typical value would be 20 ohms, which would give us 327 ohms altogether, which most modern preamps can cope with quite happily.

Our output level will now be 32 mV, or 30dB gain with respect to 1 mV. So we have an improvement of +10dB over the 32 ohm transformer.

No Free Lunch
In life, and in physics, we know that you don’t get something for nothing. So are there any drawbacks with increasing the ratio. The higher impedance can increase the resistance noise, so it is important to make sure that the transformer is well designed with a very low DC resistance, particularly for the primary winding. However, the extra 10dB could be the difference between asking 50 dB gain from the preamp, or cranking it up 60 dB gain, where many preamps are becoming noisy.

Ancient and Modern
In most cases, it is worth getting the transformer right and demanding a bit less from the preamp. With vintage ribbon microphones it is very often possible to re-wind the original transformer to a higher ratio to get more output from the microphone. If the original laminations and winding style is used, the vintage tone of the mic can be retained, and overall this can give a stronger signal and a better signal-to-noise ratio into modern equipment.

Vintage Ferrograph and Wearite matching transformers

Another option is to use an impedance matching transformer. Back in the 1950s and 60s, most manufacturers of ribbon mics sold transformers to solve all kinds of matching problems. One example is this line matching transformer from Reslo, which connects a low impedance mic to a high impedance tape recorder. Xaudia make impedance matching transformer boxes with XLR fittings to do exactly the same job in a modern studio.

In part 2 of these ramblings I will discuss the effects of the transformer’s inductance and resistance characteristics.

*Usually corrugated, and usually aluminium!
** Almost always. I have seen one example of a transformerless ribbon mic, but it is a crazy design!

Something old and something new – STC Coles 4038 and 4050

A good customer brought in his Coles 4050 stereo microphone for show-and-tell, which gave us a good opportunity to compare and contrast with some of the STC-Coles mics from the past.

STC4033, 4038 and Coles 4050 microphones
On the of the photo left is the imposing and impressive STC 4033, which contains both a ribbon mic and a ‘ball & biscuit’ dynamic element. These combine to give a cardioid pattern, which was difficult to achieve at the time. 
In the middle sits a 4038, which is perhaps the classic British broadcast ribbon – designed by and made for the BBC. This one was made by STC, and they are still made to the same design by Coles Electroacoustics. The soap-dish styling is dictated by the large horseshoe magnet inside.
The 4050 stereo mic is on the right, and looks very different again. It is a more modern styling but form still follows function, and strong neodynium magnets are used not only for the ribbon motor, but also to fix the mics to the stand mount. This allows free rotation and makes setting up for Blumlein pairs very quick and simple.
Frequency sweeps of 4050 (top, red & yellow) and 4038 (bottom red)

We ran a frequency plot of both halves of the 4050, and of the 4038.* Both mics sound very good, and although the old 4038 had a smoother top end roll off, the 4050 had an extended about +6 dB higher output and an extended frequency response. We were also very impressed with how well matched the two 4050 ribbons were – less than ±0.5dB across the range, and mostly much better than that.

The 4038 is prettier though!

* Taken at 30 cm distance. Please note that some of the bumps are due to our test chamber – there are issues with calibration when comparing a figure 8 ribbon with an omnidirection reference mic.

Thanks to John Gooding

Fi-Cord FC1200A tube microphone

This nice Fi-Cord 1200A tube microphone arrived without a power supply… so we built a new one!

The problem with these mics is that they are filled with resin, and it is almost impossible to get inside them. The mic has a Nuvista tube (like the AKG C28c) somewhere deep inside. Thankfully this one was working well so it just needed a new cable and an Xaudia custom power supply….

These mics were designed and built by Calrec, so it should be no surprise that they sound really good! There is a bit more information about Calrec Fi-Cord mics at Saturn Sound.

Thanks to Santiago Ramos

BBC-Marconi Ribbon Microphone Type B

Our microphone of the month for September is this a rare and lovely BBC-Marconi ‘type B’ ribbon microphone. The type B is closely related to the ‘A’ series of mics (AX, AXB and AXBT) which were made from around 1935 onwards. The model B was made from 1937 onwards and used the same  motor assembly, but with a smaller (yet still massive) magnet and without the ribbon tension adjustment facility.

BBC Marconi type B, side view

The smaller magnet format allowed the mic to be packaged into a smaller cylindrical body, and these were apparently were often used for outside broadcast, attached to the chest of the broadcaster! One would have to be pretty strong to carry that around all day.

Although this is widely know as the model ‘B’, the nameplate calls it 8559A.

BBC Marconi type B badge

As well as the outer grill, there are two extra windshields inside the mic, which would have protected the ribbon from wind blasts and dirt. These windshields did their job well – in this example, the ribbon is unbroken, but this has oxidised and stiffened over the years and will need to be replaced.

BBC Marconi type B ribbon motor

The magnet and motor assembly are held in place with foam rubber, which has mostly survived the years. The output transformer is hidden behind the magnet. This had a break in the secondary winding, but luckily I was able to unwind it by a single turn and bring the mic back to life.

BBC Marconi type B, transformer

At the rear of the mic, connection to the outside world is made by three screw terminals, and square bulge at the bottom shows the location of the transformer.

BBC-Marconi ribbon mic, rear

Overall, the mic sounds warm and rich, although the metal can gives it a certain ‘boxy’ sound that instantly defines it as a very old microphone!

There is some more info about the BBC-Marconi ribbon mics at the Coutant and Orbem websites.

Thanks to Tom Barwood

The Americans are coming

Here is a trio of American model R331 ribbon mics…

American R331 microphones
These rather pretty looking mics made a brief appearance in Back to The Future (at the end, where Marty sings Johnny B Goode….)
Is this the DeLorean of microphones? No.
The mic can be set to either low (50 ohms), medium (250 ohms) or high impedance using jumpers and clamps hidden behind the badge. The inside of the mic looks like a bowl of spaghetti where all the wires from the transformer are run out to the panel.
Impedance settings for the R331
The mic also has a block of wood in it! In fact American Microphones made a range of three ribbon mics, and the sister models – the DR330 and DR332, both employed a dynamic capsule as well as the ribbon motor. In the R331, the wooden block fills the space which would otherwise be occupied by a dynamic capsule – a low tech but effective solution to the problem.
The motor is simply made of two magnets screwed and welded to a metal frame, and the ribbon itself is about 2.1 mm wide. This one needed some welding and a new ribbon, but once repaired sounds nicely balanced for a vintage ribbon, with the transformer rolling off some of the bottom end to compensate for the proximity effect. 
American R331 ribbon motor assembly 

There is a lot more information about the R331, DR330 and DR332 at Coutant.org

Thanks to Myles Davis

Lustraphone Badges in stock!

I see a lot of Lustraphone VR53 mics around that have lost their original badges – like the ones on the left and right. The glue that was used wasn’t great, and they look rather sad without their original nameplate.

Replacement Lustraphone badge

I am delighted to say that we have just taken delivery of some replacement badges for these that look absolutely fabulous. They have a silver logo on a vintage cream background, just like the originals.

Lustraphone VR53 with new badge!

They of course also fit the Grundig, Pamphonic and Mimco badged versions of the VR53, and also some of the small Lustraphone dynamics too.

Lustraphone dynamic with new badge!

The badges are £5 each plus post from the Xaudia website.

(Thanks to Best Badges for their excellent service!)

Ervox R58 – French ribbon mic

Today on the bench we have an unusual microphone from France. I have never heard of this brand!

Ervox R58 ribbon mic

The Ervox R58 is a high impedance ribbon microphone designed for public address or home taping to a reel-to-reel recorder. It is made from a two part cast body, perhaps inspired by the RCA Varacoustic, and is nicely finished in hammertone paint. Paint still covers two of the screws, so I can see that I am the first person to look inside this one, which is always a nice feeling, like unwrapping a present!

Ervox R58, rear

Inside the mic everything looks nice and clean. The motor is built around a sturdy block of clear plastic with a large horseshoe magnet to the rear, and the ribbon itself is a piston-style design similar to those found in B&O and Altec microphones.

Inside the Ervox R58

Unfortunately the transformer is not working properly – the inductance measures only 14 microhenries, which for an (estimated) 0.2 ohm ribbon would make a HPF filter at around 2KHz… I’m sure it can’t have been designed like that, so one suspects either insulation breakdown and a short, or the laminations have deteriorated with age and lost some permeability.

Ervox ribbon motor assembly

I’m not sure if it is worth the effort of re-winding this one, particularly if the lams are below spec. Luckily we can make a new low impedance tranny for it and bring it back to life.

The previous owner kindly included this scan of a wiring diagram for the mic.

Beebs to Belgium!

We have just shipped this rather lovely set of Reslo microphones to Thomas at Le Lupanar Studios in Belgium. He will be recording a brass section with two of our ‘Beeb’ Reslos, and a pair of upgraded cardioid Reslo CR mics on goosenecks.

His studio is still under construction but Thomas has been making a photo diary of the project – from the pictures so far it will be an amazing facility in a great location! How’s this for soundproofing…

Good luck with the building, and we will watch with interest as it all comes together.
🙂

Reslo Beebs in Organ Action

Organist Andy Wright used a pair of our Xaudia Reslo ‘Beeb’ ribbon microphones to record his organ playing at St Peter and St Paul Church, Kimpton, Hertfordshire.

Reslos at St Peter and St Paul Church, Kimpton

He kindly sent in this brilliant photo, and an .mp3 file too so that we can hear how it sounds! 

Organ recording with Beeb Reslos – Andy Wright.

(Or download the file)

The recording was made with the mics plugged straight into a Tascam DR100 mk 2 and recorded in wav mode, then compressed to mp3 in Soundforge.

In the eighties and early nineties Hyperion Records used the organ to record classical music, including string quartets, piano solo and the Kings Consort doing The Four Seasons. Eventually Luton Airport, about 8 miles away, got too busy!

The Reslo RB mics are perhaps most famous for being used by the Beatles in their Cavern Club days. As a young photographer, Andy was assigned to one of their early gigs, and here are some of those photos at the Daily Mail website.

One of Andy’s photos of the Beatles

You can see more of Andy’s photos at his website.

Stereo guitar switching box

Carrying on from my previous post….

Matt from Bobby and Jemima, had one of our stereo pickups fitted to his guitar. For stage use, we made him one of these….
3 channel guitar switch box

 It’s a very simple custom 3 channel foot-switch box, which lets him control each of the bass, treble and rhythm channels separately. I was pleased with how it came out. Hammertone paint always gives things a 1950s industrial look.

The battery just lights the three LEDs, and should last for ages, so long as the cables are unplugged when not in use.

Pickup fitting with Bobby and Jemima

I recently installed one of our hexaphonic pickup systems into a a guitar for Matt Shaw, who is one half of Bobby and Jemima.

Bobby and Jemima… AKA Charlese and Matt (not sure who is who!)

Matt provides a large chunk of the music for the act, playing guitar and drums – often at the same time – and he wanted to be able to send bass runs on the lower strings to a bass amp whilst simultaneously playing the melody and lead from the top strings out through a guitar amp. No problem at all!

I fitted a hexapup to the bridge position, wired out to a pair of output jacks, and an additional toggle switch gave the option of sending the G-string to either the bass or treble output. And we put one of our new P90 pickups in the neck position, with its own output for a third amplifier. Now Matt can make a lot of noise with one guitar!

Many thanks to Karen Duckworth who hung out with us for the afternoon and took these marvellous photos.

Lots of mess during the pickup transplant.

All stripped down and ready for the new pickups

Xaudia’s Meteor coil winder, and lots of wire!

Some fine tuning of the setup
All done!

Inside the Beyer M360 (again) …

Beyer M360 cardioid ribbon mic
Back in May I posted about the Beyer M320 and M360 directional ribbon mics and mentioned that they used acoustic labyrinths to provide damping to the ribbon, adding omnidirectional character to the ribbon’s native figure-8 pattern, to give, hopefully, an overall cardioid behaviour.
Since then I have had the opportunity to peek deeper inside the M360, and below is a picture showing the labyrinth. It is not a great photo as the shiny varnish on the top confused my autofocus, but we can see what is going on.
Beyer M360 labyrinth (left) and motor.

The magnet assembly is larger than the standard Beyer motor, in order to accommodate a smooth curved cavity at the rear of the ribbon. This tube curves through 90 degrees and out through a hole in the aluminium base plate. This connects to the inlet of the acoustic chamber, which consists of 25 interconnected tubes that go up and down through the block. There does not appear to be any kind of outlet at the far end, and the tubes are stuffed with string to damp internal reflections.

The mic is really directional, with relatively little pickup from the rear of the ribbon. The back pressure from the sealed rear chamber also has the consequence of making the output brighter and lower than it would otherwise be. These are really very bright sounding for ribbon mics.

SJT 31 July 2013

Reslo MR1 ribbon mic (MOTM)

The MR1 was an attempt by Reslosound to re-invigorate the classic RB model for a 1970s market, whilst trimming down the cost of manufacturing parts and assembly.

Reslo MR1 and RB models

The MR1 (left) has the same format as the RB, with the ribbon element and magnets housed in a tilting head attached to a cylindrical body that contains the transformer. The grills are now flat, rather than domed, and the custom pivot screw is replaced with a standard hex socket bolt.

Reslo MR1 and RB

The MR1 still usesd Reslo’s custom 3-pin connector, and still makes ground contact through the body only. One assumes that this was to ensure backward compatibility with their older mics and cables, but it seems like madness  that they did not take the opportunity to switch to using XLR connectors, which were very well established by this time.

The classic stamped brass badge on the RB is replaced by a printed foil sticker that hides the join between the barrel of the mic and the cast base of the pivoting head. The sticker shouts ‘Reslo MR1’ – note that it no longer says ‘Reslosound’ – in a very trendy 1970’s style font, with fattened letters typical of the era. I am also 1970s vintage, and the label reminds me of watching programmes like Magpie on TV in my childhood!

Magpie – classic 70s font!

The ribbon and motor assembly (top in the picture below) is exactly the same as the RB, but the transformer is smaller. Over time, better understanding gave rise to alloys with higher magnetic permeability, enabling smaller transformers to be made with the same inductance properties.  The RB mics used a EE24/25 size core (pictured below the motor). The MR1 has a narrower body and a smaller transformer marked 4414.

Top to bottom… Reslo MR1 motor,  transformers from RB, MR1 and Xaudia

Xaudia, as you might expect, make a suitable replacement transformer (bottom) for upgrade and impedance matching duties. 😉

Compared to the RB, I see very few MR1s, and can only conclude that they were not a great success. By the 1970s, good dynamic mics were becoming the first choice for home recording, and professional recording studios would probably favour condenser microphones for many applications. Reslosound Ltd. disappeared sometime in the 1970s, and this must have been one of the last models that they produced.

Lustraphone microphone catalogue

Here is a scanned product sheet from Lustraphone, which includes the VR53 and VR64 ribbon microphones, along with dynamic microphones and accessories. Like many other manufacturers, they supplied stands and impedance matching transformers to use with their mics.

With a typically British quirkiness, the price of the VR65 stereo ribbon is given as 30 Guineas rather than pounds, shillings and pence. A guinea was equivalent to one pound and one shilling, so at about 4 times the cost of the mono VR64, the stereo VR65 was a very expensive mic!

In other Lustraphone related news, I have commissioned a batch of replacement enamel badges for Lustraphone VR53 and other microphones. They will be available through the Xaudia website very soon.

Electro-Voice Microphone Catalogue

Here is a scan of an old Electro-Voice catalogue, probably from the 1950s or early 60s, featuring a wide range of microphones. It includes the multi-pattern Cardak, which appears to have been the flagship model, and the V-series ribbon mics. There is no date on the document, but at this point in time the V1 would set you back US$27.50, and the multi-impedance V3 was $50. The Cardak II would set you back a whopping $75!

In the velocity microphone description I was amused to read that “the woven housing allows the sound to pass through without reflection”. This neglects to mention the whopping magnet located at the rear of the ribbon! All of the dynamic ribbon mics were available in 50, 200, 500 ohm and high impedance models, which reflects the plethora of input types around at that time.

The second page deals with carbon and crystal microphones and accessories. The bottom of the page was uppermost in the box, and consequently is somewhat grubby.

Cadenza Crystal Mics – a mystery solved!

This Ebay auction has solved a little mystery for me!

Cadenza Crystal Microphone

Cadenza was a British brand remembered primarily for their ‘Rocket’ ribbon microphones. They are still quite common, and I have repaired many of them in the course of my work.

Cadenza microphone with ribbon element

Most of the Cadenza mics are grey or pale blue in colour, and have a removable stand. However, I have come across three or four of these mics with black bases and a fixed stand. These often have a crystal element rather than a ribbon motor, and I and speculated on their origins in a previous blog entry. When I first encountered one of these, I had thought that it was some kind of DIY ‘repair’ job, but having seen more than one, it seemed more likely that they came out of the factory this way.

Crystal element in a Cadenza body

Until now I had never seen an advertisement, manual or box that could confirm the existence of a Cadenza Crystal microphone. The photos in the auction show the original packaging, marked ‘Cadenza Crystal. So this was indeed a Cadenza product, using the same body as the ribbon microphones.

I like the triangular box!

Thanks to Benchmark Collectibles for permission to use this photo.

MOTM: Melodium / Radiodiffusion model R

Here is a rare and magnificent microphone: the Melodium type R (number 12).

The microphone is dated 31.12.40, which makes it 72 years old at the time of writing! The mic was made by Melodium for the national broadcaster “Radiodiffusion Nationale”, which would have been the French equivalent of the BBC. This is particularly fascinating as it dates the manufacture to during the period of occupation in the Second World War. I was surprised that microphones were still  being manufactured during that period, but I suppose that the government needed to broadcast their propaganda, or perhaps this one was stolen and used by Le Resistance!
 

There is a bit more about the history of the French national broadcasters here, and it seems that Radiodiffusion Nationale began in 1939 but was subverted by the Vichy government in 1940. It was replaced or perhaps rebranded in 1945 after the end of the war. There is more history here for our Francophonic readers.

Inside, the mic is very similar to the 42B, with the same magnets and motor assembly, but the internal grills are different, using a wider mesh and cloth.

The high pass filter section of the mic is also different to its square cousin.  Instead of the three way rotary switch on the 42B, this mic uses a metal bar to bridge a terminal inside the base of the mic, and it just as ‘Music’ and ‘voice’ settings. A hole in the bottom plate lets you see whether the jumper bar is engaged or not. It is a more reliable arrangement, but you need a screwdriver and spanner to make the change. I guess the guys at the radio station did not want the filter to be engaged accidentally, causing them to wonder where the bass had gone!

Remarkably, the ribbon on this one was still intact, and after cleaning the motor the mic sounded very good indeed, with a big bottom end and nice proximity effect to make voices sound richer and fuller.
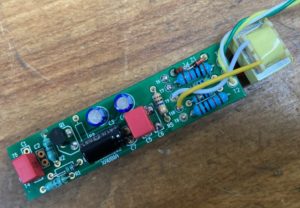
New parts for the old microphone.

The mic arrived without some parts, so we made replacement brass washers and thumb nuts on the lathe. They look really smart, and in a few months will be a lot less shiny!

Melodium 12 side by side with the 42B
In comparison to the 42B, the model R has a bit more bass, although this could simply be due to the differences in tension and mass of the ribbons. There are other small differences to the high frequency sonic signatures, primarily due to the differences in grill shape and mesh. 
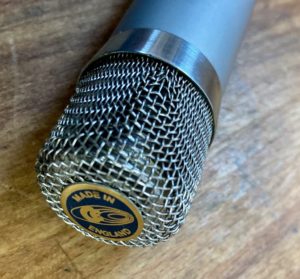
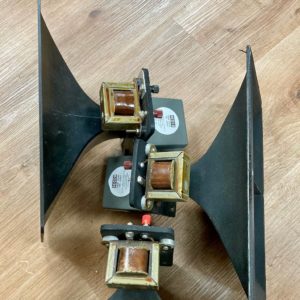
Frequency sweeps for Melodium R (red) and 42B (Blue)

The mic is now back home at Kore studios, in good company!

Oktava mod FET biasing

Here’s one way to bias the FET on an Oktava microphone….

Our good friends at Valley Wood Studios in Leeds had followed one of the popular projects for upgrading Oktava MK319 microphones, which involves changing a handful of resistors and caps, along with the field effect transistor (FET). After the mods one of the mics was about 3dB louder than the other.

This kind of thing is normally due to variations in the FET’s characteristics, and to optimise the modification, it is necessary to adjust one or both of the bias resistors (R7 and R8 in the PDF document). Between them these set the gain of the mic, and the bias point for the FET, which gives the best noise performance.

I often do this by hacking a decade box into the circuit, and in this case we put the mic in our test chamber so that we can tweak and scan as we go along. At the end of the tweaking the pair of mics were well matched, and noise free.

We celebrated with tea and biscuits!

Cadenza Mic Transformers and Mounts

Xaudia now supply drop-in upgrade transformers for Cadenza ribbon microphones.

Xaudia transformer (left) and original Cadenza tranny
The original transformers had a tapped winding made to give an output impedance of either 30 ohms or high impedance, neither of which is ideal for interfacing with modern equipment. Our upgrade transformer gives an output of 300 ohms with a good original ribbon, which gives about +10 dB compared with the 30 ohm connection. It also has a lower DC resistance and noise floor.

The transformer is supplied in a mumetal shielding can of the same dimensions as the original, and slots into the base of the mic below the motor assembly, as shown.

Cadenza on a stand!

And here is a funky adapter that we made for a customer, to mount his Cadenza onto a normal mic stand. It recycles the plastic connector and locking ring from the original tripod mount.

Cadenza mic stand adapter

*Or other impedance values on request.

Reslo RV and UR microphone variations

Reslo RV ribbon velocity microphone.

The RV was one of Reslo’s earliest ribbon microphones – possibly their first production model, although I am not sure if the UR series came before or after. They share parts so it is hard to pin down which one came first.

Inside Reslo RV mics

The two mics shown have the same frame for the ribbon, but the magnets are very different. I believe the mic on the right to be the earliest RV design, or at least the earliest I have come across, and it uses a single cast magnet with quite a complex shape.

Reslo RV magnets

The mic on the left uses two simple horseshoe magnets at the top and bottom, attached to a pair of metal pole pieces, and this really sets the style for all subsequent Reslo ribbons – later models have three magnets but use a similar layout.

The UR model has a similar construction but has a rear mounted transformer. This is effectively blocking the pickup from the rear of the mic, giving it a more cardioid pickup pattern. It seems likely that ‘UR’ stands for Unidirectional Ribbon, although I have not seen any documentation to support this.

Reslo UR magnets and rear-mounted transformer

But the story doesn’t end there. Many of the RVs that I have worked on have a later, smaller motor which is essentially the same as found in the RB model. Keeping common parts with the later models must have kept costs down.

Reslo RV mics with different motors.

Until very recently I had only ever seen 30 ohm versions of the RV and had assumed that they were all low impedance. However, the one on the left, which came in recently, has a high impedance transformer, and measures around 6.5K ohms with the original ribbon.

Reslo mics don’t have serial numbers or dates on them, so it is hard to make a definitive time line for the development, and always if you have any further information we would love to hear from you.

M320 and M360: Beyerdynamic’s ugly ducklings

We have TWO microphones-of-the-month for May. Both are cardioid ribbon microphones from Beyerdynamic. We see a lot of M260 models, but the M320 and M360 are bigger, uglier and much less common too.

Beyer M320. Do not stick it in your kick drum!

The M320 makes good use of plastic for the body, and has all the style of a brick! A Beyer catalogue* from 1965 called it a “heavy-duty dynamic type for show business use”, and the switch allows the use to select ‘music’ or ‘speech’ settings, the latter giving a bass attenuation of 12dB at 50Hz.  Because of its appearance and a vague resemblance to the AKG D12, it is tempting to thing that this is designed for inside a bass drum. It is not.

The M320 has the same motor that is found in the M260, but is connected to a large rectangular chamber below the mic via a tube. I have not been brave / stupid enough to cut open the chamber to see what is going on inside, but one assumes a series of interconnected tubes forming an acoustic labyrinth.

Beyer M320 inside

Although the M320 is called ‘heavy duty’, the M360 is much more sturdy, with a metal housing and grill. The catalog calls it a “dynamic unidirectional studio microphone with ultra-modern styling“. Again, it is as elegant as a 1980s Volvo, but at least form follows function in these mics!

Beyer M360. Ultra-modern?

… or just ugly?

The M360 is slightly larger and like the M320 it also has an acoustic chamber below the ribbon motor. I was fully expecting to see the same motor in this mic as is found in the other Beyerdynamic ribbon microphones of the same era, so was suprised to find something quite different. Rather than being assembled from four small magnets glued together, the M260 has a larger cast magnet with two copper coloured pole pieces which may also be a magnetic alloy.

Beyer M360 motor

Although the motor is wider and deeper, it still accommodates the same size of ribbon. And the magnetic field measures around 5000 Gauss, which is similar to a ‘normal’ healthy Beyerdynamic motor. So I am really not sure why this uses a different motor. Perhaps it was an early production run. The transformer and switch (on/off) are housed below the acoustic chamber below the microphone.

In the photo above, the ribbon is fully corrugated, but another specimen (below) had a standard Beyer ribbon, which seems more likely to be the original.

Both mics sound good when working properly, with a cardioid pickup, a relatively flat response and a bit less proximity effect than you would find in a figure-8 ribbon. They use the typical tiny Beyer transformers, which in the case of the M60 at least is wound for a full range response.

*Here is the full Beyerdynamic catalog from 1965, at the excellent Coutant website.

Huge heavy Meico dynamic mic

Here is another big old dynamic microphone, this time made by Meico.

Meico Dynamic microphone

The big ferrous magnet inside the mic bring the weight up to nearly 1.5 Kg!

This one is certainly a heavyweight!

The badge is very cool though, and the star and wings look like it might be inspired by Soviet artwork of the era!

Like Mexico, but without the X….

According to this eBay seller, the mics were made in Congleton, and they were used as announcer’s mics in boxing matches. I have found nothing to confirm or deny this, so as always if you know more than I do, please get in touch!

But if it fell on your head, then it would certainly be…. a knockout.

(Sorry)

Oktava ML16 ribbon microphone dissected

Here is an Oktava ML16 from 1968. Back in ’68, man had not yet been to the moon, and you could not buy a Russian microphone in Western Europe! 
The early Oktava ribbon mics are nicely designed and generally sound good, although it seems that smoke-free regulations did no apply to old Soviet studios and stations, and the old mics often benefit from a good clean and a service. 
The ML16 is a bi-direction model, and the ML17 was its cardioid partner.

Sometimes it is easiest to strip a mic down completely and build it again from scratch to make sure everything is cleaned, tested and working properly. 

At the top of the photo you can see the brass blasts shield to protect the ribbon, the internal grills and the ribbon clamps. Across the middle are the outer grills, some wiring and the motor and magnet themselves. At the bottom we have the lower housing and the toroidal output transformer.

Then it can all go back together again, and with a new ribbon it works first time!

MOTM – Toshiba Type K multi-pattern ribbon mic

Last month I posted about a Toshiba copy of the RCA BK5. Here we have Toshiba’s take on the RCA77 DX….
Toshiba Model K
The Toshiba model K was one of the later Japanese ribbon mics. By this point they had really mastered the technology and were producing high quality microphones to rival to the American mics. It is slightly shorter than an RCA 77DX, but is equally heavy and well built. I very much like its stubby looks and slotted grill holes.
Rear of the model K, with pattern control
The model K was designed to broadcast standards, and this specimen was obviously made for NHK (Nippon Hōsō Kyōkai, or Japan Broadcasting Corporation), which is Japan’s equivalent of the BBC. Like most Japanese ribbon mics, this has a 600 ohm impedance and gives a strong output.

Inside the mic, the motor is based around a single strong horseshoe magnet, with the ribbon held between two chunky pole pieces.

Like the RCA 77DX, there is an acoustic labyrinth made from a series of holes with connecting channels, which goes up and down the centre of the mic. Two thick wires take the signal from the ribbon, through the labyrinth, down to the transformer below.

Acoustic labyrinth in the middle of the mic

The pattern control uses a choice of baffles to partly or entirely redirect the rear of the ribbon into the acoustic labyrinth. This turns the mic into a pressure transducer when the rear baffle is closed, giving a more omnidirection pattern.

Pattern control on the Toshiba type G.

It differs from the RCA design: the 77DX has a a cam shaped copper plate that allows the rear vent to be opened by incremental amounts, whereas the Toshiba has three discrete positions, which are labelled…

  • N (fully closed – non-directional)
  • B (fully open – bidirectional or figure 8), and 
  • U (a small opening – unidirectional or cardioid)

And in an attempt to beat the Americans, on the bottom of the mic there is a switch for a 6 position variable frequency high pass filter – the RCA77DX only has three!

High pass filter switch

Update 27/5/13… this is how the filter affects the frequency response….

The Bang and Olufsen ribbon microphone family

Bang and Olufsen are a Danish company that make high end hi-fi equipment. Once upon a time they made some decent ribbon mics too. Here are a few…
B&O ribbon mics, from left, 2x BM2, 2x BM3, 2x BM6, 3x BM5 stereo

As far as I can tell, the first commercially available B&O ribbon mic was the BM2 – which begs the question “what happened to the BM1?” There seems to a bit of confusion about this, and possibly there never was a model called BM1. According to Beophile, the first B&O microphone was a dynamic mic called MD1. However, others have listed this as BM1. Numbers 2 to 7 were ribbons and carried the prefix BM, which may have stood for ‘baand mikrofon’ – Danish for ribbon microphone. Although it could also have stood for beomic. The MD8 was also a dynamic.

B&O BM2 ribbon microphone

Regardless of the BM1 (or lack thereof), the BM2 is a good-looking microphone, with a very different look to the later mics. It has a cast metal body and folded, chromed brass grill. The mics were painted in a green-yellow textured paint, which looks better than that sounds! They are usually* 50Ω mics, with an a switch which connects an inductor into the circuit, for a high pass filter. The ribbon is held in a removable frame, which slides out for servicing. (*They can be re-wound for 300Ω, to great effect).

The BM3 and BM4 look very similar to one another, and used an evolution of the motor assembly in the BM2, this time in conjunction with a steel tube body. This design set the style for all their later ribbon mics, and also inspired Speiden and Royer microphones, and a bunch of clones such as this Stellar mic.

B&O BM3 microphones

In the case of the BM3, the ribbon motor frame is larger than the diameter of the tube and sticks out from the sides of the mic, giving it the look of a long face with ears, or perhaps Doctor Who’s Cybermen. It has a three way selector switch which provides M (music – full range), T (talk – HPF) and  0 (off) positions.

Motor frame from the BM3, with Xaudia transformer, awaiting a new ribbon

The BM4 looks the same as the the BM3, but with an additional switch at the rear for selecting 50, 250Ω, or high impedance output. The BM3s were fixed at 50Ω (and benefit from a matching transformer or upgrade). Occasionally you see these badged as “Fentone”, although, oddly enough, they kept the B&O name on the mic too.

Fen-tone add showing the BM3 – from Preservation Sound

The BM5, BM6 and BM7 came later and formed a family of mics. The BM5 is the stereo model, and when rotated to 90 degrees, it is perfect for Blumlein pair recordings. The bottom half of the BM5 was available separately as the mono BM6, and the top was called the BM7, although it could not be used by itself.

Standard BM5 stereo set with stand

The design was an evolution of the BM4, but by this point the ribbon frame and been replaced by plastic mounts, and the cyber-ears have gone. The magnets are also slimmed down, with a semicircular or triangular cut-out, presumably in an attempt to increase the high frequency response. In these mics the body of the mic is made from steel and also acts as the magnetic return path, which helps to increase the output.

Insides of a B&O BM6 ribbon mic. Note the pistonic ribbon

Like all of Bang and Olufsen ribbon mics, the BM5/6/7 family have a pistonic ribbon, which is gently curved in the middle and deeply corrugated at each end. The ribbons were made from Duralum alloy, which contains copper in addition to aluminium, to improve the strength and stiffness. However, the alloy is more prone to corrosion than pure aluminium, and it is quite rare to find ribbons that are in perfect condition.

Delux BM5 set in posh wooden box!

From a technician’s perspective, these later mics are less robust  than the BM3/4. To me they feel more of a hi-fi design than one for a busy working studio. Although the sound is excellent, they are delicate in places and some of the plastic parts deteriorate with age, most noticeably the rotating ring in the top part of the mic. The switch tips also have a tendency to come off.

Plug for a B&O BM3 microphone

All the B&O mics used bespoke connectors, which can be hard to find. the BM2, 3 and 4 have a 3 pin connector only found on B&O equipment, whereas the BM5 and 6 used 5-pin DIN connectors but with their own threaded locking ring. The latter can be replaced with a standard bayonet DIN if the cable is missing.

Here are some links to wiring diagrams for some of the mics.
BM3 data sheet
BM4 data sheet
BM6 data sheet
BM7 data sheet

Thanks to Tom Day and Robin Kiszka-Kanowitz for additional information.

Update 1/2/18


Our friends at Extinct Audio now manufacture the BM9 studio ribbon microphone, which shows the  influenced of the B&O designs.

Update 4/3/14

We now have upgrade magnets and transformers for all B&O microphones.

Update 22/4/13

Many thanks to Evan Lorden for sharing these photos of his B&O MD1.

Geloso M88 dynamic microphone

Here is a pair of funny little Geloso dynamic microphones, one is in pieces already.

Geloso M88 dynamic mics

The build quality is nice – better than the early Geloso mics which tend to crumble. It has an internal two-bobbin humbucking transformer, to give an output impedance of 250 ohms.

Internal transformer for impedance matching duties

The diaphragm is made from a light plastic for fast response, and they sound nice, if a little light on  bass.

Geloso M88 diaphragm in good shape
They use an annoyingly unobtainable 4 pin connector – I feel an XLR mod coming on…
The original unobtanium connector can be converted to XLR

🙂

Short, stubby and dynamic – The Reslo PGD

Reslos are best known for their ribbon mics, but they made some dynamics too. 

Short, stubby and dynamic – The Reslo PGD
This early model is labeled ‘Dynamic – PGD’, which one assumes stands for Pressure Gradient Dynamic. It proudly says ‘Reslo’, on the badge –  the later RB mics were mostly labeled ‘Reslosound Ltd’.

The PGD appears to be made of leftover parts from the RV ribbon mics. The base of the mic is the same, complete with swivel mechanism, and the grill looks like a cut down version of the RB too. As usual it uses the annoying Reslo plug.

The head on the RGB could be tilted for best pickup of sound.
There is space in the base of the mic for an output transformer, although this 30 ohm example doesn’t need one. I don’t yet know if they were produced with other output impedances, but it would not be surprising, as later models like this pencil mic came with switchable outputs.
Reslo PGD – aluminium diaphragm

Like many early dynamics, it has a pressed aluminium diaphragm, which is heavy and stiff compared to later polymer film designs. Consequently has a quite lumpy response. Here is a frequency plot for one mic – other examples may differ!

Frequency sweep for Reslo PGD mic.
Thanks to Sean Davenport.

Experiments with Carbon Microphones

Carbon microphones were one of the earliest audio transducers, and were used for radio broadcasts up until the mid 1930s, when they were superseded by ribbon microphones. 


They were really simple devices, with small particles of carbon packed into a space between two electrodes and pressed against a plastic, mica, rubber, or wax paper diaphragm. When connected to a battery supply, a current flows through the mic which is modulated as the sound impinging on the diaphragm compresses and releases the carbon particles. 

Old carbon microphone – unknown manufacturer
I have been meaning to investigate carbon mics for some time, so when a couple came up for sale for £10 each, it seemed like the perfect opportunity to get my hands dirty. Literally. In German these are called Kohlemikrofon, which also translates as ‘coal microphone’. 🙂
Carbon microphone with the diaphragm and carbon removed.

The body of the mic is made of an insulating material, in this case a block of marble. The classic Marconi-Reisz microphone also used marble – this one is clearly a copy of that mic. Others had bodies made of wood, which must have been cheaper to make. Four hooks screwed into the body would have been used to suspend the mic within a metal ring, using springs or rubber rings, like this nice example at the ORBEM website.

Old diaphragm and grill from a carbon mic

After many decades this example is in pretty poor shape: most of the carbon has escaped into the wild, and the diaphragm is cracked and perforated. I wanted to try and get this working again, for fun and as a learning experience.

Clean again!

 The first step was to clean everything up in the ultrasonic bath, and the brass terminals were given a scrub. At least it looks better! The carbon will sit in the depression between the two brass terminals.

New diaphragm !

I made a new diaphragm by stretching a sheet of thick cellophane over the bakelite frame that makes up the front of the mic, and then heated it gently with a hot air gun. The plastic film shrinks and pulls itself tight. It looks neat and has a similar thickness to the original – as far as I can tell.

It took me a little while to work out the purpose of this big screw in the base of the mic. It is in fact for filling the microphone.

Then the mic can be re-assembled and filled with new carbon granules. It takes a few goes to pack the carbon, shaking the mic in between each fill.

Carbon microphone circuit, from the TFPro website.


I tried a circuit inspired by the one above, using a battery and transformer.  Ideally the transformer should be gapped, or a capacitor used to block the DC, to prevent saturation.

With a new diaphragm and new carbon, the microphone does now pick up sound, and although it is far to noisy for any serious recording, I was pleased just to get that far in my first attempt. As always with microphones, the art is in the detail and I can now at least appreciate some of the design parameters than need to be considered. These include

  1. Diaphragm material, tension, thickness and stiffness. The diaphragm needs to be thin and compliant enough to vibrate, yet stiff enough to transfer the energy to the carbon granules. Cellophane may perhaps be too flexible, but glass or hard plastic could be too stiff.
  2. Carbon granule type, size and packing. The carbon needs to be compress reversibly by the diaphragm, otherwise it will pack and stop working.
  3. Impedance. I noticed that the impedance of the mic dropped from about 10K ohms to 1K ohms on tightening the filling screw. Clearly some pressure on the granules makes a big difference to the impedance, and also made an audible difference to the sound of the mic.
  4. Terminal size and shape. The contact with the carbon granules will affect the impedance of the mic and the efficiency.
  5. Circuit. Varying the voltage across the mic made a noticeable difference to the noise level. The transformer should be capable of taking some DC current, or a capacitor used to block the DC. (which is how I did it)

There is also a nice blog post about carbon mics at Preservation Sound.

MOTM: Siemens-Telefunken M201/1 Ribbon

We have seen an influx of weird and wonderful ribbon microphones this month, including a rash of Bang and Olufsens, half a dozen Film Industries mics, and a cardioid Toshiba BK5 copy, so we were spoilt for choice for a Microphone of the Month…. until this came along…

Telefunken M201/1 cardioid ribbon microphone

The Telefunken M201/1 was one of the very first commercial ribbon microphones. It was made by around the early 1930s and would most likely have been used for radio broadcast. These ribbon mics were a big improvement on the carbon microphones that they replaced, but in Germany they were quickly superseded by the new valve condenser microphone technology.

Telefunken logo on the M201/1 microphone

There are very few of these left in circulation – this one is in very nice condition and after a clean and a new ribbon sounds truly excellent, with a strong output not much below a modern dynamic.* After over 80 years, the magnets are still strong with a field on >5000 Gauss in the narrow 2.5 mm gap between the ribbons.

Telefunken M201/1 rear

The M201/1 is constructed around a huge horseshoe magnet, which surrounds the transformer and (presumably) some kind of acoustic labyrinth or wadding to control the pattern. This dictates the shape of the body and gives it an unusual cylindrical aspect. The ribbon sits behind a fine brass grill at the front of the mic. With the rear of the ribbon being obstructed by the magnet, the mic is almost cardioid in nature,  becoming more figure of 8 towards the very bottom of the frequency range. Two chrome B-shaped vents sit above and below the ribbon to equalise the pressure behind the ribbon. The output connection is made via a pair of screw terminals hidden behind a circular plate on the rear of the mic.

Although we can’t see the transformer, we can make some measurements. The primary and secondary DC resistances are  50 milliohms and 19 ohms respectively, and the inductances are 5.25mH and 2.43H  at 100 Hz, which gives a turns ratio of (about) 1:22. The low DC resistance and relatively high inductance point to a well designed transformer with a good quality core and thick wire for the primary. Excessive resistance in the primary winding leads to noise, so it is especially important to see a low value here.

M201 ribbon 

The ribbon itself is long and thin, and the old broken one inside the mic was fully corrugated (the one shown is a replacement). For ‘ease of service’ the ribbon is held in a frame behind the front grill. However, once in place the assembly hides the ribbon pole pieces from sight, which means that alignment is a case of trial and error, which is possibly the only weak part of the design that I have found. With the new ribbon, the mic has an output impedance of around 300 ohms.

Telefunken M201 under test

I did a test sweep of the mic in our little testing chamber.** The mic shows a strong output with good bass response, a little proximity effect below 100Hz, and a graceful roll-off above 6KHz. The noise above 14KHz are likely to be diffraction from the grill and other parts.

This microphone is thought to have been made originally by Siemens & Halske and supplied under various model numbers including the KVM3, SM3 and others, and this rather wonderful example on Martin Mitchell’s excellent microphone blog, which is just called model ‘R’. In German a ribbon mic is called a Bändchen-mikrofon. However, the name plate on this is in English, and perhaps this is the export model, with the R simply for Ribbon. There is a bit more history at Martin’s blog, which is well worth a read.

Mitchell’s Siemens type R ribbon microphone

* Testing against a Shure Beta57, the preamps were on the same gain setting for a comparable output
**Calibration is with an omni measurement mic, so there can be some bumps due to the differences in pattern picking up more or less reflections from the room.

Toshiba Model H mic – RCA BK5 copy

Although now more associated with household TVs and video players, Toshiba once made some very nicely engineered studio ribbon microphones. Very often they were close copies of RCA microphones, but with a few added innovations and improvements.
Toshiba type H ribbon mic – looks like a BK5

The ‘Model H’ is no exception, being almost identical to the RCA BK5 cardioid ribbon in both looks and function. The small format ribbon sits between powerful magnets, in front of an acoustic chamber or labyrinth that takes up the middle segment of the microphone

Rotating the base of the mic implements a high pass inductive filter.

In fact it seems slightly better engineered than the BK5, with a 5 position high pass filter switch that is actuated by rotating the dial at the very bottom of the microphone.

Toshiba type H ribbon

There is some additional electrical screening around the ribbon, but less acoustic baffling in front of it, which may be to give a more ‘open’ sound. In practice the ribbon is more prone to being stretched by air blasts than the RCA model.

Overall the type H is a decent alternative to a ‘real’ BK5, and is a little less peaky than most of the BK5s that we have measured.

Thanks to Kore Studios.

Grampian Amplifier Speaker Set

As well as microphones, Grampian made amplifiers and other PA equipment. Here’s an old Grampian amplifier and speaker set.

I found the amp a few years ago in Dave Dee’s junk shop in York. The circuit is actually very similar to a Mullard Twenty, with the addition of a transformer balanced mic input, and several taps on the output transformer for 8 ohm loudspeaker or 100V connection. I have even used this in the past as a mic preamp for recording, for some warm and slightly dirty vocal tracks.

The speaker is a recent purchase found on GroupDIY.com. It has a rather nice and unusual tapered shape, with (no longer very) white vinyl covering. The whole set has a really cool vintage look to it – very different from today’s ubiquitous square black boxes.

I am now using this as a guitar rig – it has a great vintage valve tone with just the right amount of breakup coming from the speakers. There is plenty of volume for recording, but I would hesitate to use it for rehearsals with a modern loud drum kit!

I am unsure of the age of these but I would guess 1950s or early 60s – they don’t appear in Grampian’s 1968 product line, and presumably pre-date that. If anybody knows more, please get in touch.

Hexapup switching

Here’s an easy way to switch between the ‘split’ and ‘spread’ modes on our hexaphonic pickups, using a DPDT switch.
The E&D strings are wired in series, as are the G&e strings, observing polarity. The negative sides of these pairs are wired to the sleeve(s), and the positive ends of these are connected to a double pole, double throw switch as shown. 
The B and A strings are wired between the switch and the two outputs.  Flicking the switch then routes the E and D to either the B or the A string, and so on.
This is ideal for a tip-ring-sleeve stereo output jack. If using two mono jacks then the sleeves of these should be connected together, and to ground.

GEC Ribbon Microphone Evolution

Some time ago I posted about GEC models BCS 2370 and 2373, and how they were essentially the same design in different body shapes for different applications.

Left to right – unknown, unknown. GEC BCS2370 and 2373 mics. All have the same motor.

Since then I have come across some other ribbon microphones which may be earlier GEC models, prototypes. They are perhaps rather ugly in style, but I find their functional utilitarian style rather charming.

The two unbadged mics share some parts including a twinaxial connector at the base and rubber yoke mounts. The mic on the left is made of folded steel, whereas the one on the right is brass, with a more open grill.

All four mics are essentially the same design inside. The mic on the far left has a smaller transformer and different brand of magnet, but the pole pieces and ribbon assembly are the same. The mic in the middle of the photograph above is identical inside to the known GEC mics – with the same magnet and transformer and crumbling plastic ribbon mounts.

Remarkably, both of these mics are still working with a nice tone, although a little noisy. A good clean and service should sort that out.
The mics look very similar to the drawing in a patent by GEC and Thomas Julian, from 1947.
Drawing from a ribbon mic patent by GEC and Thomas Julian, 1947 
Which in turn is obviously inspired by the BBC-Marconi type AX ribbon mic…
Drawing from BBC-Marconi type AX ribbon mic manual.
As an aside, the GEC patent is slightly odd, in that the major innovation is that the pole pieces are held in place by the magnetic field alone, with no mechanical fasteners. That is to say the major innovation is something that they have left out, rather than something they have added to the system. The implication being that other manufacturers MUST use a screw, bolt or other fastener, or else risk infringing the patent.  It would have been interesting to see how that one would stand up in court!

Grampian GR1 & GR2 ribbon mic manuals

Grampian made some fine ribbon microphones, and the GR1 and GR2 were our Microphones of the Month in May of last year. Here’s a scan of the original Grampian GR1/2 manual.

Grampian GR1 or GR2 ribbon mic

The mic also came with a word of caution….

Don’t test a ribbon mic with a multi-meter or else…

I am particularly pleased to see the warning not to use a DC meter on these. Quite often I come across ebay auctions where the seller measures ribbon mics with a multimeter, unaware that the carrier current can bump the ribbon out of the magnetic field and stretch it. 🙁

Grampian also made matching transformers for their mics – we have a few available for sale. Here is the factory drawing for the transformer.

Grampian matching transformer wiring.

I posted some other Grampian documents last November.

Many thanks to Pete Guppy for sending this in.

Thiele Microphones schematics and documents

Thiele, of Liepzig, were one of several manufacturers of tube condenser microphones in post-war Germany, although they are less well known than Neumann, Gefell and Schoeps. Thiele microphones also appeared under the Elektro-Medizin and Wetzel brands.

Thiele M4 microphone

The Thiele M1 (cardioid) and M4 (cardioid and omni) are great looking microphones but feature some frankly bizarre design decisions, most notably the placing of the tube directly behind the capsule, which interferes with the rear pickup whilst simultaneously cooking the PVC on the rear capsule. Of course the manufacturers would never have expected that we would be picking up these mics sixty years on and trying to record with them.

Inside a Thiele M4

In addition, the power supply was built into the base of the mic which can lead to hum issues despite the on-board potentiometer that acts as a ‘null’. This also means that the mic has two cables running from it – one for power and one for audio. Both mics use two-stage head amplifiers based around an ECC83 tube, and both have unbalanced outputs. Here are the official schematics for the M1 and M4 mics.

Thiele M4 microphone circuit

Thiele M1c tube microphone circuit

The M5 seems to have been the ‘Studio’ version, with an external power supply and output transformer for balanced low impedance operation. I haven’t seen a factory schematic for the M5, but this is a drawing that I traced out from a specimen on the bench.

Thiele M5 microphone, inside and out.

Here are some original sales and technical documents from Thiele, in  German.

Thiele sales brochure for M1 and M4

Elektro-Medizin M4 technical document

Elektro-Medizin M4 & M5 product sheet

Many thanks to the Microphone Online Museum for kindly sharing the documents and schematics.

Massive Old Dynamic Microphone – GEC?

We’ve had some website issues this weekend, but everything has been sorted out, so let’s get back on track with another vintage microphone curiosity.

This gigantic bronze dynamic mic has no badge or makers name on it, but arrived in a box of GEC microphones. Connection to the outside world is made via two terminal posts at the rear. From the size and style it probably dates to the 1930s or even earlier. 
It is around 11.5 cm across and 8.5 cm deep, weighs nearly 2 kg, and would originally have been mounted on springs within a hoop. Two of the suspension mounts are missing – it will be a quick job on the lathe to turn new ones from a bit of brass. 
Inside the mic is very much like a speaker in reverse, with a paper and fabric cone driving a coil into the field of an enormous magnet.
On initial testing, the mic wasn’t picking up well as the cylinder in the centre of the diaphragm was scraping against something as it moved. Some careful cleaning to remove the dirt eased the movement, and the mic sounds OK, if rather peaky. The addition of some foam inside the body helped to dampen some of the ringing from the cavity.
Even with the foam, the mic is far from flat in response with an enormous bump at 200Hz. So if you want to give something an EQ boost at 200Hz, this is your mic!
Frequency plot for big bronze dynamic microphone!
Other uses include door stop, paperweight, shot-put and burglar deterrent (ouch!).
If you recognise this one or have information on any of our other unidentified mics, please get in touch.

MOTM: Bruno – Webster Velotron Microphone

The Bruno Velotron (made by and sometimes badged as Webster) was an oddball microphone that took inspiration from both ribbon and condenser technology. Strips of aluminium foil were attached to an insulated metal backplate, and a voltage applied between the two. As the foil vibrates, the capacitance of the device varies, and a signal is generated. They are notoriously fragile, and there are very few around in working condition.

Bruno Velotron microphone

I found this one on ebay a few months ago and could not resist grabbing it for dissection and possible resurrection. The specimen is in very good cosmetic condition so will look nice in the collection even if it it is beyond repair. But it would be even nicer if we could hear it in action!

Looking inside, the element is marked ‘4½M’ and 2/4/38, which in American would be 4th Feb 1938. The ‘4½M’ may refer to the impedance of the device.

Velotron element

The Velotron requires a polarisation supply and a buffer amplifier to operate – I am not sure if these came with the mic, but the tube amps of the era could easily have been modified to provide this from the high voltage supply. The excellent Coutant.org shows a wiring diagram for a suitable polarisation supply and buffer amplifier…

Supply for Bruno microphone – from Coutant.org

Based on this diagram, I wired a 7205 subminiature tube into one of our tube microphone power supplies, to act as a little amplifier circuit for the mic.

Hacking together a power supply and amplifier.
Miraculously, the microphone worked on the first attempt, even after 74 years! The sound is very warm and dark with an obvious roll off at the top end, and it was very exciting to hear one of these for the first time.
Bruno Velotron – frequency plot
I wondered if some of the roll-off may be due to cable capacitance – if the element really does have an impedance of the order of 4.5 MΩ then even a few tens of pF will become significant. However, swapping cables and using a triaxial arrangement didn’t make any different, so it may well just be the natural response of the beast, and certainly how it would have sounded at the time.
The mic is unfortunately prone to noise and pops. They are notorious for breakdown of the insulation on the backplate and that seems to be the case with this one. So the next job would be to drill out the rivets that hold the element together, strip off the ‘ribbon’ foil and re-lacquer the back plate. 
I’ll save that for one day when I am feeling brave, but for now the Bruno shall be our microphone of the month!
Update 27/5/13: It seems that these were sold in Europe under the Radio Marelli brand. As seen on ebay….

Altec 670A vs 670B microphones – What’s the difference?

Altec 670B (left) and 670A (right) ribbon microphones

Q. What is the difference between Altec 670A and 670B ribbon microphones?

I had not realised that there was a difference until I re-ribboned this 670A for a client, which gave me an opportunity to compare it to our studio 670B. The two microphones look identical from the outside apart from the label. Both are housed in some kind of blue-grey plastic, and the label hides an impedance switch cryptically marked ‘1’ and ‘2’.

Inside, the mics look similar at first glance, but on close inspection the ‘B’ model is a significant evolution of the 670A.

The ribbon in the earlier 670A is twice as wide as the later 670B, measuring 3.8mm and 1.9 mm wide respectively. The narrower gap between the magnets would also give a higher magnetic field, although I forgot to measure that.

Altec 670A ribbon and 670B (right) ribbons.

Both ribbons are the same length, so if the same thickness of foil is used, the 670B ribbon would have (about) twice the impedance of the 670A. This has implications for the transformer design, as a different ratio and different inductance would be required.

A second difference is in how the transformer primary wire is routed. In the 670A (left) the thick wire is routed directly behind the ribbon, which would affect the pickup pattern of the mic. This is redesigned in the 670A and passed to the side of the ribbon.

Altec 670A and 670B pattern selectors

Both mics were ready for new ribbons so I replaced both with 1.8 µm foil and measured the impedances (in position 2). The 670A had an impedance of 600Ω whereas the 670B measured 350Ω, which shows that the transformers are indeed different ratios.

It also suggests that the 670A would have originally been fitted with substantially thicker foil – perhaps 4 or 5 µm. The feel and stiffness of the corroded old ribbon also suggests this to be the case.

Here is a frequency plot of the two mics. The 670A is the red line, and the 670B, in blue has a slightly higher overall output. Both mics sound very good and quite similar in tone despite the differences.

Melodium 93C & 530C measurement microphones

Melodium was a French manufacturer of microphones and other audio equipment, probably best known for their excellent model 42B ribbon mic.

The Melodium model 93C is a small diaphragm condenser measurement microphone that was on the market in the 1970s. Although the data sheet is not dated, the frequency plot is marked 03-73, which pins down the measurement, if not the manufacturer, to March 1973. The specimen on the bench was actually stamped with model number 530C, but seems to be the same microphone.

Melodium 530C measurement microphone

The 93C / 530C needs a 13V to 18V supply to operate, and a battery pack was available.

Melodium 530C with battery pack

The mic is not compatible with phantom power, but a simple converter can be built. In this case it was built into the old battery pack, with an indicator LED replacing the on-off switch.

Melodium 530C with modified supply to convert from phantom power

Once the power is sorted out, the mic is quite sensitive, with a very hot signal which may even need padding for louder instruments.  The mic seems nice and flat up to about 8000 Hz – here’s the result from our little test chamber, which doesn’t go much past 10KHz anyway.

Frequency plot for Melodium 550C, referenced to Beyer measurement mic

When I wired this one up according to the manufacturer’s data sheet, I found that the mic was out of phase with our reference mic, and indeed the data sheet claims that the ‘Angle of phase rotation 180C to tension’.

Here is the manufacturer’s data sheet for the Melodium 93C.

Thanks to Santiago Calvo Ramos for sharing.

Ward Beck preamps part 2

The old aluminium front plates from the preamp modules were screwed to the new front panel to act as a drill guide, so getting the holes in the right places was quite easy (for once). The Canford chassis is very nice to work with – the aluminium panels machine easily, and the metal is thick and sturdy enough for the job.

With additional holes drilled for XLR inputs and a power switch, the panel is ready for the modules to be screwed in place.

It looks like a neat job once the black printed control panels and all the knobs are back in place – I also added a pair of jack sockets as additional outputs so that I can route the signal to either the front of the unit or the studio patchbay – or both for some parallel compression fun!

The modules are connected to the outside world via 44 pin card connectors at the rear. Although these look daunting, only a few of the connections are needed for our application. Here’s a revised pin assignment with the surplus connections omitted.

In this case I am just using two of the four available inputs – XLRs on the front connect to Mic Input A, and jacks on the rear for line input A. Both sets of outputs (M1 and M2) will be used, one on the front and one on the rear of the case. On the original WBS mixer the modules would have been wired to a fader, but we can bypass this by connecting across the appropriate pins as shown in red. Note that in the schematic for the M480C, the fader inserts are wired from pin T to 10 and from pin 16 to L, which means diagonally across the connector rows.

However, when we wire it that way the polarity of the preamp is inverted, as shown on the scope.

It seems likely that some other part of the console flips the phase, or less probably that the M480 is differently wired from the M480C – one would expect the modules to be interchangable. Either way, the simple answer is to connect pin T to L and pin 16 to 10, as shown on the pin assignment above.

The hole for the fused IEC power inlet was cut through with an appropriate punch – this gives a neater rectangle than a jigsaw or just drilling and filing, and is quicker too. A dual ±24V bipolar supply is required, and I used a small board left over from an 1176 project. The board from mnats.net uses LM317 and LM337 voltage regulators, and 5Kohm trimmers were used to set the voltages. The modules have on-board filters and regulators to bring the down to ±18V, and their is no audible hum on these modules even at full gain.

Once up and running, the modules sound very nice with plenty of gain. I particularly like the low boost on the EQ, which sounds like it should be useful for beefing up tracks. At the moment many of the pots are rather worn and scratchy, so I next will strip it all down and replace those. It never stops!

MOTM – Lustraphone VR64 ribbonette

Lustraphone was a British manufacturer of audio and hi-fi equipment based on Regent’s Park Road in North West London. They traded from 1942 until sometime in the 1970s, when the company was dissolved. This month’s MOTM is the Lustraphone VR64 pencil ribbon mic, known s the ‘ribbonette’  because of its small size. It was the successor to the VR53. They were also sold under the EAP / Elizabethan brand.

The VR64 is an attractive looking small ribbon mic, with a slightly wider grill at the front than the rear. Like its competition from Reslo and Film Industries, the magnets are positioned to the rear of the ribbon making it an imperfect figure-8 pattern. It was produced in several colours – I have see brushed chrome, blue paint, and grey hammertone examples.

Add caption

I always thought that Lustraphone had one of the coolest logos, a bit reminiscent of The Man From UNCLE TV series. Different models have different styles of badges, either applied as a decal or a sticker.

When working properly, the VR64 sounds rather good, with a higher output and better top end response that the VR53. Like most of the British ribbons of the time, the Lustraphone mics were available with different impedances. The mics come badged with either ‘High’ or ‘Low’ impedance, but that doesn’t always tell the whole story. Two examples pictured here were both marked low impedance. However, one measured 15 ohms and the other 600 ohms, so it is important to know what you have.

The output transformers have a slight quirkiness, in that the bobbin is pushed halfway through the frame of the mic before the laminations are added, which neatly solves the problem of mounting the tranny.

Lustraphone VR64 inside
Lustraphone VR64 motor – rear view showing magnets

I’m not sure if having a layer of insulator between the laminations has any sonic effect, beyond the fact that the transformer has one fewer layer of laminations in the stack, and so a lower inductance and higher cutoff frequency. Probably little or none.

The 15 ohm transformer is made up from 15 turns of 0.85 mm wire for the primary, and about 145 turns of 0.3 mm for the secondary, giving a ratio just under 1:10. This one was re-wound for 300 ohms using the original lams, which gives a better output level into a modern preamp, whilst retaining the vintage character.

Lustraphone transformer autopsy

This example had a quick release mounting system. A bullet shaped part screws onto the mic stand, and then the mic is pushed onto it. Very cunning!

Lustraphone quick release mic mount
There was also a stereo model, the VR65, which was basically two mics stacked one on top of the other, with the upper mic rotated by 90 degrees for Blumlein pair recording. There are some sound clips on this thread over at Gearslutz.
Lustraphone VR65 stereo ribbon mic

Lustraphone filed a patent for a stereo ribbon mic with a complicated switching system, to reverse phase and reduce noise, although the only examples I have seen have had seperate outputs for each ribbon, and no switches.

Lustraphone VR65 in action 
(Thanks to Santiago Ramos for permission to use the photos of his VR65)

Reslo LTU1 line matching unit manual

When home recording with  reel-to-reel tape machines was a popular hobby, back in the 1960s and 70s, many recorders had only high impedance inputs. However, the low impedance microphones of the time could be used with a longer cable without signal degradation, and so most manufacturers offered matching transformers to plug that gap.

Other transformers were also available to match medium and high impedance microphones to low impedance inputs, and so on. But the Low-to-High is by far the most common.

Here is a scanned manual for the Reslosound LTU1 line matching unit, which was used to connect 15Ω to 50Ω ribbon microphones to a high impedance tape deck. This was superseded by the LMT, which is essentially the same thing in a smarter metal can.

Reslo impedance matching transformer.

Hexapup samples, wiring and technical specs


Here are some wiring suggestions and sound samples for our ‘Hexapup’ hexaphonic pickups

Installation – Mounting the pickup
The hexapup is a standard humbucker size and will fit into most humbucker routed guitars without modification. Please note that the hexapup gives best results in the bridge position, and because it uses strong magnets it not really suitable for use as a neck pickup.

1. Mono pickup
When wired as a conventional mono pickup, the hexapup has a bright single coil tone. The coil arrangement means that it has very good hum rejection (humbucking) properties.

2. Stereo guitar.
The simplest way to connect the hexapup for stereo use is to mount two jack sockets into the guitar, and wire one side of the pickup to each jack. The signal can then be run to two amps or DI boxes for gigging or recording. There are two obvious ways to divide the strings, the pickup can be supplied in either split or spread mode, with spread being the default.

Split mode – low strings are sent to one amp, high strings to the other


Split mode sends the low strings E, A and D to one channel, and the high strings G, B & e to the other, like Neil Young’s stereo guitar.  Spread sends alternating strings to each channel, that is E, D and B to one output, and A, G & high-E to the other, which gives a nice spread of frequencies across the stereo image.

Here are some sound samples of the pickup in split mode. As always the stereo image comes across better on headphones than laptop speakers!

Split mode Hexapup – picking

Spread mode – alternating strings are routed to each channel

Here is one of the riffs above in stereo ‘spread‘ mode.

Spread mode hexapup – picking

In each case the playing is a single guitar,  and the recording was made using the DI input of API A2D preamp into protools, processed using Amplitube amp modelling plug-in.

3. Mono / Stereo Jack 

An alternative way of wiring the output is to use a stereo jack and a stereo breakout box. If the stereo jack is wired so that the positive wires from both sides are wired to the tip, one negative wire to the ring and the other to the sleeve, then the pickup will also work in mono if a normal mono guitar cable is used.

4. Stereo guitar with Split / Spread switch.
On request, the hexapup may be supplied pre-wired with a switch to choose either split or spread mode. Here is an easy way of switching between the modes.

5. Full hexaphonic mode.
The hexaphonic pickup can of course be supplied with six pairs of output wires, which gives a vast range of wiring possibilities. Probably the simplest way is to use a 6 or 7 pin XLR socket for the guitar output, and run this to a breakout box wired to give six separate jacks.

Heavily modified Jagmaster with hexaphonic and stereo outputs.
When wired this way all six channels share a common negative path, which precludes phase or series / parallel switching of individual strings. However, having six channels without these options is usually enough to worry about!  For our demo guitar we used this 8-core screened cable from Canford Audio.
Six channel breakout box for a hexaphonic guitar.

Here is a sample recording made in hexaphonic mode, with the EA strings panned left, the top B and E to the right, and the D and G strings lower in level and somewhere in the middle. Different amp models (Amplitube) have been used for left and right.
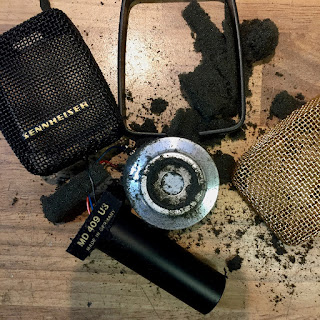
Low and high – hexapup

There are some further sound samples of the hexapup in full hexaphonic mode here.


Xaudia Hexapup – Typical specifications


Dimensions
Fits in a standard humbucker route.
70 mm x 39 mm x 20.5 mm deep (25 mm including screw lugs)

Stereo model (3 coils in series)
DC resistance = 5.1 K ohms
Inductance @ 1kHz = 0.9 Henry
Wiring = Red & black, green & white.
Case ground = green/yellow
Red & green = positive, black & white = negative

Hexaphonic model (single coil)
DC resistance = 1.8 K ohms per coil
Inductance @ 1kHz = 0.31 Henry per coil

Rear of hexapup with six pairs of output wires
Wiring. Output wires are silver plated, teflon coated.
Colour = positive, black = negative
E = Red & Black
A = Pink & Black
D = Yellow & Black
G = Green & Black
B = Blue & Black
e = White & Black
Case ground = green/yellow

More Hexaphonic pickup sound samples

Xaudia Hexapup

A hexaphonic pickup lets you record you record the signals from each string separately, either through six amplifiers, or perhaps more sensibly by recording directly through instrument inputs or DI boxes. This gives a lot of creative possibilities.

For example, here’s a G major chord, played lazily from the low strings to the high. This was recorded directly into Protools, with the notes spread across the stereo width.

Gmajor – spread

Adding an amp simulator gives it some body…

Gmajor – jazz amp

With a hexaphonic recording, it is simple to change the timing of individual strings. Imagine that we wanted the chord played tightly, rather than note by note. A quick edit and here it is…


Gmajor – all together

Or perhaps we would prefer to strum from the top to the bottom instead. No problem – we can just shift the notes slightly and we have it …

Gmajor – reverse strum

And by reversing the waveform of three strings and repeating the notes, we get this little ambient loop. A semi-reversed guitar

Gmaj & Amaj – edited loop

Now let’s get silly…
… we want to transpose part of a song, but the guitarist has gone to the bar. We can use Autotune on each track to pull each string up by two semitones to play an A major instead.  Here’s how it looks on the screen…

And here’s how it sounds!

Auto-tuned Chord – Gmajor to A major 

Of course we could have simply pitch shifted the whole chord up to achieve a similar effect – Autotune gives it an interesting glitchy slide texture as it chases the notes


By shifting the G-string up by one semitone rather that two, the chord becomes an A-minor. Now that’s something which can’t be done with simple pitch shifting!

Auto-tuned Chord – Gmajor to A minor!

The possibilities are endless!

Polyphon mechanical music player

And now for something completely different, let’s look at a portable music player from a hundred years ago!

This rather wonderful Polyphon type mechanical disc music player was a Christmas gift. Thanks Santa (& Mum & Dad!).

Metal disc music player

Inside the box is a clockwork device very much like a music box, but the music is encoded onto a metal disc with teeth around its outer edge.

The disc is driven by a clockwork device, with a coiled spring providing the power, and a spinning regulator to keep the speed constant.

The disk drives a set of rotating gears, which in turn strike the tines of the comb to produce the sound. Each tine is a different length, and so a different note. The sound is then amplified simply by the resonance of the wooden box.

Small polyphon style music discs

The discs are about the size of a CD, and the musical information is stored in them by punching and bending strips of metal so that they strike the music player. Each disc holds a mammoth 20 seconds of music, approximately. A few of the discs are rather rusty and bent, but the majority of them still play well enough.

Rusting gracefully!

Each disc is ink stamped with a number and the name of the tune. I have discs with numbers beyond 400, so this must have been a popular format with a wide choice of titles.

Here are some sound files  for a few of the discs. The sound is pretty and a little creepy at the same time, with all of the mechanical clicks and whirrs.  (mono .wav files around 3 Mb each, recorded with a Neumann TLM49 through RFZ KV80/1 preamp).

133 – Bonnie Dundee
143 – Banks of Alan Water
152 – Sally in our Alley
156 – Rock of Ages
189 – In the good old summertime
219 – Liberty Bell March (damaged)
222 – Marching through Georgia
402 – Carmen Polka

My aim is to record and share all of the discs that I have, so check back later for more.

Update….
I found this video on the web, which features the same player. The owner claims that it was made by the Swiss company Thorens in around 1910. One can imagine people taking this kind of music player along on a picnic perhaps, on a sunny summers day!

Mine seems to run a lot faster than this, so I may need to adjust the regulator.
Update 2…
Thanks to Alexander Schulz for sending in a link to the History of Thorens webpage.

Happy 2013

Thanks to all of our friends, customers and suppliers who helped to make 2012 another exciting and successful year for Xaudia.

Hot-rodded Reslo RB microphones

In 2012 we repaired 203 microphones for customers, an increase over 2011, and Reslo microphones were again very popular – we serviced 47 of them this year.  Once again RCA mics came in second place (23), with AKG and Beyerdynamic in third and fourth.

Xaudia – microphones serviced in